
- Windows 11’s screen dimming issue can occur because of certain features that automatically adjust brightness levels.
- You might need to disable certain power-saving features to solve screen dimming.
- Disabling startup items and services is another potential fix you may apply.
XINSTALL BY CLICKING THE DOWNLOAD FILE
Screen dimming is an issue that can arise on Windows 11 PCs. When screen dimming occurs, a monitor’s brightness level drops by varying degrees without any user input.
Screen dimming more commonly arises when users are playing games. Many have posted on forums about screen dimming automatically lowering brightness for Windows games. The screen dimming can make a lot of games too dark.
If screen dimming is spoiling your gaming as well, there are a few ways you might be able to fix it. Give the potential resolutions below a try.
What causes Windows 11’s screen dimming issue?
Screen dimming can arise because of certain Windows 11 or built-in monitor features that automatically lower brightness levels. The issue may also pertain to graphics drivers. These are some of the more common causes for screen dimming:
- Graphics cards’ drivers: Your graphics card’s driver might be faulty or outdated
- Monitors’ auto-dimming features: Some monitors have auto-dimming features that reduce brightness levels for Windows games
- Adaptive brightness: Some laptops have adaptive brightness features that automatically lower the brightness level to extend battery life
- Night Light and Game Mode: Night Light and Game Mode are two other features in Windows 11 that can feasibly cause screen dimming when you’re playing games in full-screen mode
You can always prevent your laptop screen from dimming. The tips detailed in our guide are for Windows 10 but you can apply them all in Windows 11 too.
How can I fix screen dimming in Windows 11?
1. Disable adaptive brightness
- First, click the taskbar button for Windows 11’s Search tool.

- Next, enter the keyword edit power plan within the search box.
- Click Edit power plan to bring up the Edit Power Plan Control Panel applet.
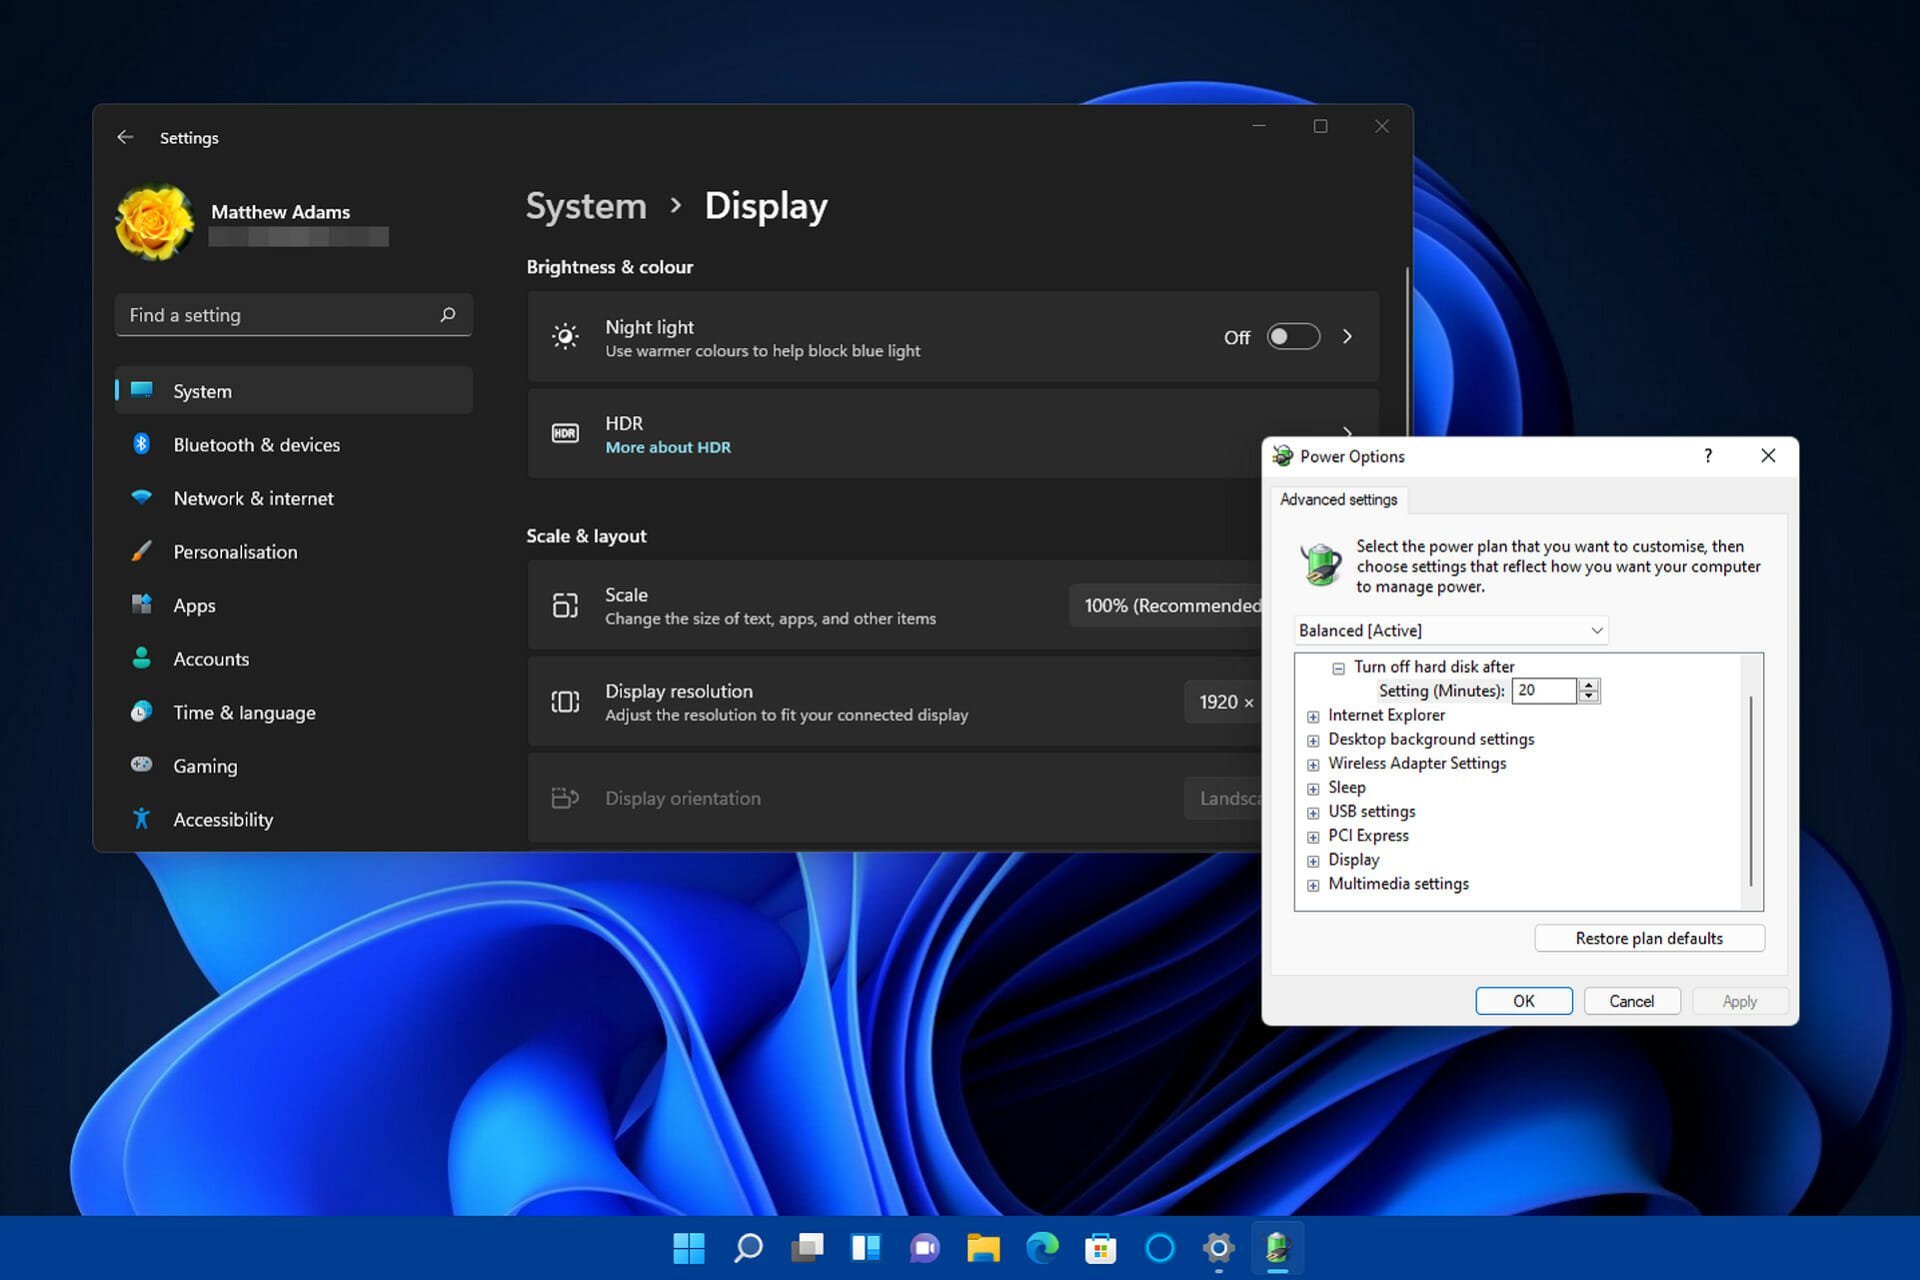
- Next, click the Change advanced power settings option.

- Double-click Display in the Power Options window.

- Then double-click Enable adaptive brightness.
- Toggle off both the On battery and Plugged in adaptive brightness settings.
- Press the Apply button on the Power Options window.
- Click OK to exit to close the Power Options window.
Users can also disable adaptive brightness via Settings. To do so, click the small arrow by the Brightness bar on the System tab in Settings. Then you can deselect the Change brightness automatically when lighting changes checkbox.
Note that not all PCs support adaptive brightness. Therefore, not all users will be able to disable/enable adaptive brightness as outlined above.
2. Disable Night Light
- Click Start on the taskbar to bring up that menu.
- Next, select the pinned Settings app on the Start menu.
- Click Display on the System tab.

- Then turn off the Night light setting by clicking its toggle button.

3. Turn off your monitor’s auto-dimming feature
Your monitor might have an auto-dimming feature that’s dimming the brightness. The best way to find out if that’s the case is to look through the manual for your PC’s VDU (visual display unit).
That manual will tell you about any auto-dimming feature the monitor has and how to disable it.
4. Turn off Windows Game Mode
- Press the Windows key + I keyboard shortcut for opening Settings.
- Select the Gaming tab in Settings.
- Next, click Game Mode on that tab.

- Click the toggle button to turn off Game Mode if it’s enabled.

5. Update your graphics card’s driver
- To open a Win + X menu, right-click the Start button.
- Select Device Manager on the menu that opens.

- Next, double-click the Display adapters category in Device Manager.
- Right-click the graphics card listed there and select the Update driver option for it.

- Thereafter, click the Search automatically for drivers button. The Update Driver utility might then detect and install a new driver.

However, third-party driver updater software will more likely detect if there are new drivers available for your PC’s graphics card.
A driver updater utility like DriverFix will scan your PC and list devices with outmoded drivers. Then you can download and install new drivers with the software.
6. Reinstall your graphics card driver

NOTE
This resolution is recommended if your PC’s graphics card already has the latest driver.
- Open the Device Manager utility as outlined in the first two steps of the previous resolution.
- Click the small arrow beside Display adapters to open that category.
- Right-click the graphics adapter and select Uninstall device.

- Select the Delete driver for this device checkbox on the Uninstall Device window.

- Then select the Uninstall option to confirm.
7. Clean-boot Windows 11
- To launch Run, press the Windows key + R hotkey.
- Then input this text in the Open box and press Enter:
msconfig - First, click Selective Startup on the General tab to select that option.
- Uncheck the Load startup items checkbox to disable that setting.

- Select the checkboxes for Load system services and Use original boot configuration if they’re not selected.
- Next, click Hide all Microsoft services on the Services tab to select the setting.

- Select the Disable all button.
- Click Apply to save the new boot settings.
- Then press the OK button to exit MSConfig.
- Select Restart on the dialog box.
If this resolution fixes the screen dimming, a background process, service, or app was likely causing it. You’ll need to identify the background process, app, or service to resolve the issue if you want to restore your PC’s original boot configuration.
You can restore the original boot configuration by selecting the Load startup items option in MSConfig you previously disabled. Click the Enable all button in MSConfig to restore third-party services.
Who can I contact about fixing screen dimming in Windows 11?
The Microsoft support service is probably the best one to contact for resolving Windows issues. Clicking Get support on the Contact Microsoft Support page will open a text box to enter a technical issue description within. Then you can select Get Help and Contact Support options.
Microsoft’s community forum also helps many users fix Windows issues. To add a screen-dimming post there, click the Ask a question link on the big M’s Windows forum. Then enter a question about the problem in the text editor, and select the Submit option.
However, the resolutions above might be enough to fix screen dimming in Windows 11 for many users. Those potential fixes are especially recommended for screen dimming that arises when playing games.
If those aren’t enough to solve Windows 11’s screen dimming, there could be a hardware issue with your PC’s monitor. In which case, you might need to return the VDU (or whole PC if it’s a laptop) to its manufacturer for repairs.
Even more, check out the tips suggested in this screen dimming article for Windows 10. They can be applied by Windows 11 users too. As for those of you who own the Surface Pro 4 device, don’t hesitate to take a look at this guide dedicated to solving Surface Pro 4 screen dimming problems.
In case you have other ways of solving the screen issue, do not hesitate to let us know about them in the comment section below.
Start a conversation