
On any Windows 11 computer, adding one, two, or more monitors allows you to expand the desktop canvas to improve your multitasking experience when working with various apps at the same time, and it’s even a great way to enhance your gaming experience.
Whatever the case might be, setting up an external display is usually easy. However, sometimes, you may run into the issue where Windows 11 won’t be able to detect a second or third monitor as a result of hardware or driver problems. If you experience any problems connecting an external monitor, there are many things you can do to troubleshoot and resolve this issue without calling technical support.
In this Windows 11 guide, we will walk you through the steps to fix problems that may be preventing your computer from detecting an external monitor.
How to fix external display issues using hardware troubleshooting
When the computer isn’t detecting the second monitor, it’s usually an issue with the driver. However, it might also be a physical connection problem.
You can try these troubleshooting tips to start with before tampering with the system settings:
- Check that the monitor is plugged into a power source.
- Check that the display is turned on.
- Power off the computer and restart to refresh the connection.
- Confirm the signal cable connection between the computer and monitor.
- Locate the display controls and switch to the correct input port.
- Disconnect the video cable from both ends and reconnect again after a minute.
- Connect a different video cable to discard a problem with the cable.
- Change ports if the monitor and graphics card have different ports.
- DisplayPort and HDMI cables have different variations. Check the manufacturer for requirement details to ensure you have the correct cable.
- Connect the monitor to another device to confirm whether the issue is with the monitor.
- Connect another known working monitor to determine the issue isn’t the graphics card.
- Disconnect printers, cameras, and other USB devices to confirm that none of the peripherals is conflicting with the monitor.
- Update the external monitor firmware to help fix bugs and compatibility issues (uncommon).
After trying the above troubleshooting steps, if you still have issues, the problem may be software-related.
1. ExpressVPN: The best VPN available right now
This is our top pick for anyone looking to get started with a VPN. It offers a great mix of speed, reliability, outstanding customer service, and affordability. There is a 30-day money-back guarantee, so give it a shot today.
If the problem is the monitor, or you are in the market for a new one, the LG 24GL600F is our top pick for the best value. You can find more choices in our best computer monitor roundup.
Second monitor
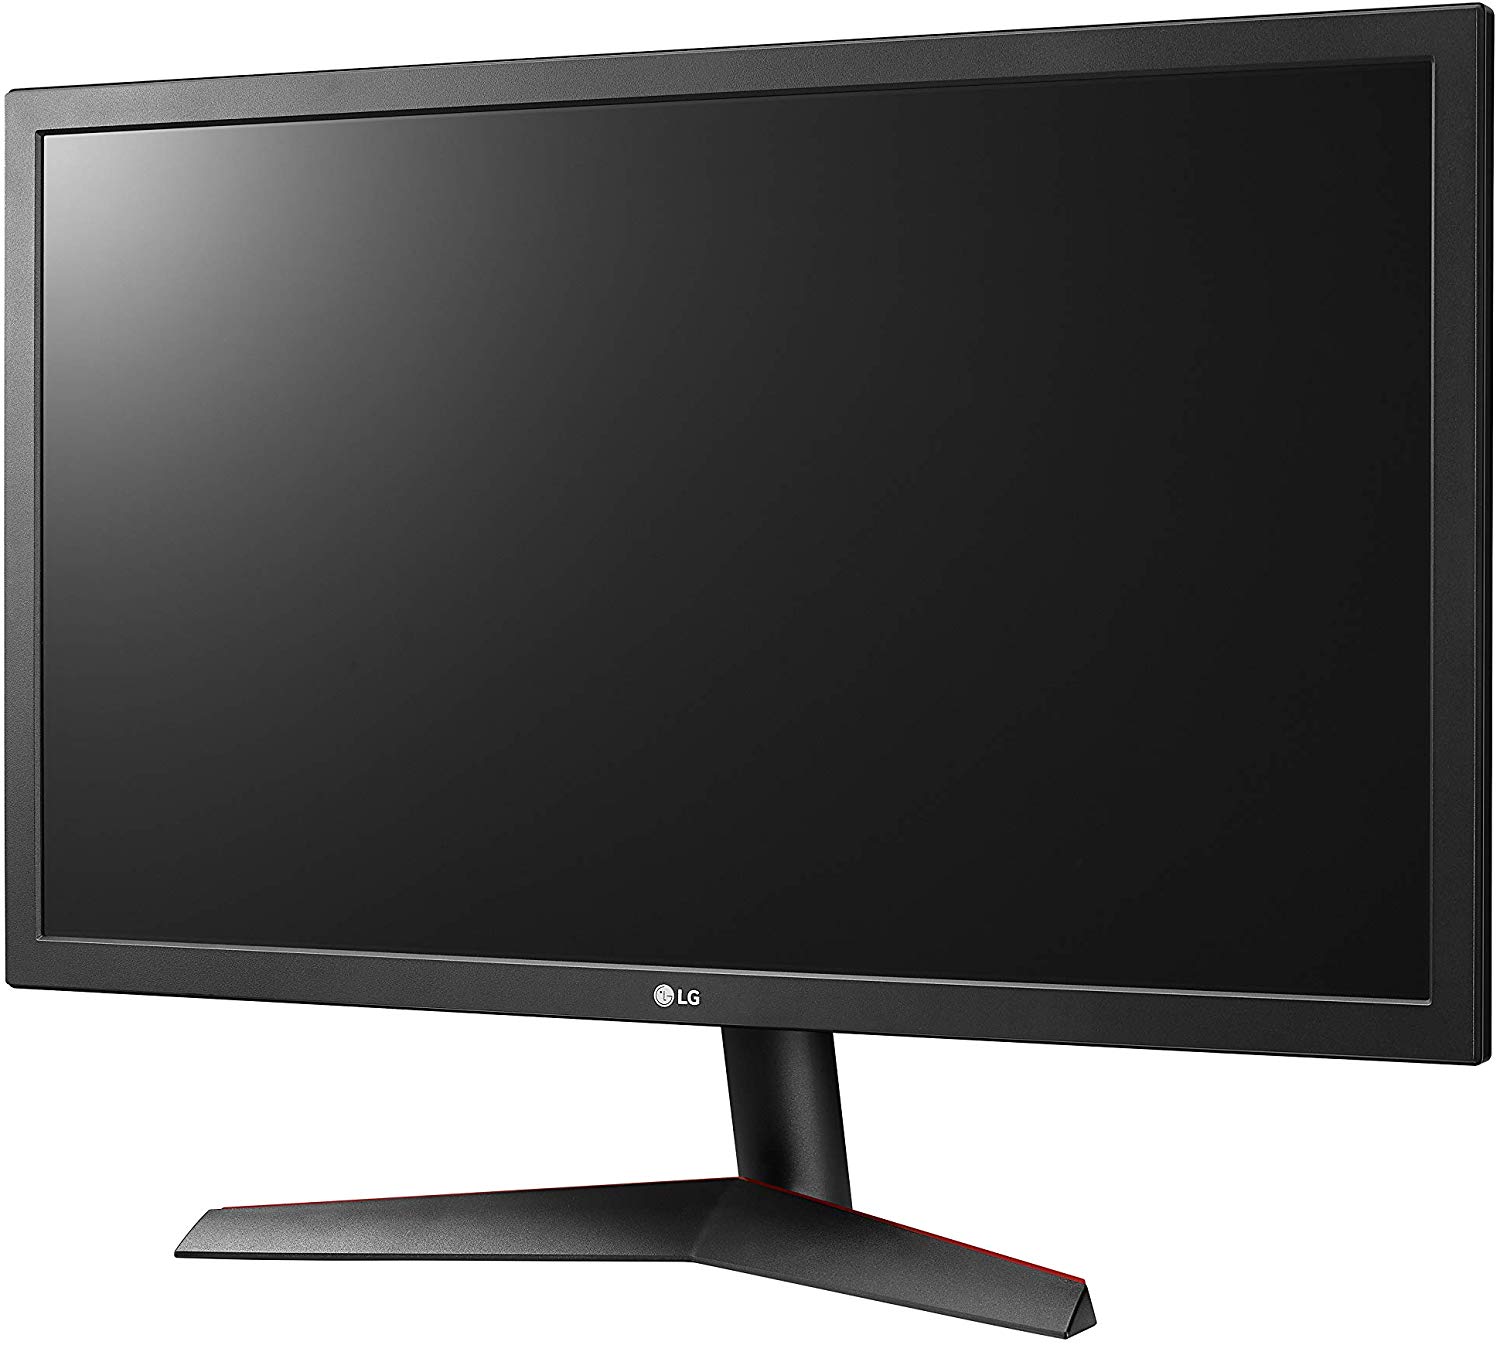
LG 24-inch monitor (144Hz)
The best value for most users
The LG 24GL600F is a 24-inch monitor excellent for general-purpose tasks because of its slim design, fantastic picture quality, and DisplayPort and HDMI ports. The display even features a 144Hz refresh rate.
How to fix display connection issues using Settings
If this is not a hardware problem, use the Display settings to force the system to detect the second monitor.
Force external monitor detection
To detect an external monitor manually on Windows 11, use these steps:
- Open Settings.
- Click on System.
-
Click the Display page on the right side.
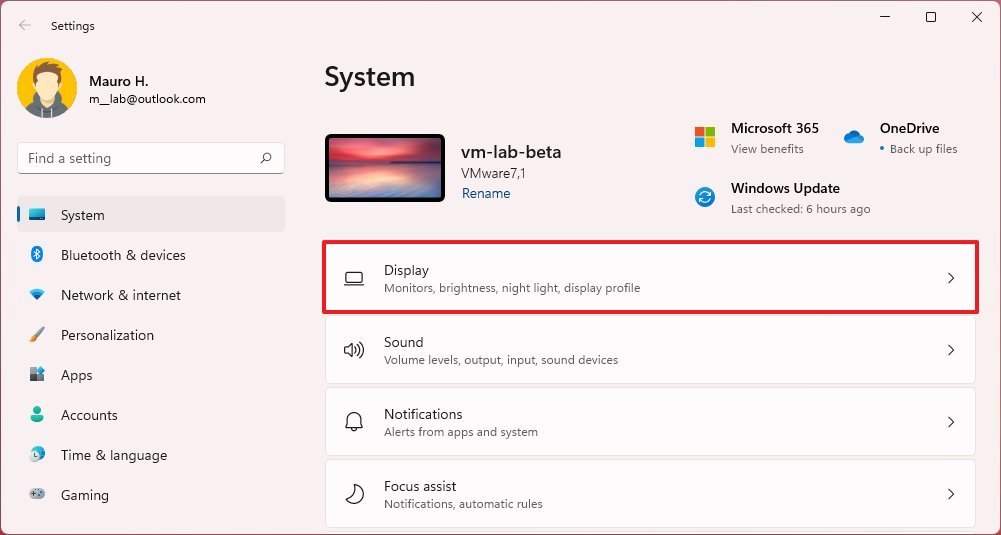 Source: Windows Central
 - Click the Multiple displays setting.
-
Click the Detect button.
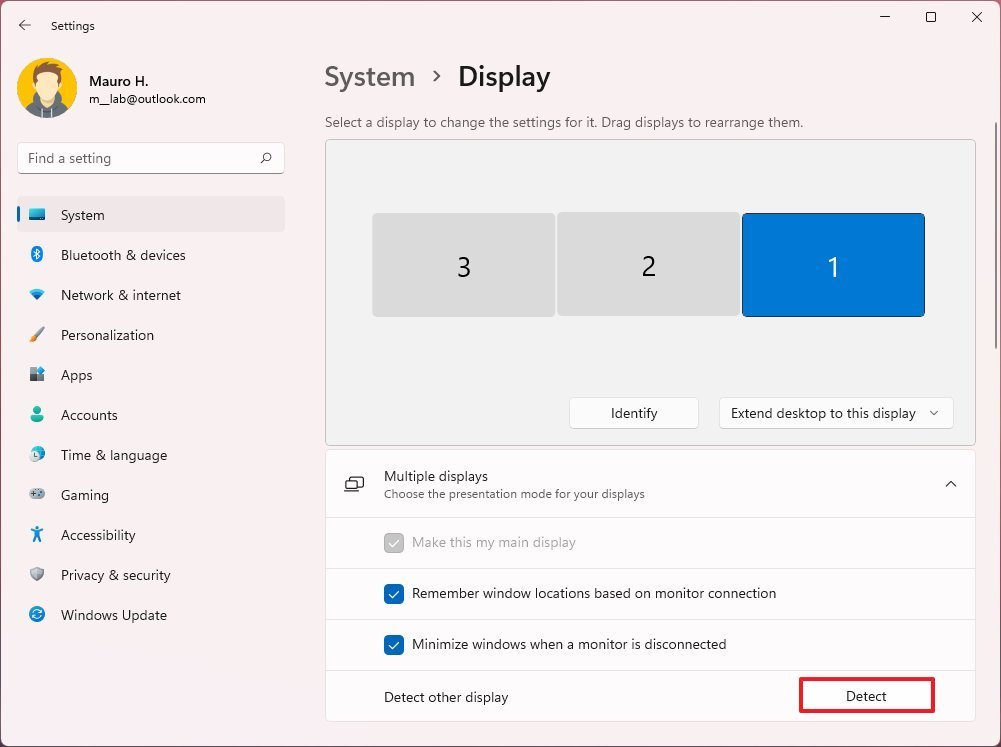 Source: Windows Central
Once you complete the steps, Windows 11 should now detect the external display.
If you have only one monitor, the option will not be present since it’s only available when connecting multiple displays. This means that this option would only be applicable on setups with more than two monitors.
Connect wireless external display
To connect a wireless display on Windows 10 as a secondary screen, use these steps:
- Open Settings.
- Click on Bluetooth & devices.
- Turn on the Bluetooth toggle switch (if applicable).
-
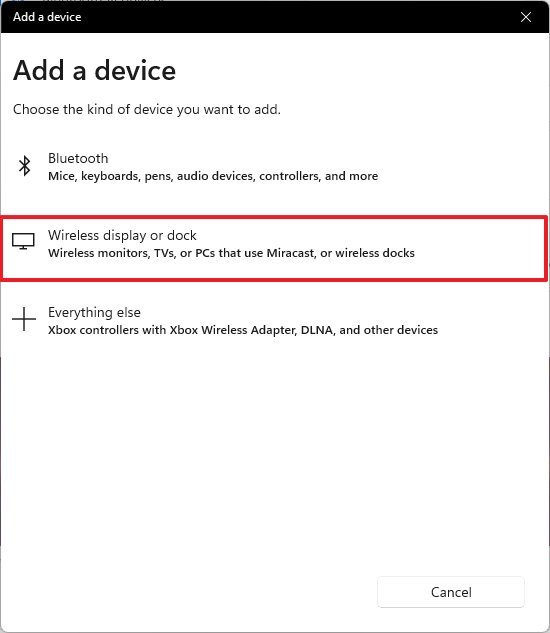
Click the Add device button.
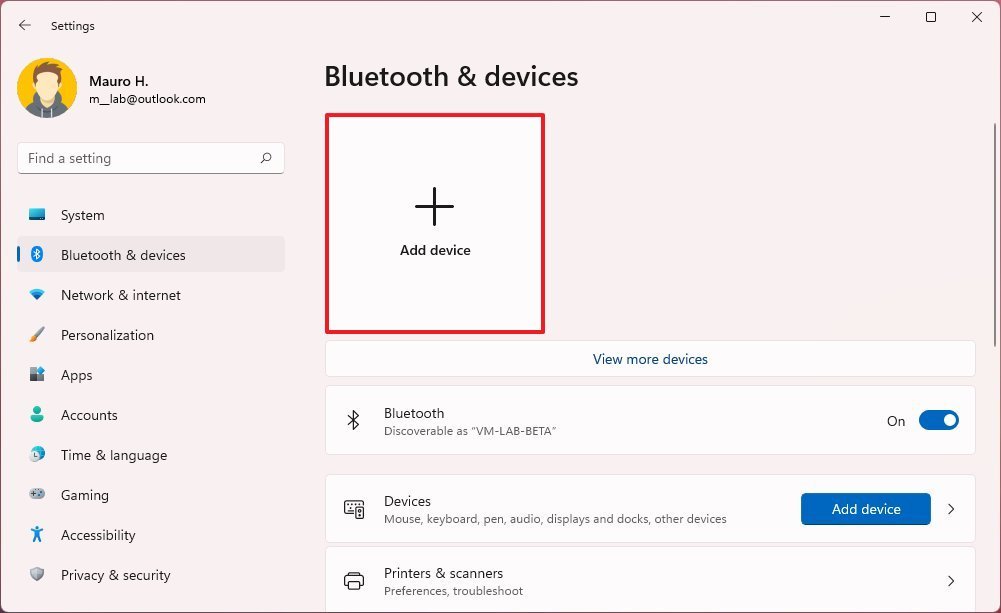 Source: Windows Central
 -
Select the Wireless display or dock option.
 Source: Windows Central
 - Confirm that the wireless display is turned on and discoverable (refer to device documentation).
- Select the display (wireless monitor, TV, or PC with Miracast support) from the list.
- Continue with the on-screen directions (if applicable).
After you complete the steps, the wireless display will be detected as a new external display on the device.
How to fix external display connection issues using latest graphics drivers
An outdated, buggy or damaged graphics driver can cause problems that can prevent the device from setting up a second monitor. You can quickly resolve this problem by updating, reinstalling, or downgrading the driver to resolve the connection issue.
Update graphics driver
To update the graphics driver, use these steps:
- Open Settings.
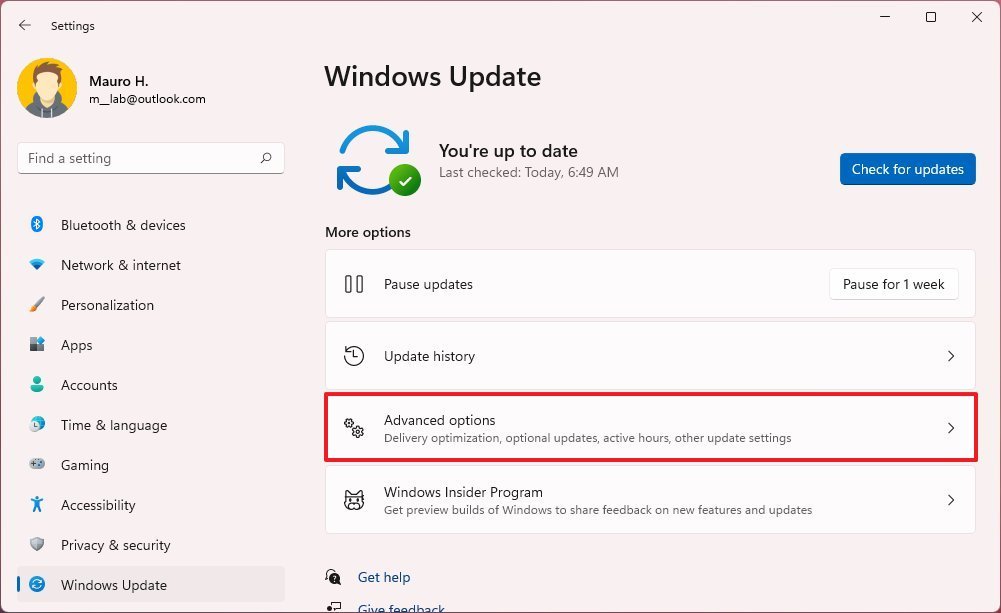
- Click on Windows Update.
-
Click the Advanced options page on the right side.
 Source: Windows Central
 -
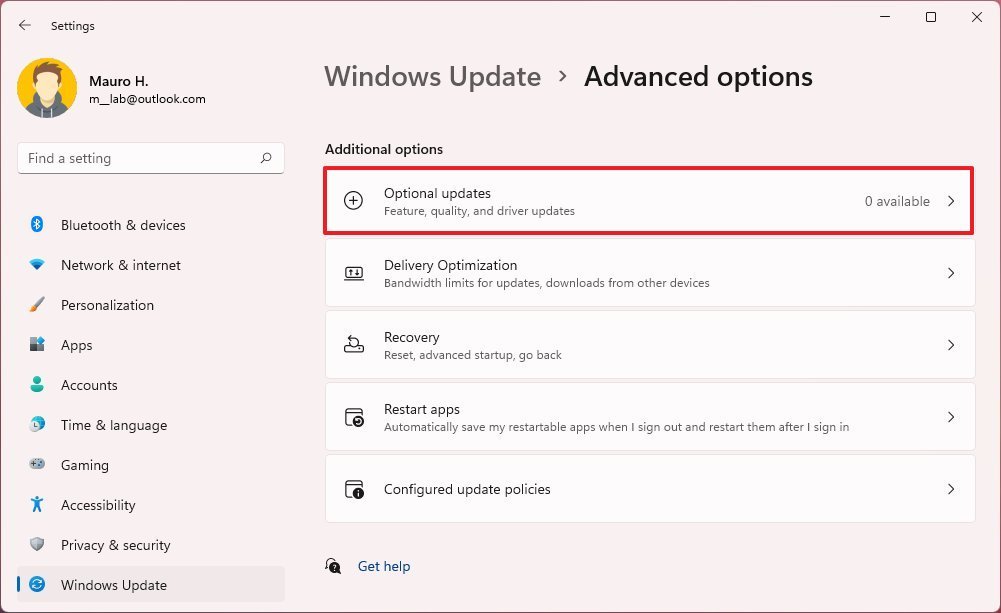
Under the “Additional options” section, click the Optional updates option.
 Source: Windows Central
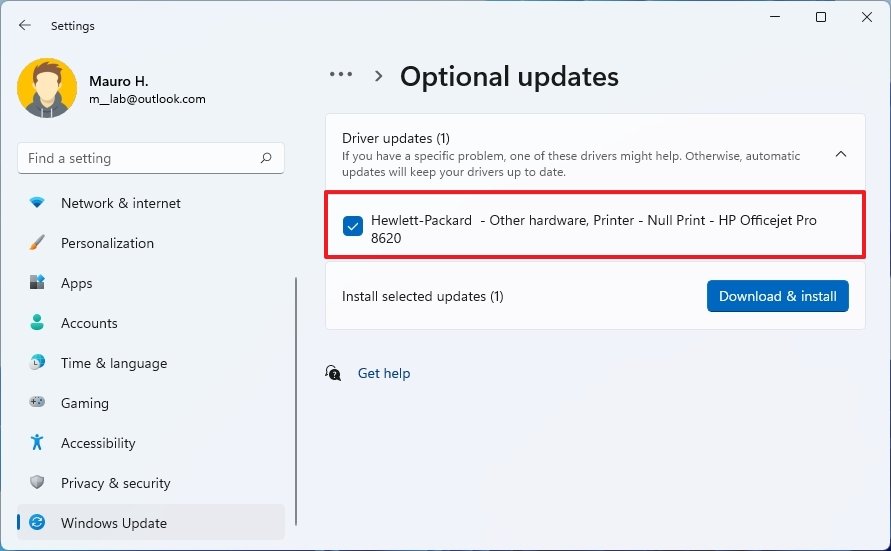
 - Select the newer graphics driver to install on Windows 11.
-
Click the Download & install button.
 Source: Windows Central
Once you complete the steps, Windows Update will download and install the graphics driver, fixing the external monitor’s detection problem.
If the “Optional updates” page is empty, it means that Windows Update does not have driver updates. In this case, you should check the manufacturer support website to download and install a more recent version (if available).
Reinstall graphics driver
To reinstall a damaged video driver on Windows 11, use these steps:
- Open Start.
- Search for Device Manager and click the top result to open the app.
- Double-click to expand the Display adapters branch.
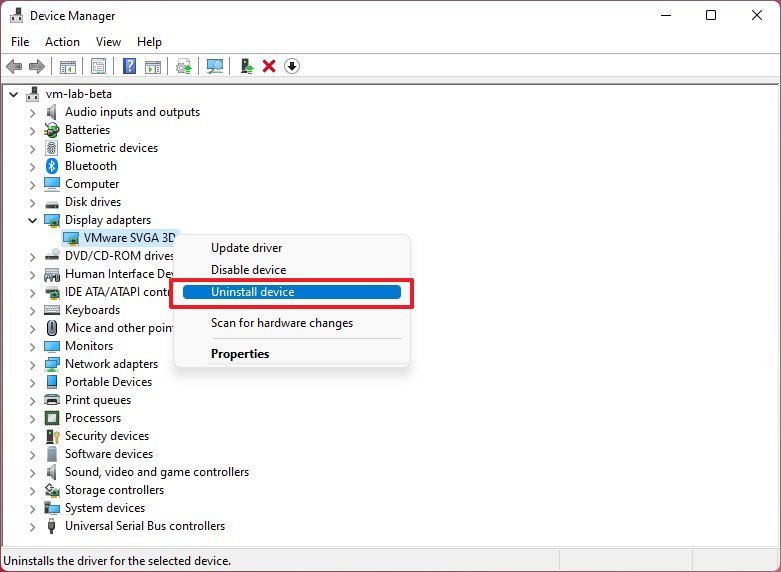
-
Right-click the adapter and select the Uninstall device option.
 Source: Windows Central
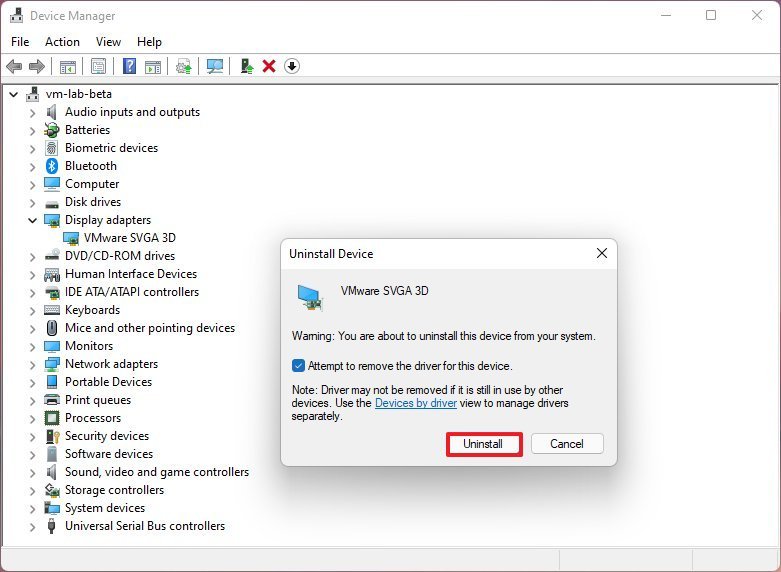
 - Clear the Delete the driver software from this device option (if applicable).
-
Click the Uninstall button.
 Source: Windows Central
 - Restart the computer.
-
Open Device Manager again.
Quick note: The system should detect the monitor again automatically. If not, use Device Manager to scan for hardware changes to force Windows 11 to reinstall the monitor.
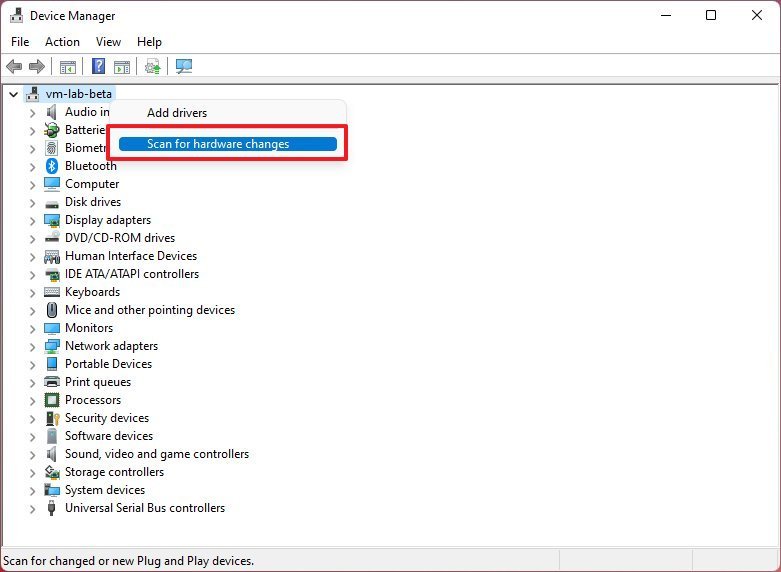
-
Right-click the computer name and select the Scan for hardware changes option.
 Source: Windows Central
After you complete the steps, Windows 11 should detect and reinstall the driver automatically. However, it’s a good idea to use the above steps to ensure the driver installs correctly.
Roll back graphics driver
If the graphics driver was recently updated, you might need to roll back to the previous version of the driver to fix the problem.
To reinstall an older version of a graphics driver on Windows 11, use these steps:
- Open Start.
- Search for Device Manager and click the top result to open the app.
- Double-click to expand the Display adapters branch.
-
Right-click the graphics adapter, and choose the Properties option.
 Source: Windows Central
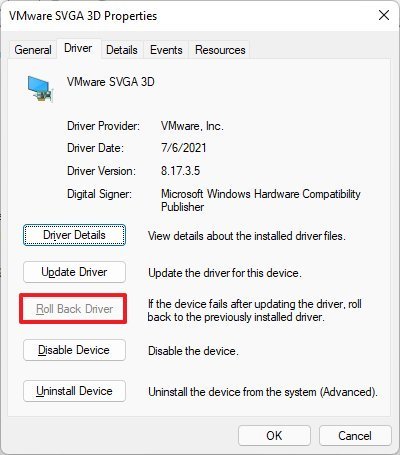
 - Click the Driver tab.
-
Click the Roll Back Driver button.
 Source: Windows Central
Quick tip: If the option is not available, it’s not possible to roll back the driver. However, you could download an older version of the driver from the manufacturer’s support website and install an older version.
- Select an option to answer the question.
- Click the Yes button.
- Restart the computer.
Once you complete the steps, the external monitor should work as expected.
Update driver with manufacturer software
Although Windows 11 can install most video cards automatically, Windows Update doesn’t always have the most recent driver updates. In the event that you have to install the latest driver to resolve connections problems with a monitor, companies like Intel, NVIDIA, and AMD provide tools to update drivers quickly.
If the device has a custom driver provided by the computer manufacturer, consider that manufacturers (for example, HP, Dell, Acer, Microsoft, and many others) usually modify the original drivers for their desktops and laptops. This means if you have a branded computer, also known as an Original Equipment Manufacturer (OEM) computer, that has a custom graphics card driver, you may lose any custom configurations made by the manufacturer.
The installation of the tool is straightforward. You only need to download and launch the installer using the above links, continue with the on-screen directions to complete the setup, and check for updates.
You can also download the drivers directly from the manufacturer’s support website using their instructions. You can use the links below to find the drivers:
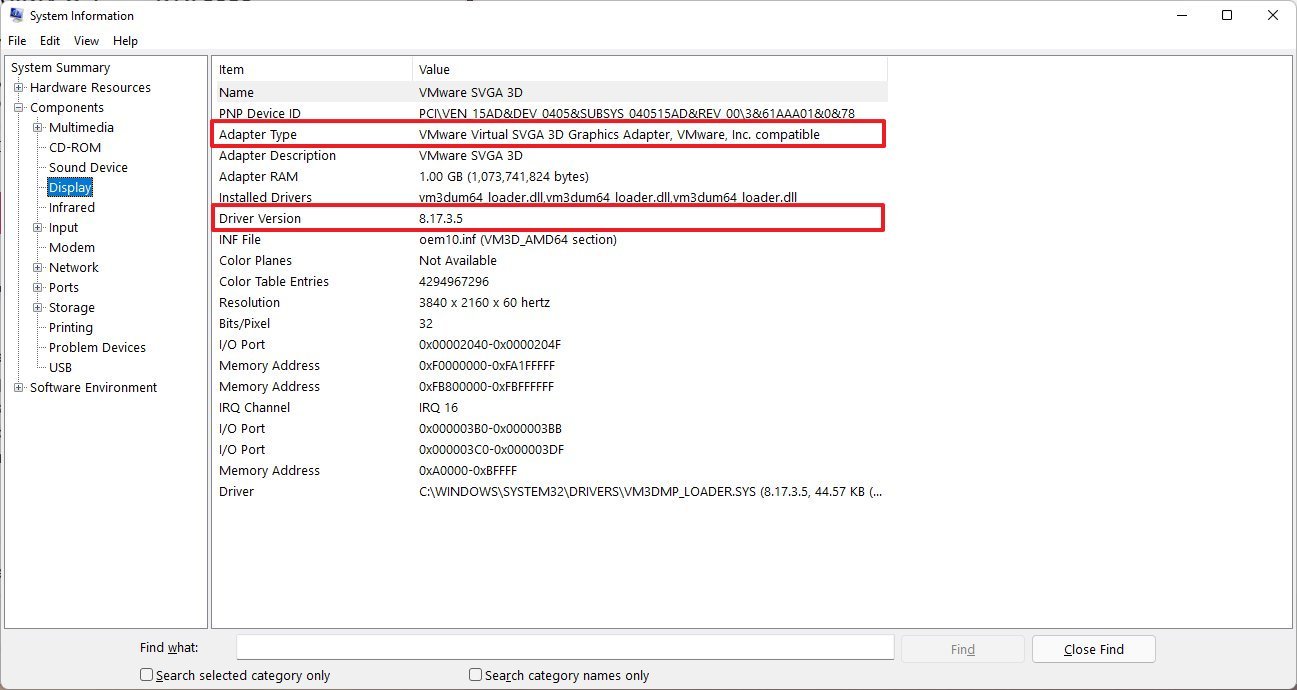
To check the adapter driver version and manufacturer available on your computer, use these steps:
- Open Start.
- Search for System Information and click the top result to open the app.
- Double-click to expand the Components branch on the left pane.
- Select the Display category.
-
Confirm the Adapter Type and Driver Version information to determine the driver’s card model and current version.
 Source: Windows Central
Once you complete the steps, use the above links to find, download, and install the correct driver.
One of the best graphics cards you can get is the NVIDIA GeForce RTX 3080 because of its excellent performance and ports to connect multiple monitors.
Multi-monitor support
NVIDIA GeForce RTX 3080
The RTX 3080 offers multi-monitor support
If you must replace your graphics card, the RTX 3080 is a great option. Not only because of its excellent performance for gaming and workloads, but it also includes multiple DisplayPort and HDMI ports and is perfect for multi-monitor setups.