
- Any message stating that access is denied can’t be good. If you stumble across it while using your Windows 10 running device, it’s actually worse.
- Since this can interfere with your work by not allowing you to access certain directories or apps, here’s a complete list of tested solutions to fix it.
- Speaking about solutions, do explore more on the topic by checking our File Explorer Support Guides.
- Visit the Windows 10 Troubleshooting Hub for more handy fixes that will help keep your PC in pristine condition at all times.

XINSTALL BY CLICKING THE DOWNLOAD FILE
Access is denied message can appear while trying to access certain directories or applications thus interfering with your work.
Although this message can cause problems, you should be able to fix it on Windows 10 by using one of our solutions.
How to fix Access is denied message on Windows 10?
Fix – Access is denied Windows 10
1. Take ownership of the directory
This error usually appears when you try to access a file or a directory while having insufficient privileges. This happens if you’re not an administrator or if you don’t have ownership over a folder.
To fix the problem you just have to assign ownership to your account, and you can do that by following these instructions:
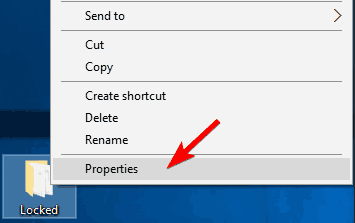
- Locate the problematic folder, right-click it and choose Properties from the menu.
- Navigate to the Security tab and click the Advanced button.
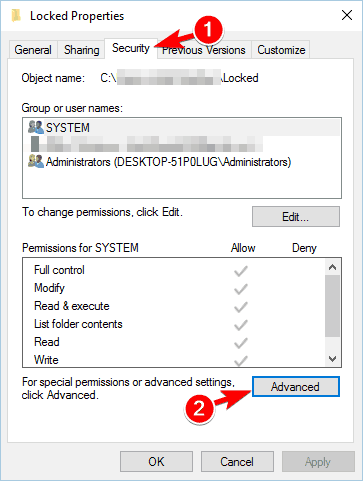
- Locate the Owner section at the top and click on Change.

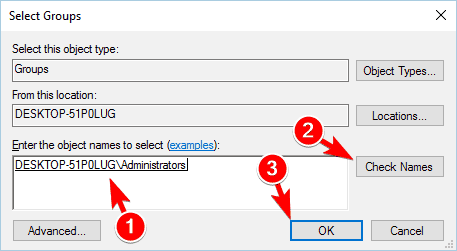
- Select User or Group window will now appear. In the Enter the object name to select field enter Administrators or enter your user name. Now click the Check Names button. If everything is in order your input will change. Click OK to save changes.
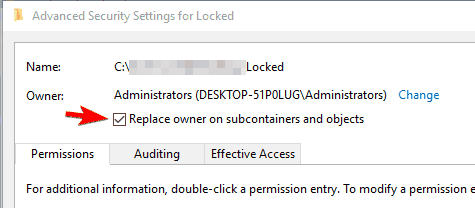
- The owner section will now change. Check Replace owner on subcontainters and objects and click Apply and OK to save changes. Some users are suggesting to check Replace all child object permission entries option, so you might do that as well.
In some cases, you might have to manually assign permissions to your account. To do that, follow these simple steps:
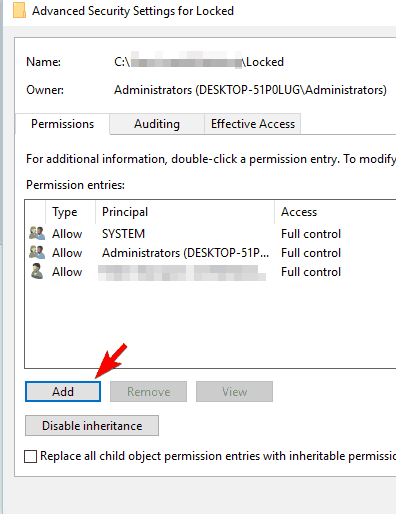
- Navigate to Advanced Security Settings.
- A list of all users will appear. If your user account isn’t listed, click the Add button.
- Click on Select a principal.
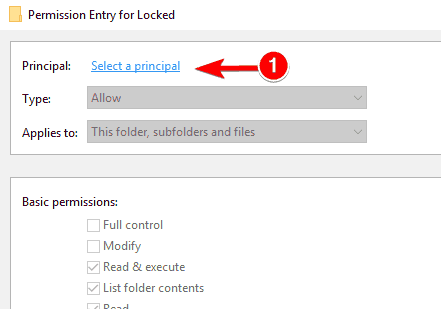
- Now enter your user account name, click Check Names, and then OK. We already showed you how to do that in Step 5 above, so be sure to check it out.
- Set Type to Allow and Applies to This folder, subfolders, and files and check Full control. Now click the OK button.

If your user name is already available, simply double click it and perform Step 5.
Another way to take ownership is to use Command Prompt. To do that, start Command Prompt as administrator and enter the following lines:
Of course, be sure to replace path_to_folder with an actual path to the inaccessible folder. After running these two commands you should have full access to the problematic folder.
2. Add your account to the Administrators group
Sometimes Access is denied message appears if you try to access a folder while not having administrator privileges. This can be a problem, but you can fix it by adding your account to the Administrators group.
To do that on Windows 10, follow these steps:
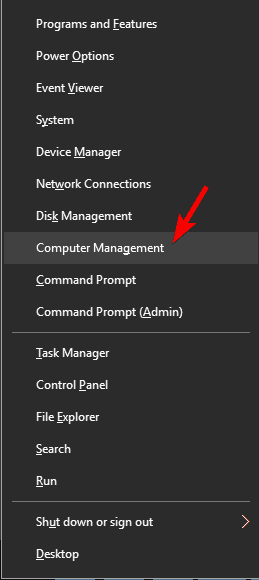
- Press Windows Key + X to open Win + X menu. Select Computer Management from the list.
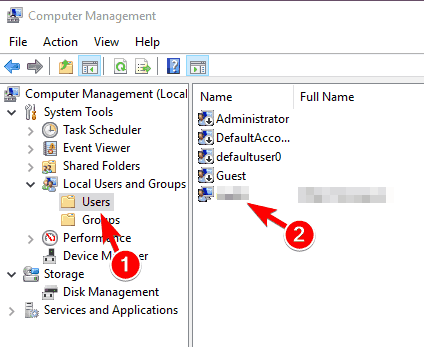
- When the Computer Management window opens, navigate to Local Users and Groups -> Users. Now double click your account in the left pane.
- Navigate to the Member Of tab and click the Add button.
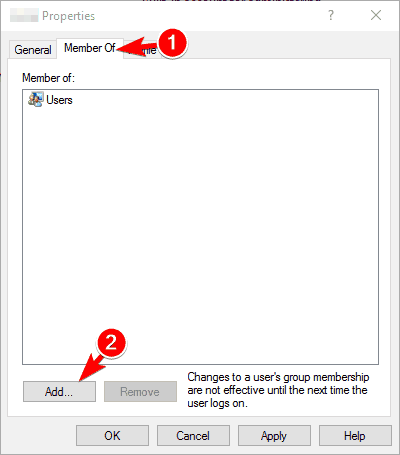
- In Enter the object names to select field enter Administrators and click Check Names. If everything is in order, click OK.
- Select Administrators and click Apply and OK.

- After doing that, restart your PC and check if the problem is resolved.
3. Enable the hidden Administrator account
Windows 10 by default has a built-in Administrator account that you can use. By using this account you should have unrestricted access to your PC.
Due to security measures, this account isn’t easily accessible, but you can enable it by doing the following:
- Press Windows Key + X and select Command Prompt (Admin) from the menu.
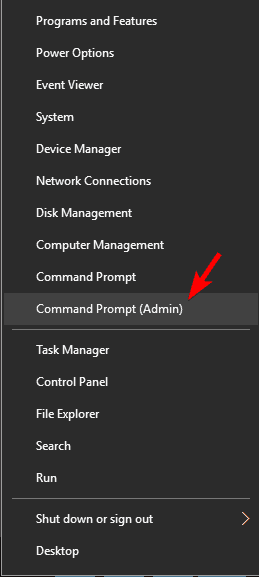
- When Command Prompt starts, run net user administrator /active: yes command. By doing so you’ll unlock the administrator account.
- Now log off of your account and switch to the newly enabled Administrator account. From there you should be able to access your files without any problems.
- After you’re done using the Administrator account, go back to your main account and start Command Prompt as administrator again. Now enter net user administrator /active: no to disable the Administrator account.
Keep in mind that after switching back to your main account the issue might still persist. If needed, you can use the Administrator account to make the necessary changes to your system and fix the problem.
4. Check your permissions
Sometimes you’ll get Access is denied message if you lack certain permissions to access the desired directory. However, you should be able to fix the problem by following these steps:
- Locate the problematic directory, right-click it and choose Properties from the menu.
- Navigate to the Security tab and click the Edit button.
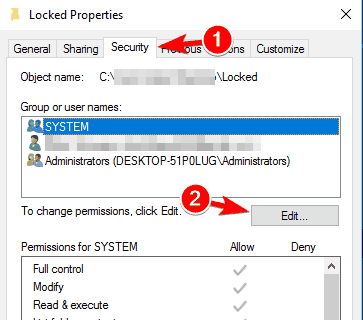
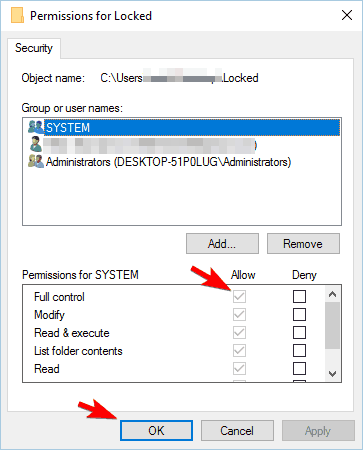
- Select your user name from the list and make sure that you check Full control for Allow column in Permissions section.
This is a simple solution, but if your user name isn’t on the list you’ll have to add it manually and then change its permissions.
Several users reported that you need to grant Full control to both Administrators and Users over the problematic folder, so be sure to try that as well.
In some cases, you might even want to give Full Control to Everyone in order to fix the problem.
5. Use Command Prompt to reset permissions
According to users, they encountered this problem while trying to access the Pictures folder. It seems that OneDrive is causing this issue, so to fix it you need to do the following:
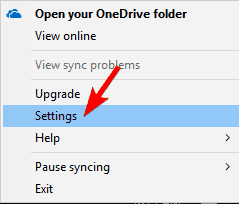
- Right-click OneDrive icon in the bottom right corner and choose Settings from the menu.
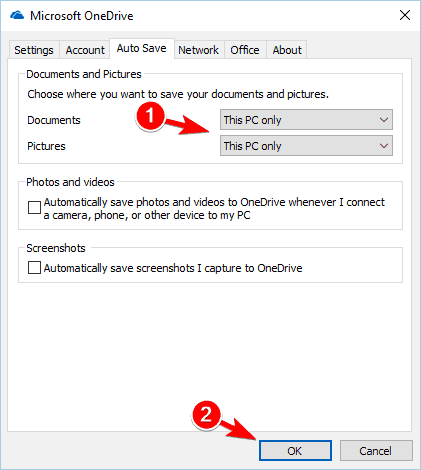
- Go to Auto Save tab and set both Documents and Pictures to This PC only. Click OK to save changes.
If that doesn’t solve the problem, you’ll need to perform the following steps as well:
- Start Command Prompt as administrator.
- When Command Prompt opens, enter the following commands:
-
cd /users/Your_Username -
icacls Pictures /reset /t /q -
cd /<path to OneDrive folder> -
icacls Pictures /reset /t /q
-
- After doing that, restart your PC.
If the problem still persists, you might have to repeat this solution and disable OneDrive until Microsoft fixes the problem.
6. Set your account as administrator
If you’re getting Access is denied message, you might be able to fix it simply by setting your account as an administrator. This is rather simple and you can do it by following these steps:
- Press Windows Key + R and enter control userpasswords2. Press Enter or click OK.

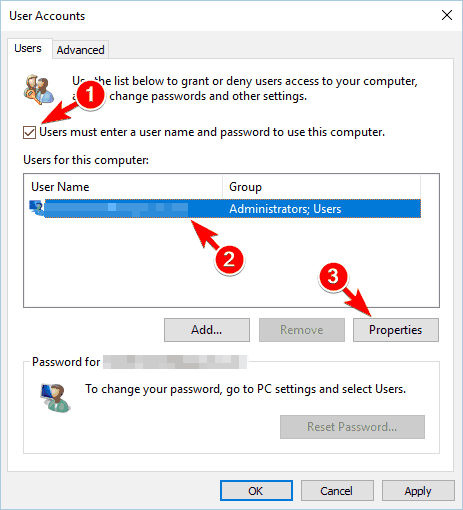
- User Accounts window will now appear. Check Users must enter a user name and password to use this computer. Now select your account and click on Properties.
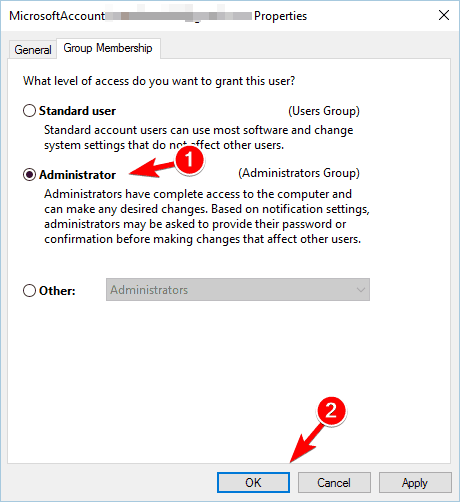
- Navigate to the Group Membership tab. Select Administrator and click Apply and OK.
- After doing that, restart your PC and check if the issue still persists.
7. Use Reset Permissions tool
According to users, you might be able to fix this problem simply by using Reset Permissions tool. Simply download the tool, run it, select the problematic directory, and check all available options.
After doing that, you should be able to access the directory without any problems.
8. Close Google Drive and reinstall it
Access is denied message sometimes appears while using Google Drive. To fix the issue, you need to completely close Google Drive and end all processes associated with it. To do that, follow these steps:
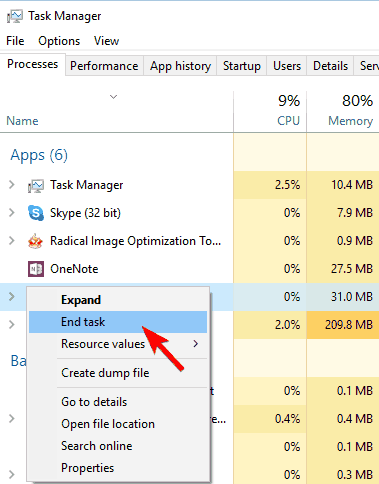
- Press Ctrl + Shift + Esc to open Task Manager.
- When Task Manager opens, locate all Google Drive processes, right-click them and choose End Task from the menu.
- After ending all Google Drive processes, uninstall the application.
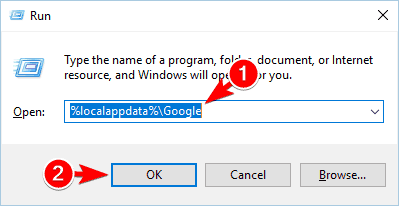
- Now press Windows Key + R and enter %localappdata%Google. Press Enter or click OK.
- Locate the Drive folder and rename it to Drive.old.
- Install Google Drive again and check if the problem is resolved.
9. Edit your registry
According to users, this error message can appear if you try to access a network shared directory. This can be a big problem, but you can resolve it by making a few changes to your registry.
Modifying the registry can cause certain issues, so be extra cautious and export your registry just in case. To modify your registry, do the following:
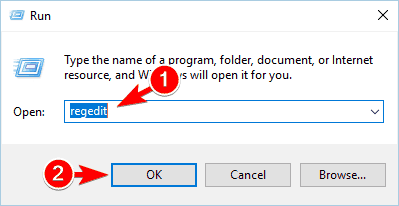
- Press Windows Key + R and enter regedit. Press Enter or click OK.
- When Registry Editor opens, in the left pane navigate to this key:
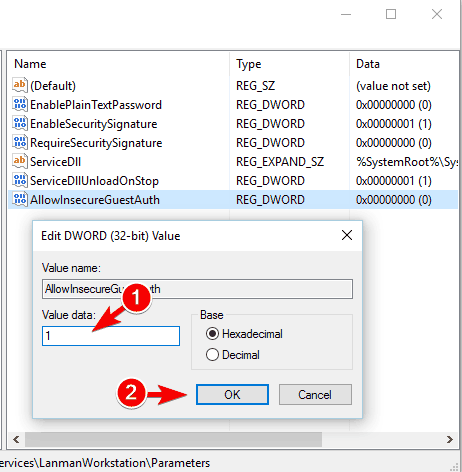
HKEY_LOCAL_MACHINESYSTEMCurrentControlSetServicesLanmanWorkstationParameters - In the right pane, right-click the empty space and choose:
New > DWORD (32-bit) Value - Enter AllowInsecureGuestAuth as the name of the new DWORD.

- Double click the newly created AllowInsecureGuestAuth DWORD to open its properties. Set Value data to 1 and click OK to save changes.
- After doing that, restart your PC and check if the problem is resolved.
Keep in mind that this solution only applies to network shared folders, so it won’t work with local folders.
10. Turn off User Account Control
User Account Control is a useful feature that will prevent applications and users from running commands that require administrative privileges.
This is a useful feature, but sometimes it can cause Access is denied message to appear, especially when installing new software. To fix the issue, you need to do the following:
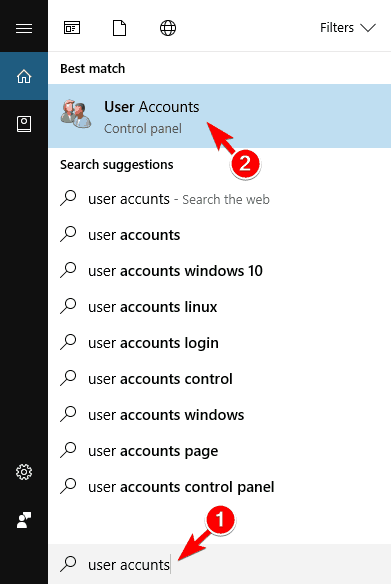
- Press Windows Key + S and enter user accounts. Now select User Accounts from the list of results.
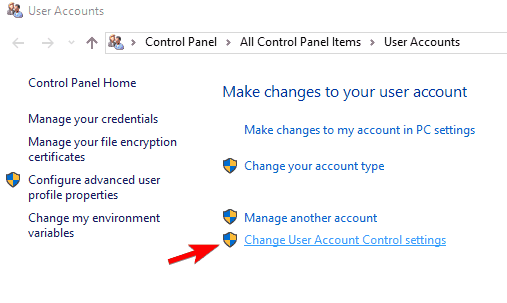
- When the User Accounts window opens, click on Change User Account Control settings.
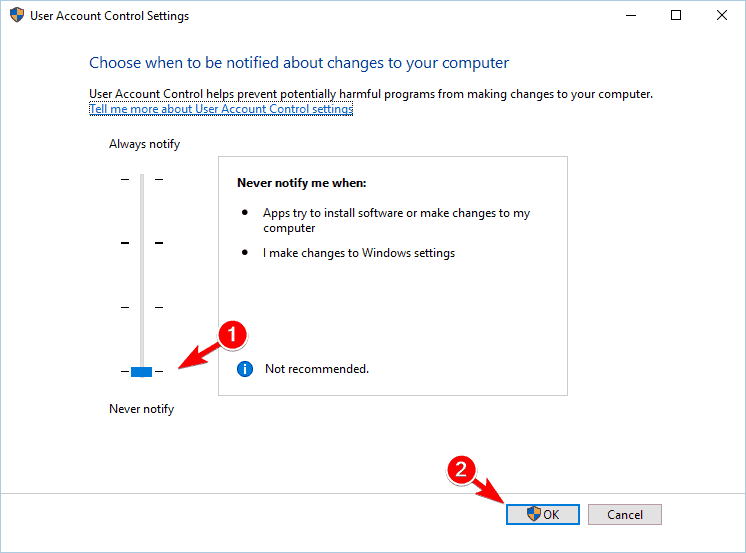
- Move the slider all the way down and click the OK button to save changes.
- After doing that, try to install the application again.
11. Disable your antivirus software
Antivirus software is rather important, but sometimes third-party antivirus can cause this error to appear.
According to users, they got Access is denied message while trying to install certain applications, and the cause was their security software.
To fix this issue you just need to temporarily disable your security software and try to install the application again.
If the problem doesn’t appear, it means that the issue was caused by your antivirus software, so you should consider updating or replacing it.
There are multiple efficient antivirus programs that will not interfere with other applications on your PC. Then, discover them and choose from the best antiviruses compatible with Windows10.
12. Change ownership or permissions of Temp and Installer folders
When installing new software its temporary files are usually moved to Temp or Installer folders. However, if you don’t have the necessary permissions, you might not be able to install the desired application.
Expert Tip: Some PC issues are hard to tackle, especially when it comes to corrupted repositories or missing Windows files. If you are having troubles fixing an error, your system may be partially broken. We recommend installing Restoro, a tool that will scan your machine and identify what the fault is.
Click here to download and start repairing.
If this error message appears while trying to install applications, be sure to check if the following folders have the necessary permissions
If needed, you might have to change ownership or permissions in order to fix this problem.
13. Check environment variables
In some cases Access is denied message can appear while trying to create zipped folder in Windows.
This is usually because the %TEMP% variable isn’t properly set. To fix this problem, you need to configure environment variables by doing the following:
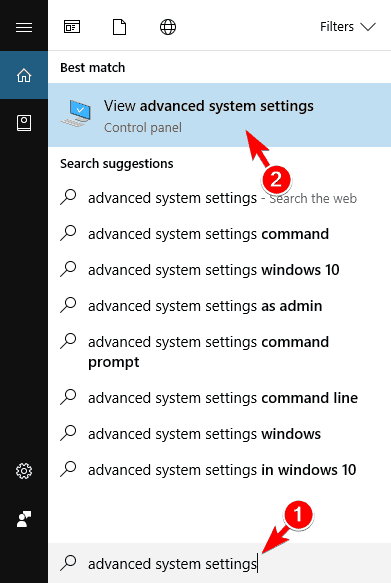
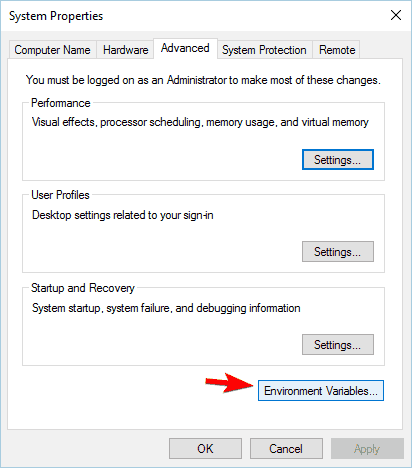
- Press Windows Key + S and enter advanced system settings. Select View advanced system settings from the menu.
- Click on Environment Variables button.
- Locate TEMP on the list and check if its value is set correctly. If not, double click the TEMP and set its value to
%USERPROFILE%AppDataLocalTemp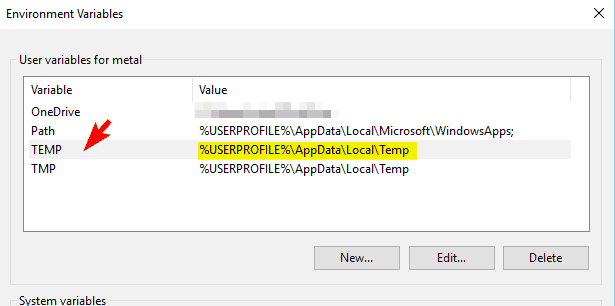
- Save changes and restart your PC.
After doing that, navigate to the %TEMP% folder by entering %TEMP% in the address bar in File Explorer. Once you open the Temp folder, try to create a new folder and delete it.
If you can’t create or delete a folder, you’ll need to take ownership of the Temp folder or change your permissions.
Fix – Access is denied Windows 10 cmd
1. Pin Command Prompt to Start Menu
If you’re getting Access is denied message while trying to start Command Prompt, you might want to try pinning it to Start Menu.
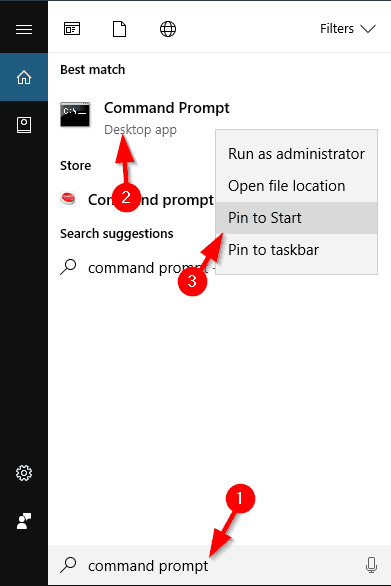
According to users, this workaround solved the problem for them, so you might want to try it. To do that, simply press Windows Key + S and enter command prompt.
Right-click Command Prompt from the list of results and choose Pin to Start from the menu.
After doing that, try launching Command Prompt using the Start Menu shortcut.
2. Run Command Prompt as administrator
Sometimes Access is denied message can appear inside Command Prompt while trying to run a certain command.
This message indicates that you don’t have the necessary privileges to access a specific file or to perform a specific command. However, you can fix this issue in most cases simply by running Command Prompt as an administrator.
We already explained how to start Command Prompt with administrative privileges in one of our previous solutions, so be sure to check them out.
Fix – Access is denied Windows 10 hard drive
1. Change your permissions
If you can’t access a hard drive partition due to Access is denied message, you might want to try changing your permissions or the owner.
We already explained how to do that in our previous solutions, so be sure to grant Full Control to your user account in order to access your hard drive partition.
Several users reported that you can fix the problem by giving Full Control to Everyone group, so try that as well. Keep in mind that you might have to add the group manually if it’s not available on the list.
It’s crucial to remember that you shouldn’t change the permissions of your system drive. If you have problems accessing your C: drive, you might want to try a different solution.
We have to mention that this solution can be potentially dangerous, so keep in mind that you’re using it at your own risk.
2. Change the sharing settings
According to users, if this error appears while accessing external hard drive you can fix it simply by changing a few settings. To fix the issue, due to the following:
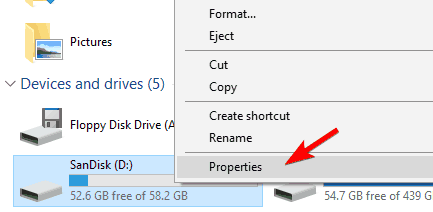
- Open This PC, locate your external hard drive, right-click it and choose Properties from the menu.
- Navigate to the Sharing tab and click on Advanced Sharing.
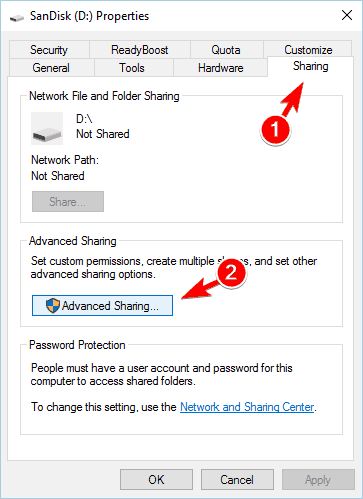
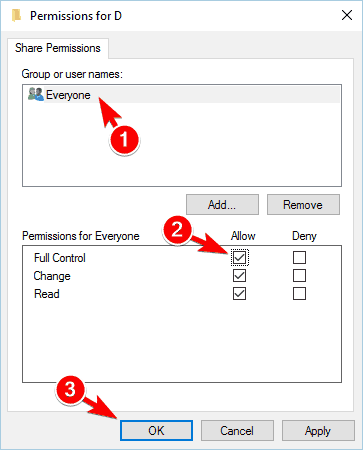
- When the Advanced Sharing window opens, check Share this folder option and then click on Permissions.

- Select Everyone from the list and check Full Control in Allow column. Click Apply and OK to save changes.
- After saving the changes, check if the problem is resolved.
3. Check if USB drives are blocked
Sometimes you might not be able to access an external hard drive due to Access is denied message. This can occur because USB drives are blocked by your registry.
Before we start fixing the problem, we have to mention that this solution can be potentially dangerous, so be extra cautious. To search your registry, do the following:
- Open Registry Editor.
- Select Computer in the left pane and press Ctrl + F. Enter RemovableStorageDevices, and click Find Next.
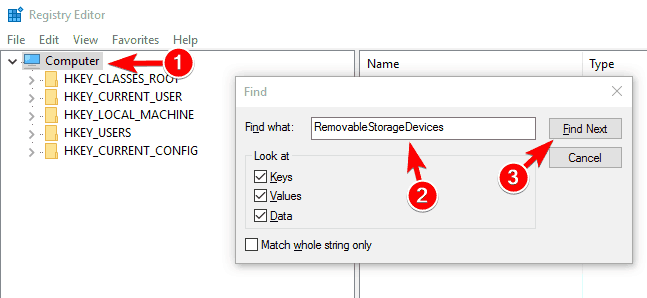
- If you find RemovableStorageDevices values, set Deny to 0 and save changes.
Keep in mind that these values might not be available on your PC, so if you can’t find them you should probably skip this solution.
4. Uninstall HP Device Manager
If you’re having this error while accessing a hard drive partition on an HP device, you might want to try removing HP Device Manager software.
Several users reported that this application prevents them from accessing their hard drive, so be sure to remove it and check if that solves the problem.
Fix – Access is denied Windows 10 Notepad
1. Run Notepad as administrator
This error message can appear sometimes while starting Notepad. If you have the same problem, you should try running Notepad as an administrator.
To do that, simply locate Notepad shortcut, right-click it and choose Run as administrator. If that solves the problem, you should set Notepad to always run with administrative privileges.
To do that, follow these steps:
- Locate Notepad shortcut, right-click it and choose Properties from the menu.

- Go to the Shortcut tab and click the Advanced button.
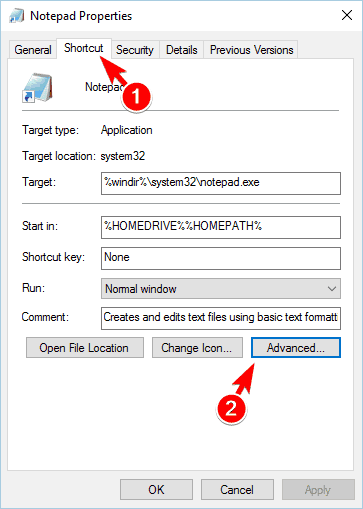
- Now check Run as administrator option and click the OK button.

- Click Apply and OK to save changes and try to start Notepad using the shortcut. If you did everything right, Notepad will always start with administrative privileges.
2. Change how files open
Access is denied message can appear if Notepad starts automatically with Windows. This is usually caused by .ini files, but you can easily solve this issue. To do that, follow these instructions:
- Go to your C: drive.
- Click on View and check Hidden files and File name extensions.
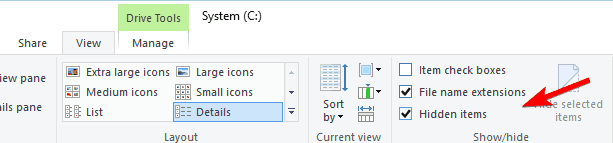
- Now locate any .ini file in C: directory, right-click it, and choose Open with -> Choose another app.
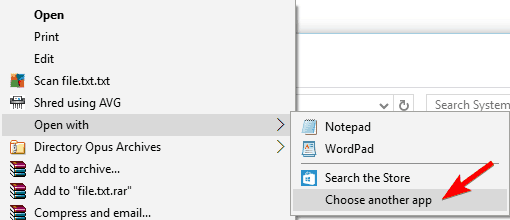
- Select the Provisioning package runtime processing tool and click OK.
- Restart your PC.
After your PC restarts, check if the problem is resolved.
3. Delete desktop.ini files
If Notepad and Access is denied message appear every time you start your PC, you might want to try deleting the desktop.ini file.
This file is located in these directories:
Visit both directories and remove desktop.ini files from them. Keep in mind that this file can be hidden, so be sure to reveal hidden files and folders. We already showed you how to do that in our previous solution, so be sure to check it out.
After deleting desktop.ini files, the problem should be completely resolved and Notepad won’t start anymore along with Windows.
Access is denied message can affect both files and folders, and it can even prevent you from installing new applications. This can be a big problem, but we hope that you managed to solve it by using one of our solutions.

There are 4 comments