
- Windows installation has failed can occur due to installed components, so be sure to remove them before trying to upgrade.
- Certain software, such as your antivirus, can prevent Windows installation from working properly.
- In some instances, performing a clean reinstall is the only way to fix this issue for good.
XINSTALL BY CLICKING THE DOWNLOAD FILE
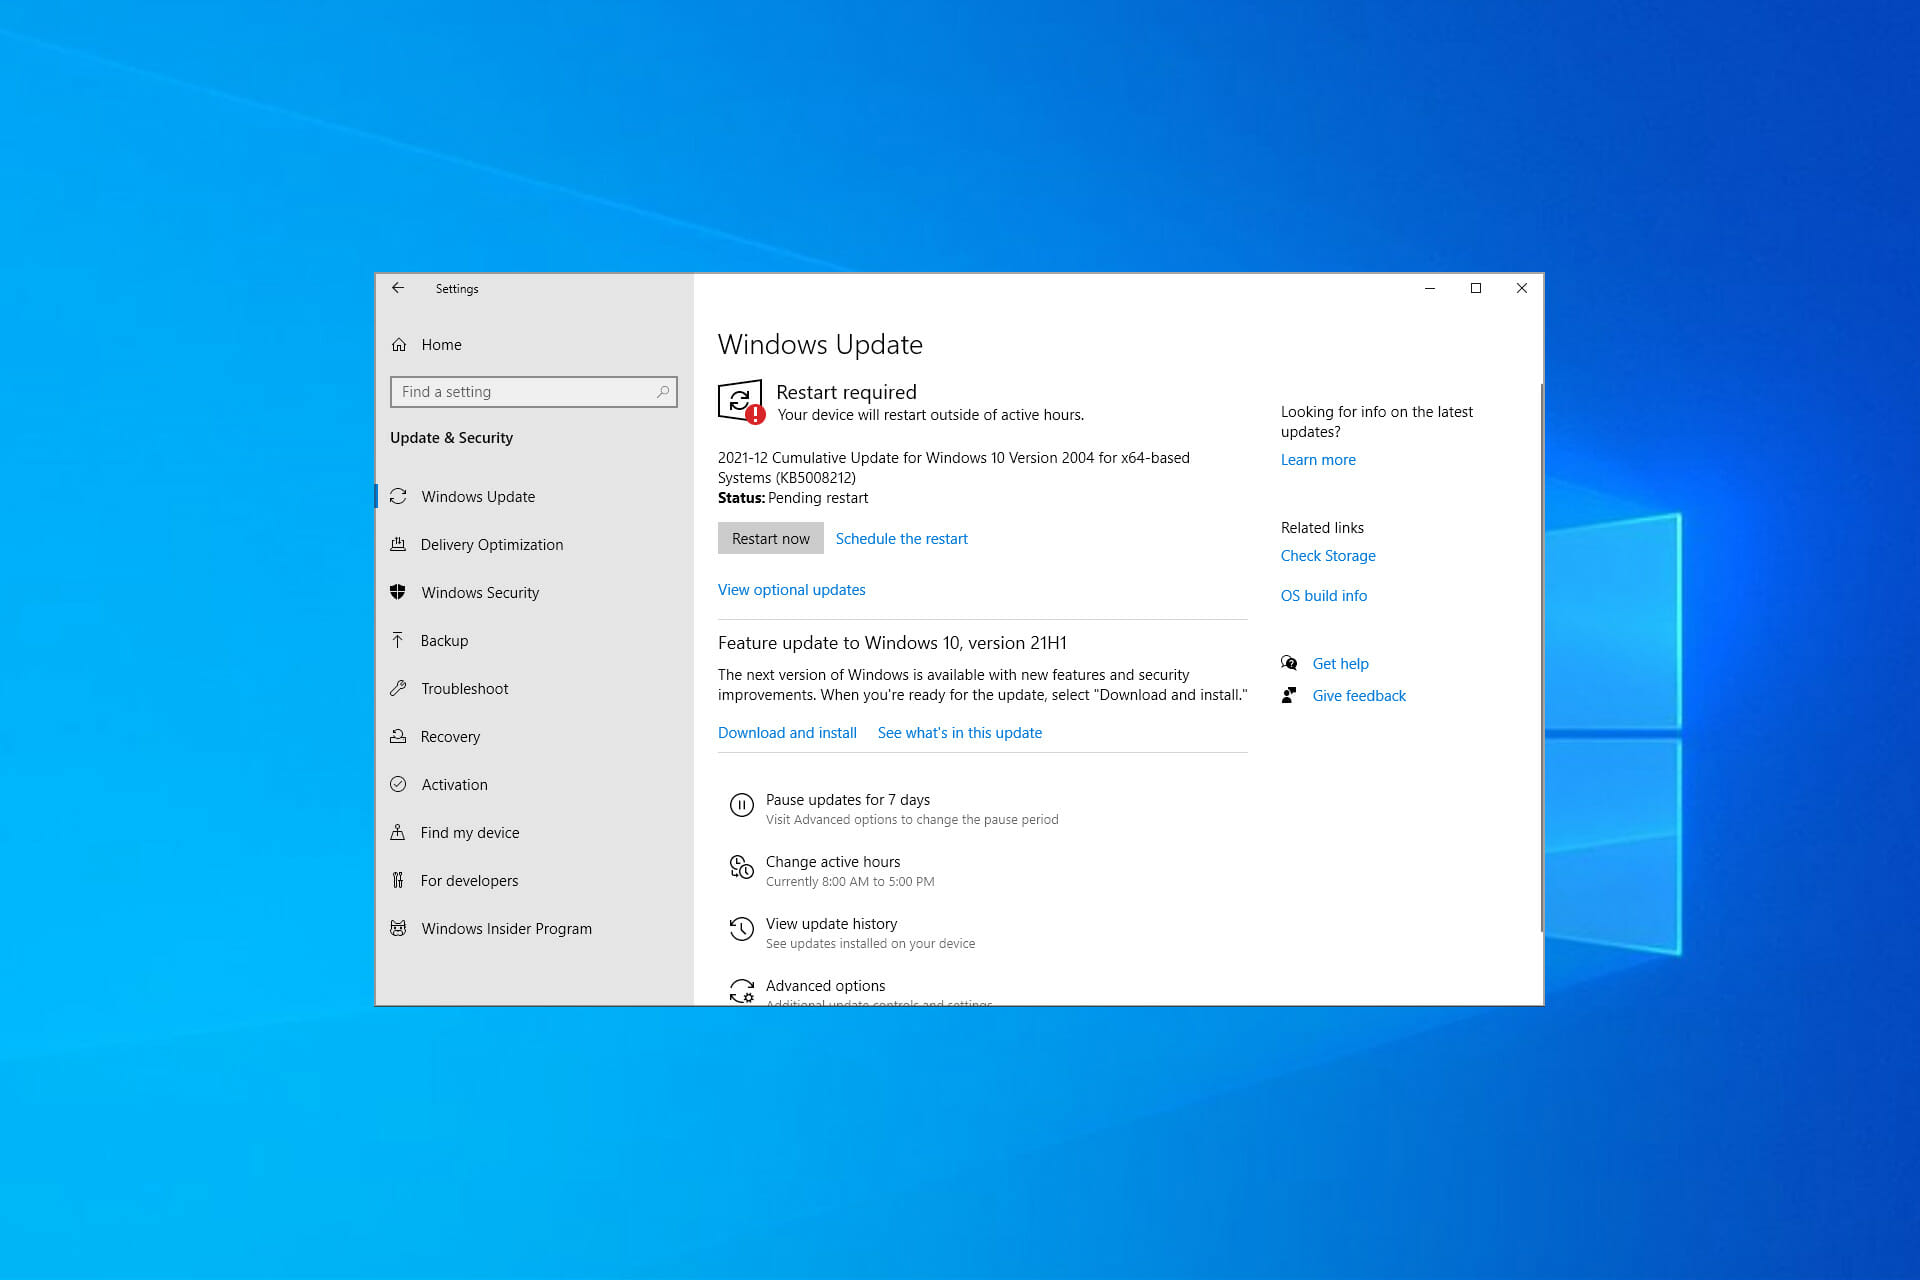
Upgrading from one version of Windows to another is usually seamless, you start the process and wait for it to finish. And while that’s usually the case, update issues can sometimes occur.
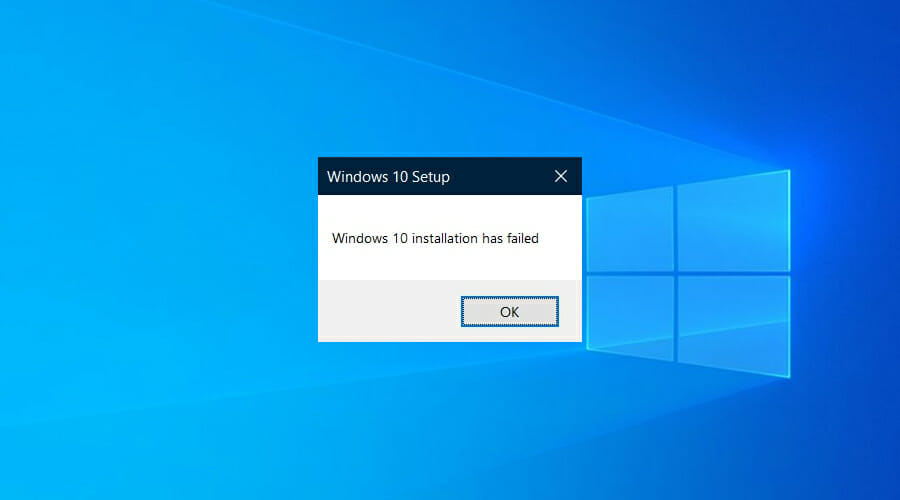
Namely, lots of users, after seemingly completing the installation, were prompted with the Windows installation has failed error. They had to start again but the results were the same.
This can be a problem, especially if you’re eager to try the new version of Windows, but luckily, there are several methods you can use to fix it in no time.
To address this, we prepared a list of possible solutions that can come in handy. In case you’re still stuck with this installation error, make sure to check the steps we provided below.
Why does the Windows installation has failed message appears?
There are several reasons why you might encounter this error message, and it usually appears due to installed components or security software.
Connected peripherals can also be a problem, so be sure to remove them before trying to install Windows. Lastly, file corruption could be the cause of this problem as well.
Which versions of Windows are affected by this issue?
Windows installation has failed message is a generic error, and as such, it can appear on almost any version of Windows.
All editions seem to be affected by this issue, and many have reported Windows 11 installation problems, so even the latest version is affected by this issue.
What can I do when getting the Windows installation has failed error on Windows 10 & 11?
1. Make sure you meet the requirements
- RAM: 1GB for 32 bit and 2GB for 64 bit
- Hard disk space: 16 GB for 32 bit and 20 GB for 64 bit
- CPU: 1GHz or faster
- Screen resolution: 800 x 600
- Graphics: Microsoft DirectX 9 or later with WDDM 1.0 driver
- Internet access
2. Uninstall the language pack
- Press Windows key + I.
- Naviage to Time & Language section.
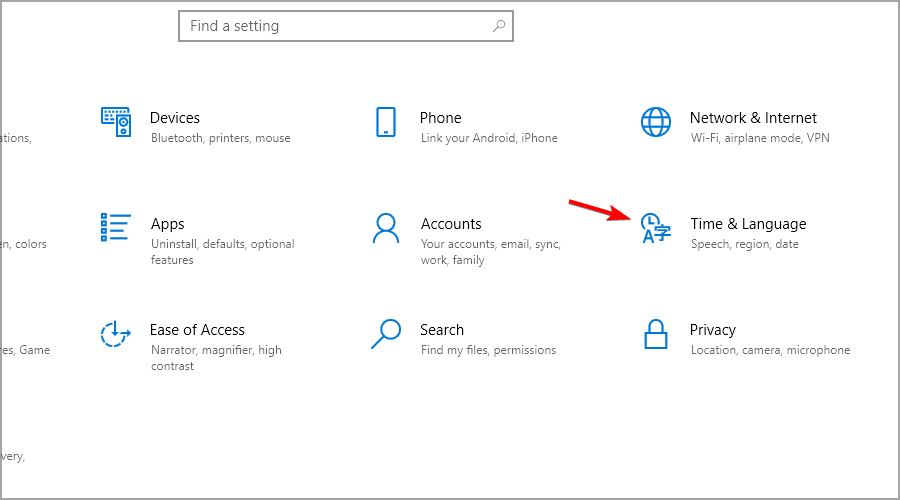
- Go to the Language in the left pane. In the right pane, select all non-English languages that you have and click on Remove.
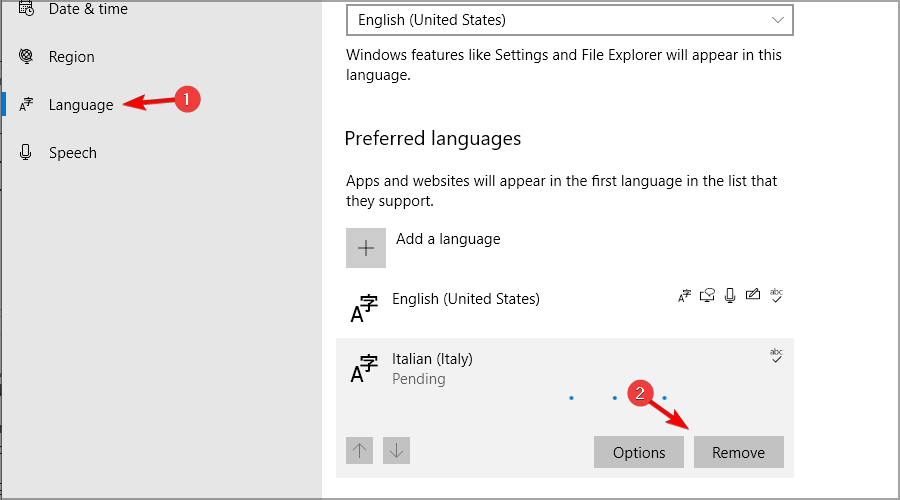
- After removing all of them, check if the problem is resolved.
If you’re having any issues with this solution, be sure to visit our guide and see what to do if you can’t remove keyboard language.
3. Unplug all peripheral devices
Expert Tip: Some PC issues are hard to tackle, especially when it comes to corrupted repositories or missing Windows files. If you are having troubles fixing an error, your system may be partially broken. We recommend installing Restoro, a tool that will scan your machine and identify what the fault is.
Click here to download and start repairing.
Before starting the update disconnect all your nonessential peripherals. This includes printers, gamepads, external drives, and similar devices.
After disconnecting them, start the upgrade process. If the process is successful, connect your devices again.
4. Uninstall third-party antivirus
- Press Windows key + X and select Apps and Features from the menu.
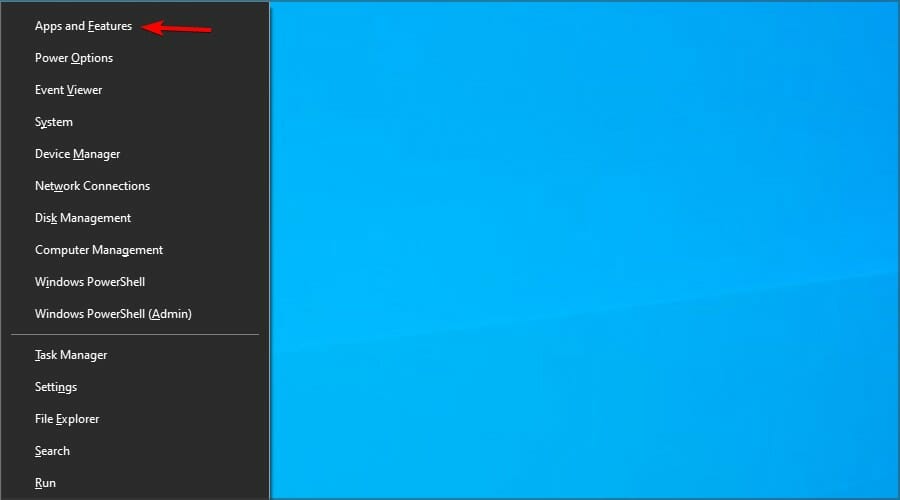
- Select your antivirus software and click on Uninstall.
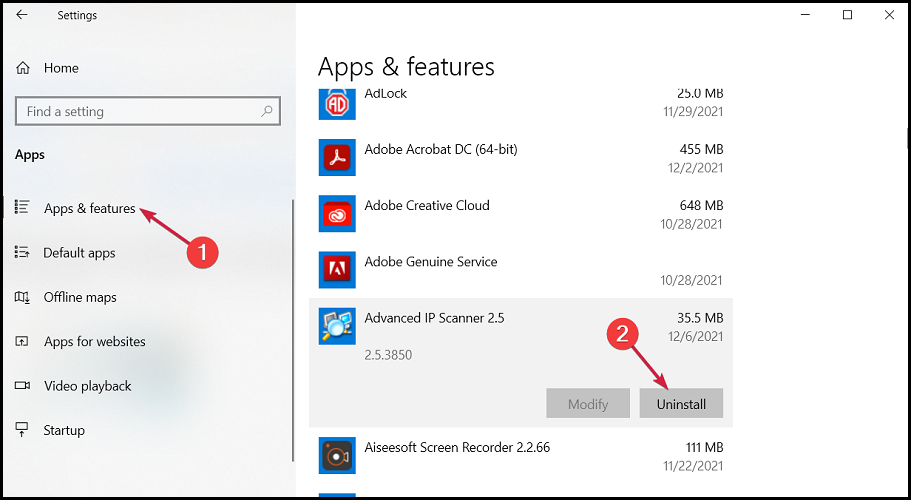
- Follow the instructions on the screen to remove it.
- After removing the software, try to perform the upgrade again.
5. Choose to keep only files when asked
- Start the upgrade process.
- Follow the instructions on the screen until you reach what to keep screen.
- Select option to Keep personal files only.
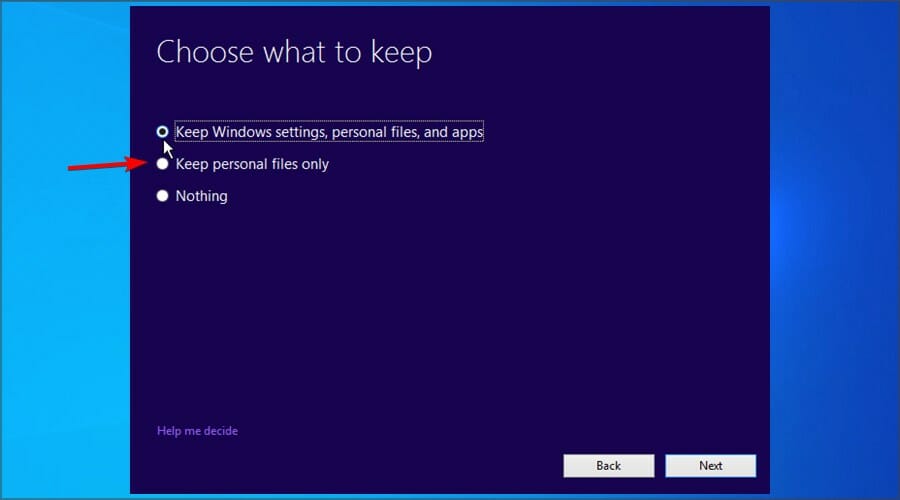
- Follow the instructions to complete the process.
6. Rebuild BCD
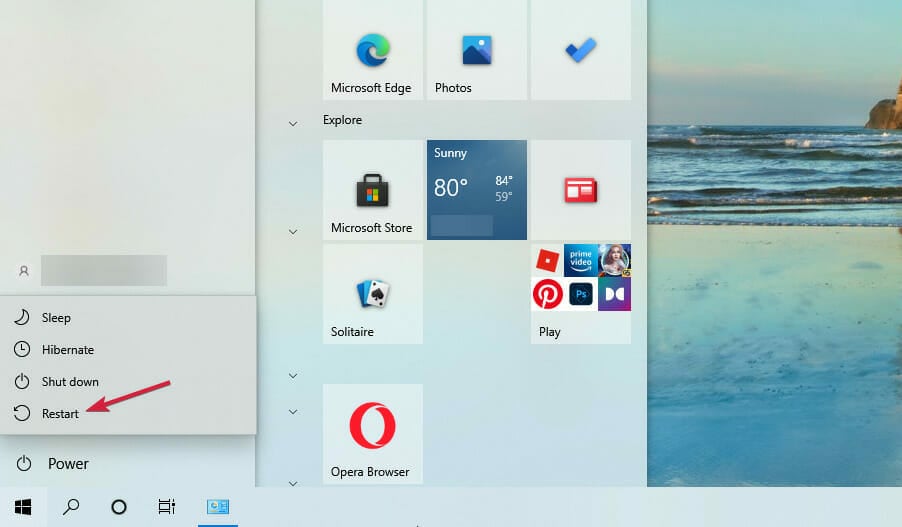
- Open the Start Menu, click the Power button. Press and hold the Shift key and select Restart.
- Choose the Troubleshoot option.
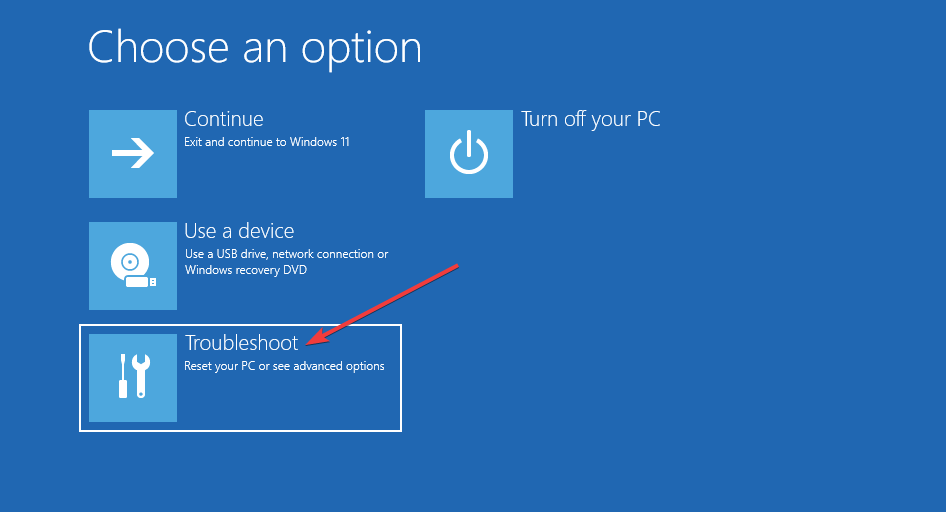
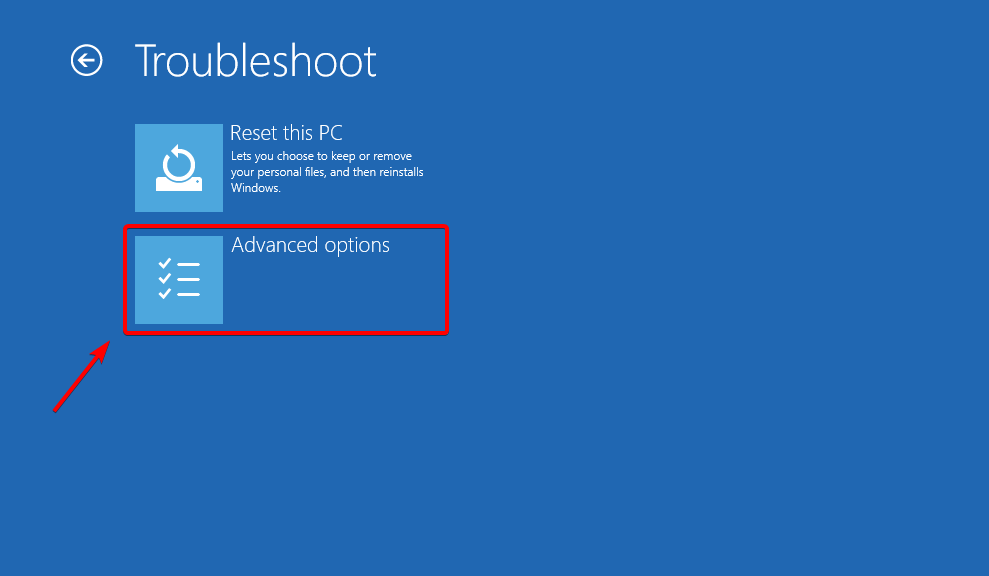
- Select Advanced options.
- Open Command Prompt. Select your account and enter the password if asked.
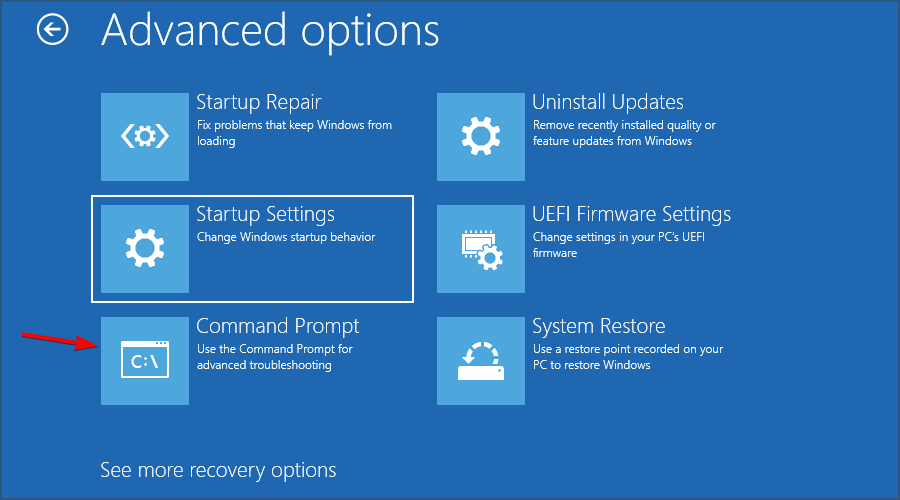
- Run the following commands one by one:
bootrec /FixMbr
bootrec /FixBoot
bootrec /ScanOs
bootrec /RebuildBcd - This should finalize the repair procedure and you should be able to upgrade your PC without any problems.
7. Upgrade with installation media
- Download the Media Creation Tool.
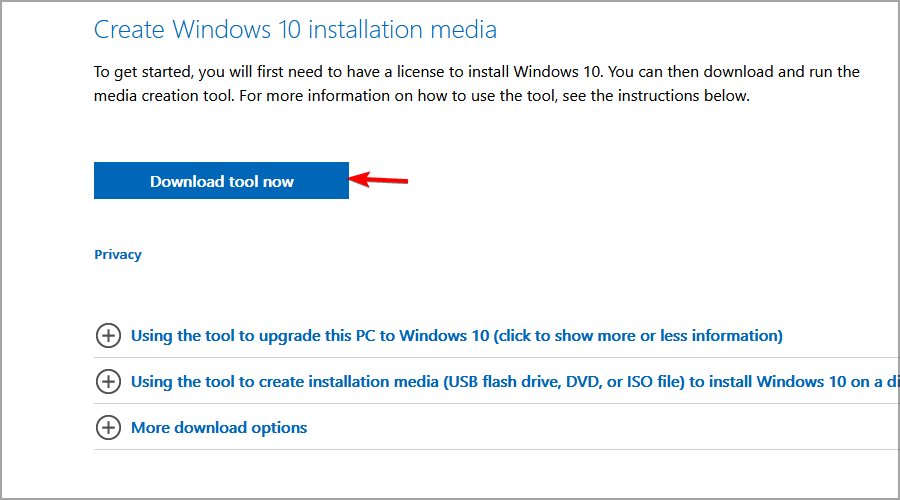
- Once the application is downloaded, run it.
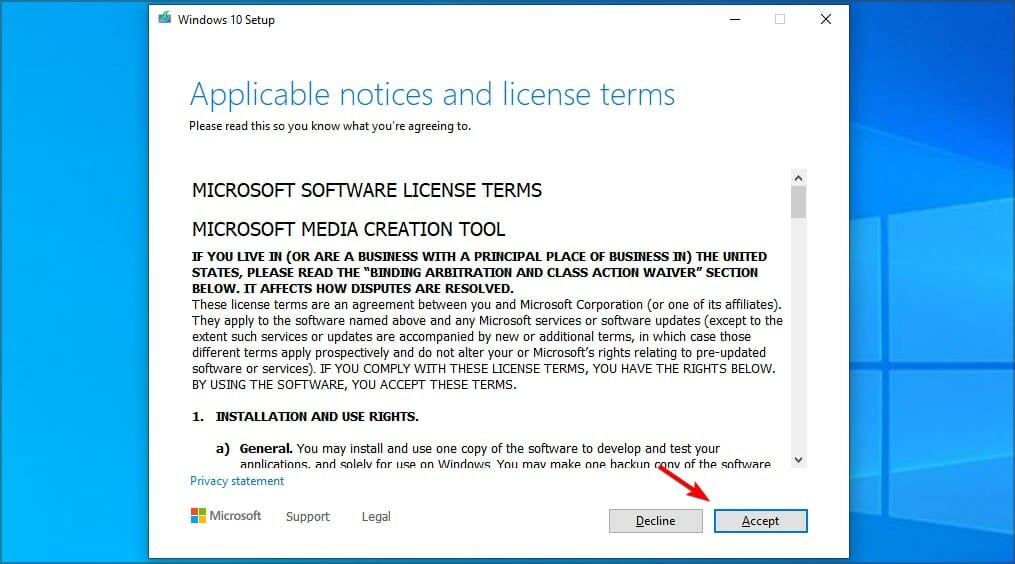
- Accept the terms of service.
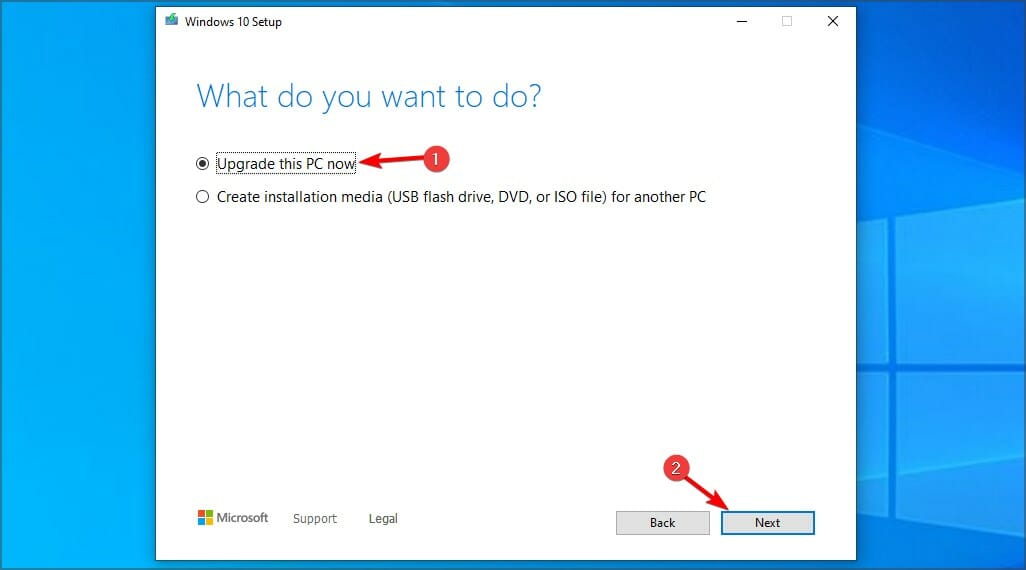
- Choose the option to upgrade your PC.
- Wait while Windows downloads the necessary files. This can take a while depending on your Internet speed.
- Follow the instructions on the screen to complete the upgrade process.
8. Perform a clean install
- Download the Media Creation Tool and run it.
- Connect an empty USB flash drive to your PC.
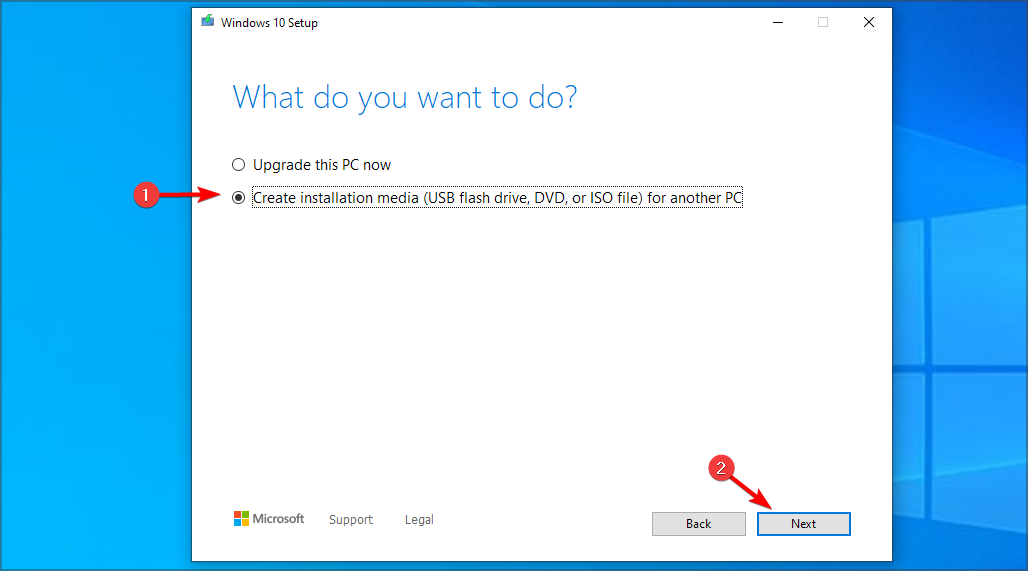
- Select the option to Create installation media.
- Choose your flash drive from the list.
- Wait for the process to complete. This can take a while depending on your Internet speed.
- Restart your PC.
- Now keep pressing the boot menu key while your PC boots. The key is different for each motherboard brand, and it’s shown briefly while the PC starts.
- Select your USB flash drive from the list.

- Follow the instructions on the screen to complete the process.
What to do if Windows installation has failed on Windows 11?
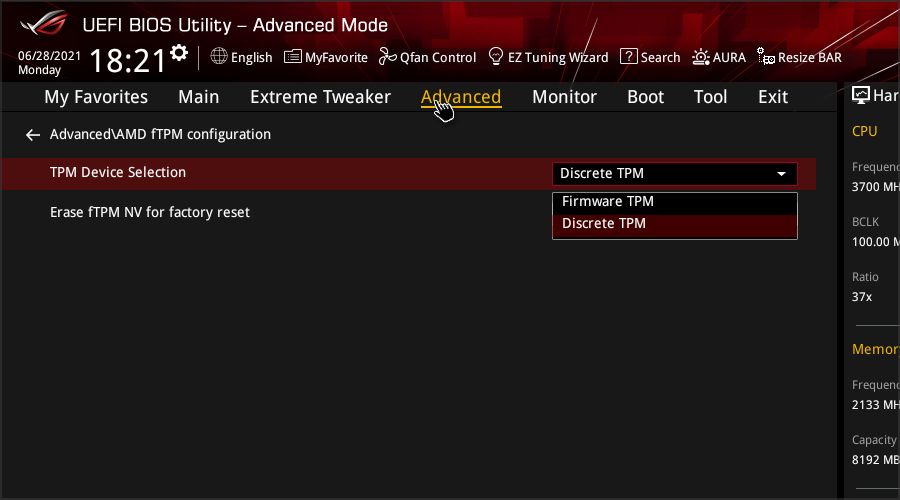
Check if TPM is enabled
- Restart your PC and keep pressing F2 to enter BIOS.
- Once you enter BIOS, navigate to the Security section.
- Look for PTT of TPM option, and enable it.
- Optional: You can also enable Secure Boot.
- Save changes and try to perform the installation again.
For more information, we suggest visiting our guide on how to enable TPM in different versions of BIOS.
What are Windows 11’s requirements?
- CPU: 1Ghz, dual-core, 64-bit compatible processor
- RAM: 4GB
- Storage: 64GB or more
- Firmware: UEFI with Secure Boot support
- TPM: TPM 2.0
If needed, you can even install Windows 11 without TPM, but this might be a security risk, so it’s not recommended.
What is Windows clean install?
A clean install is a process in which you use Windows installation media to reinstall your operating system from scratch.
Usually, clean install means that you’ll format your system drive to have a fresh start without any applications or files. If you choose to do this, we strongly advise you to back up your files beforehand.
Fixing the Windows installation has failed installation error is relatively simple, and you should be able to fix it using our solutions.
In case the issue is still there, your only option might be to create a bootable flash drive and clean install Windows.
Did you find a different solution for this issue? If so, feel free to share it with us in the comments section below.

Frequently Asked Questions
Start a conversation