
- Virus and threat protection can be found inside Windows Defender, and it keeps your PC secure from malware, virus, and other attacks.
- Issues with launching or accessing it are usually encountered due to conflicting third-party antivirus, corrupt system files, or misconfigured registry.
- An effective approach would be to first identify the problem and then execute the relevant fix.
- Unable to pinpoint the problem? Fret not! Apply the solutions in the sequence they are mentioned for quick troubleshooting.
XINSTALL BY CLICKING THE DOWNLOAD FILE
A lot of users have recently complained of Windows 11’s virus and threat protection not working. The issue seems worthwhile and largely intricate to fully comprehend, hence we are here with a bunch of effective fixes to resolve it.
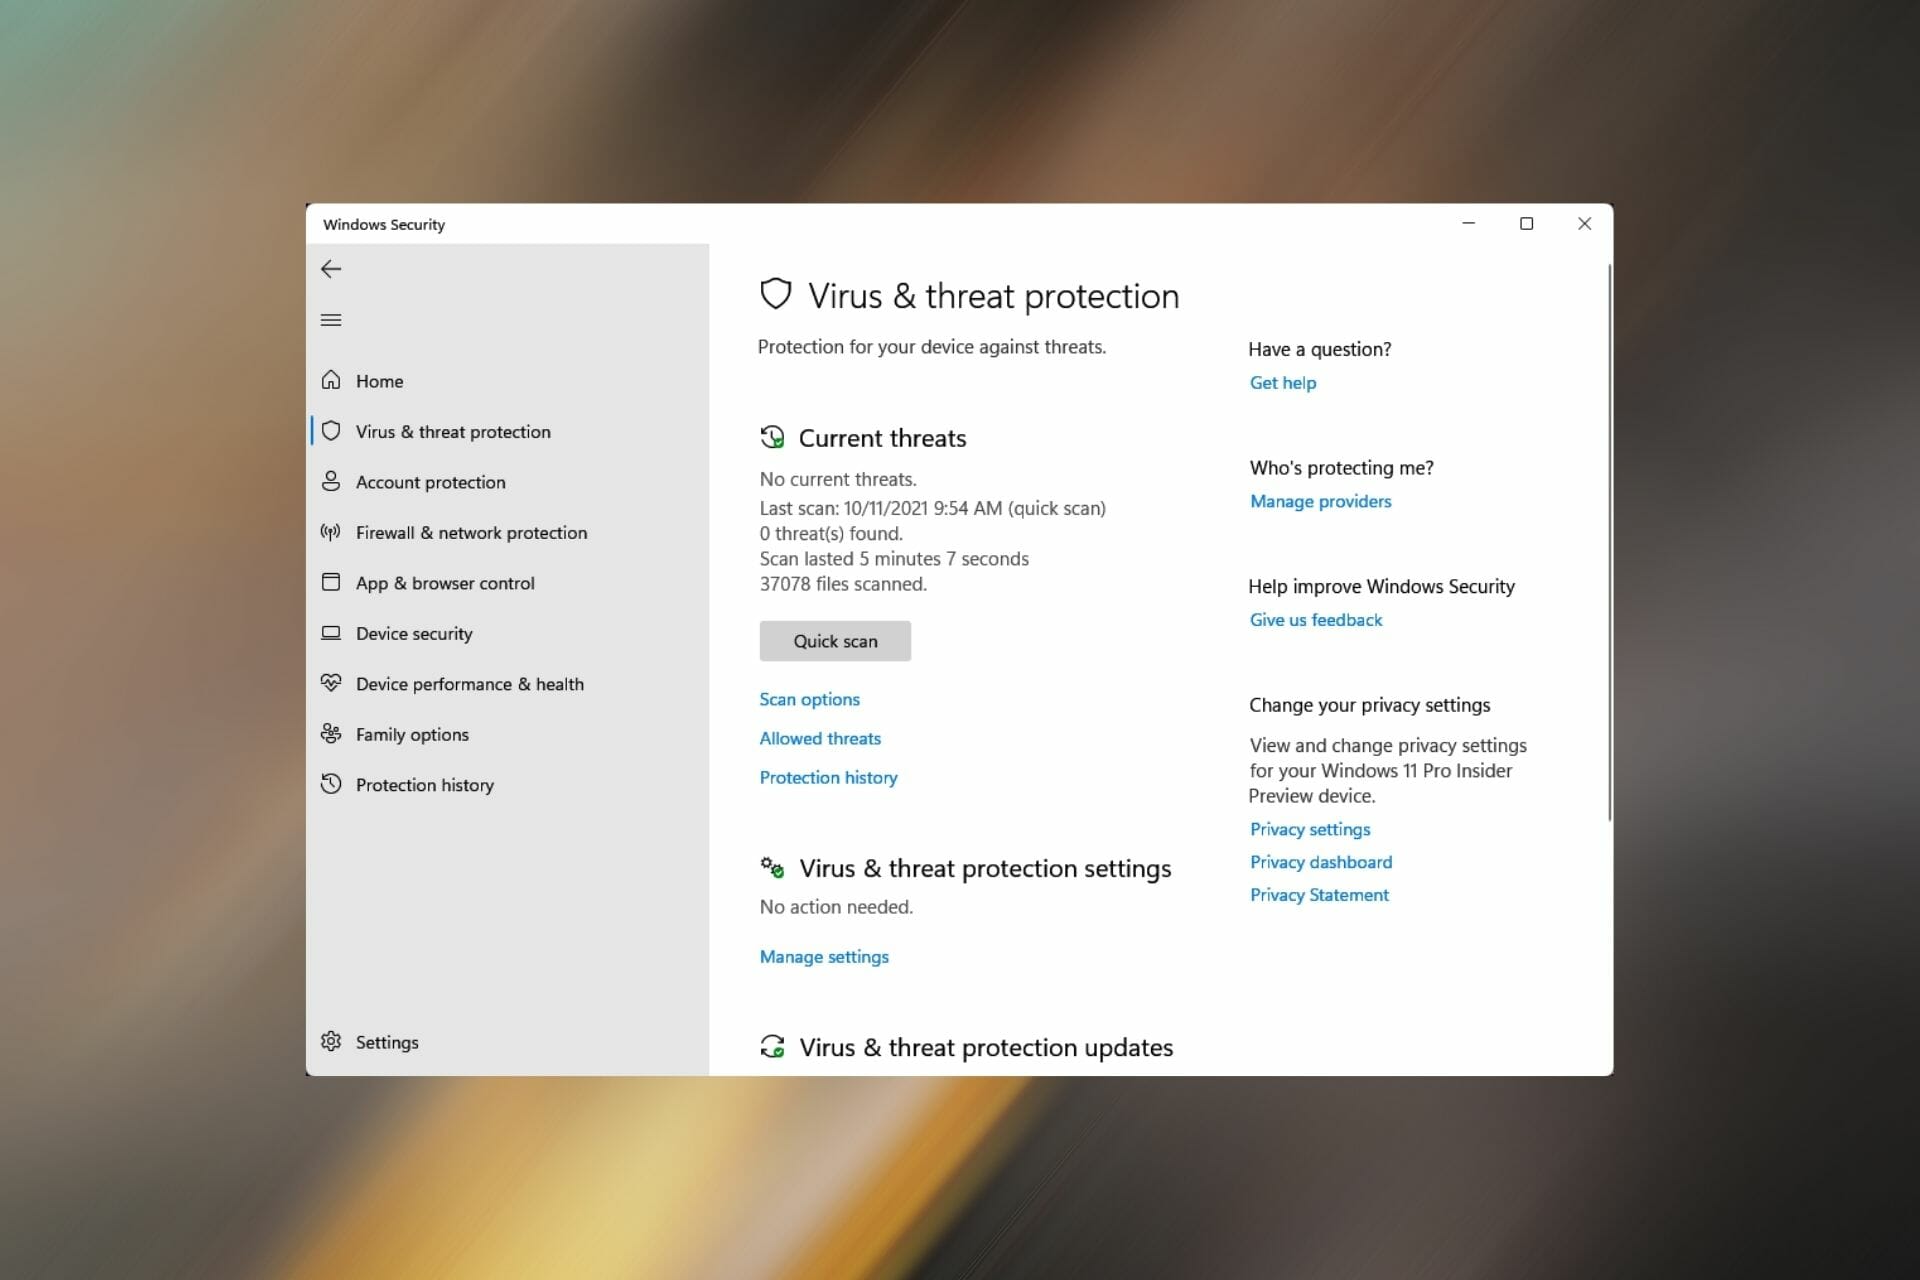
Virus and threat protection prevents your PC from malware attacks, allows you to run scans for viruses, and download security updates released by Microsoft. If this particular section becomes inaccessible, it’s going to cause a lot of trouble in keeping your system secure.
Hence, it becomes imperative that you look for ways to resolve the problem preventing you from accessing or using Windows Defender on Windows 11.
But, the primary questions that come to mind are: what are the types of issues and their causes? And before we fully understand the answers, it’s futile to start executing the fixes.
What error message is displayed when accessing virus and threat protection?
Users generally encounter the following error message when accessing or using the virus and threat protection on Windows 11: Your IT administrator has limited access to some areas of this app.
If you see this on the Windows Defender window, you have come to the right page. Go through the following sections to understand the causes and the most effective fixes for the error.
Why is the virus and threat protection not working on Windows 11?
Listed below are the reasons you encounter the Windows 11 virus and threat protection not working issue:
- Bug in the current version of Windows 11
- Conflict with third-party antivirus installed on the PC
- Corrupted registry
- System infected with malware
- Issues with the Security Center service
- Corrupted system files
With a basic understanding of the underlying issue, you must first try to identify if any of these is causing the problem and head to the relevant fix. You will end up saving considerable time this way.
Nevertheless, if you have no clue as to what’s causing the error, execute the fixes mentioned in this article in the same sequence.
What can I do if virus and threat protection is not working?
1. Restart your PC
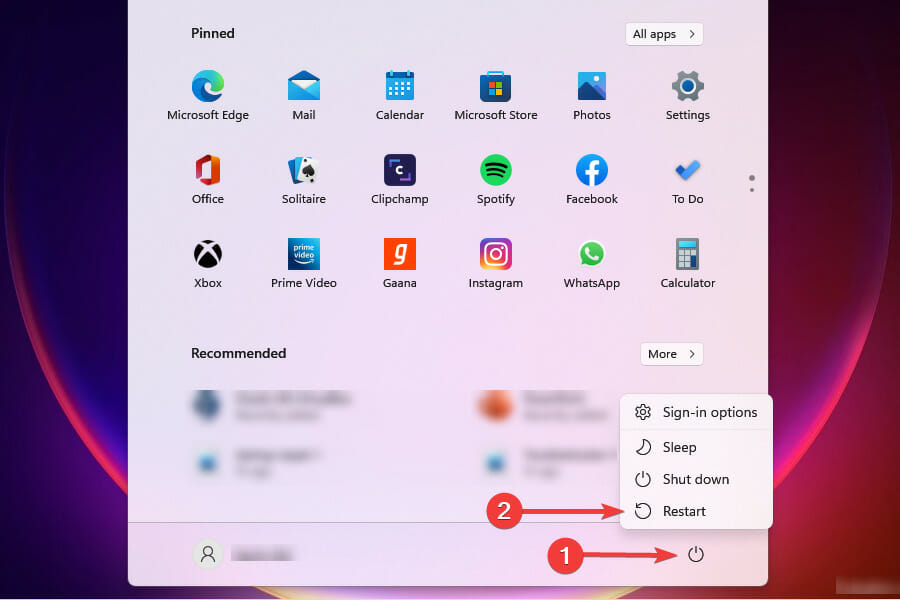
- Press the WIindows key to launch the Start menu.
- Click on the Power button and select Restart from the flyout menu.

- After the PC restarts, check if you are able to access and use virus and threat protection.
2. Update the OS
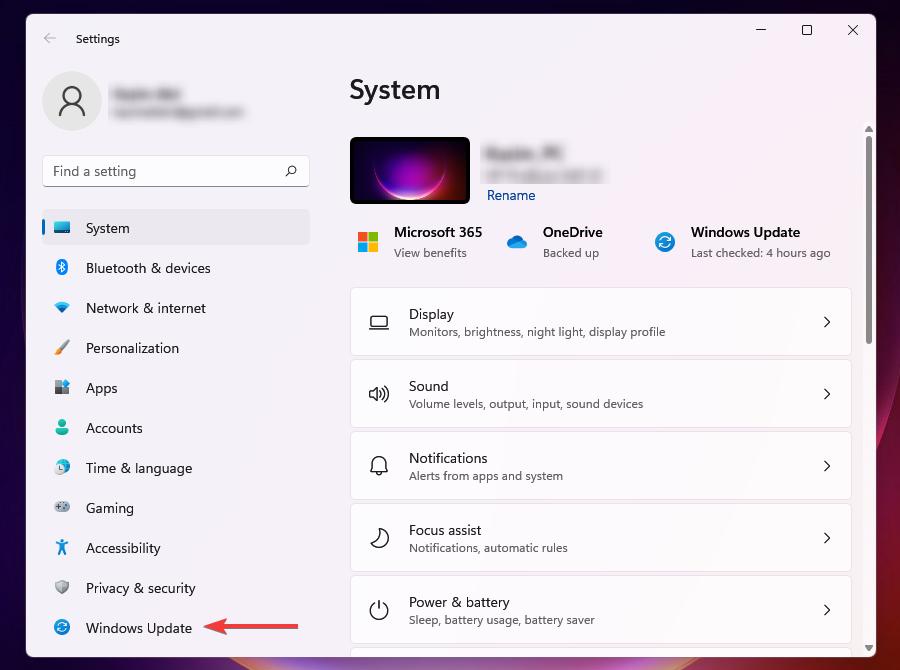
- Press Windows + I to launch the Settings.
- Select Windows Update from the tabs listed on the left.
- Click on Check for updates on the right.
- Wait for Windows to scan for updates, and download and install if any is availabe.
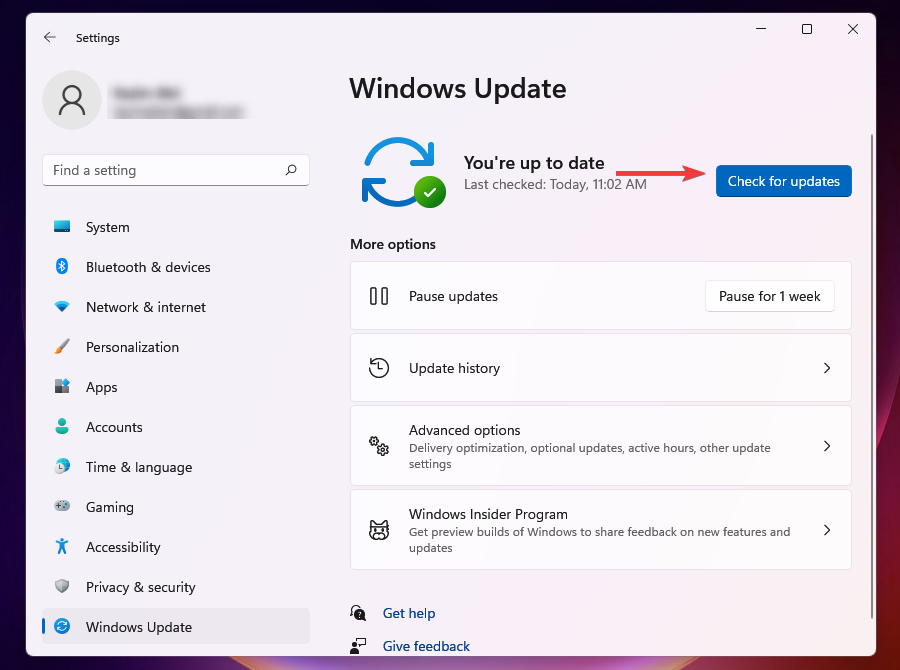
If there’s a bug in the current version that causing the issue, updating Windows is likely to fix it. Microsoft identifies such bugs and introduces a patch for them in the subsequent updates.
3. Uninstall any other third-party antivirus
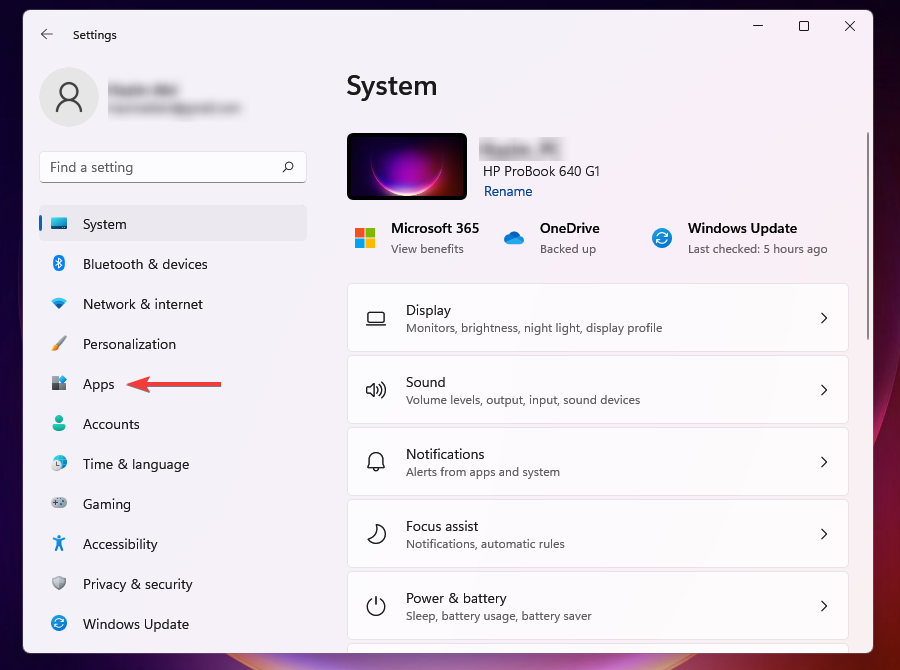
- Press Windows + I to launch Settings.
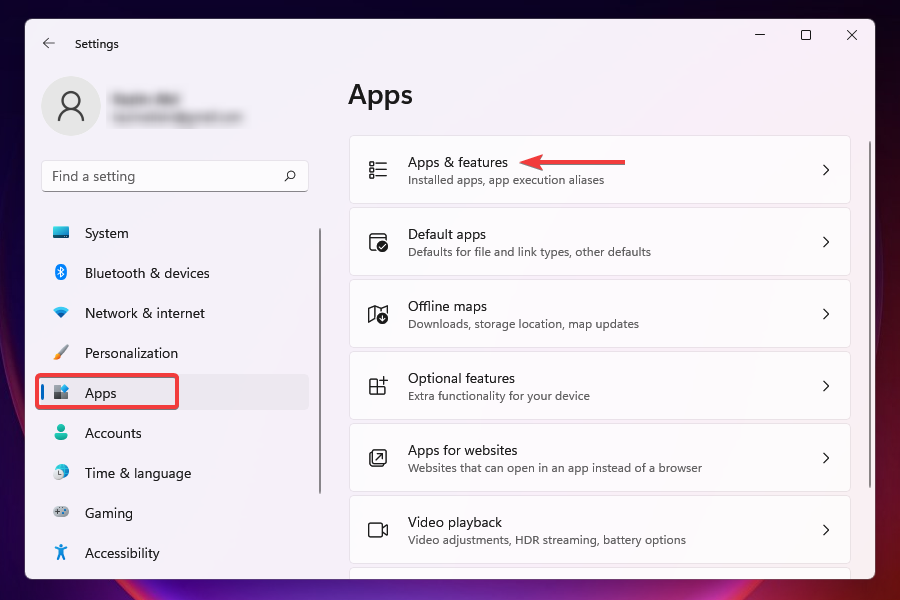
- Select Apps tab from the left.
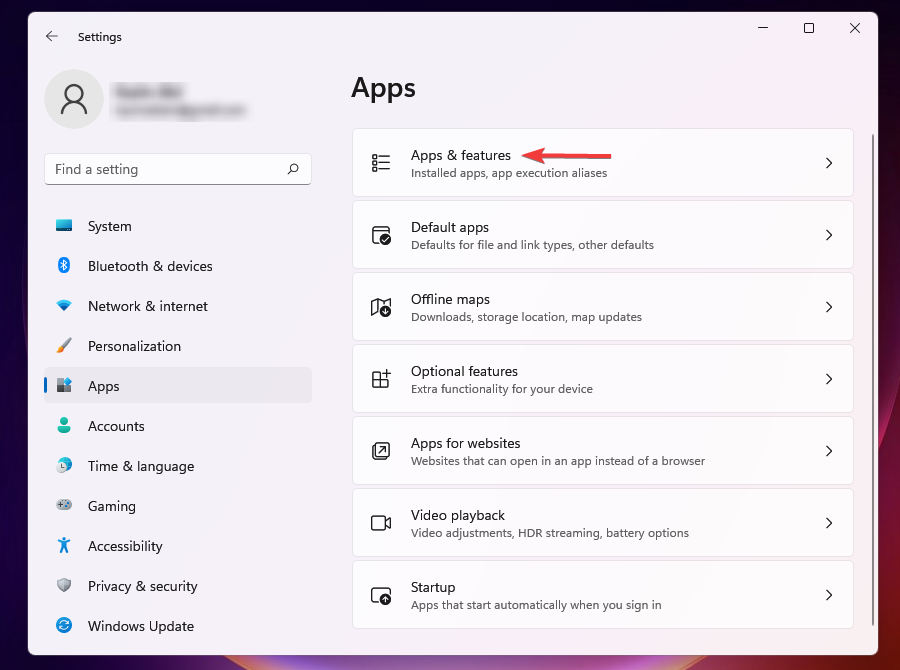
- Select Apps and features.
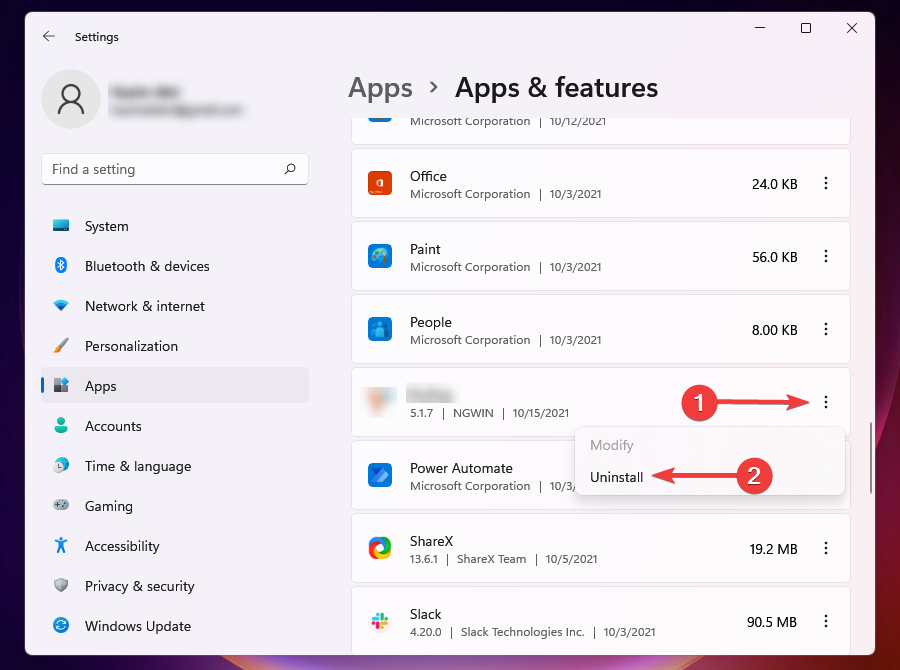
- Click on the ellipsis next to the antivirus you want to remove and select Uninstall from the flyout menu.
- Click Uninstall on the prompt.
If you have a third-party antivirus installed on the PC, it could conflict with the functioning of the virus and threat protection.
Also, sometimes, when Windows detects a similar tool installed on the system, it disables Windows Defender to avoid the two from running into conflict. Hence, uninstalling the antivirus should be a primary approach in order to solve the error.
4. Turn on Real-time protection
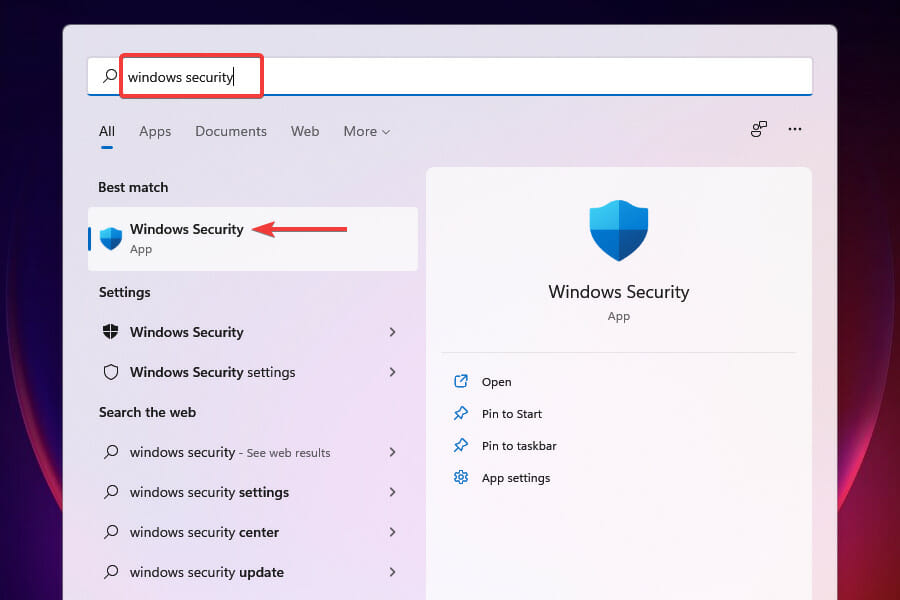
- Press Windows + S to launch the Search menu.
- Enter Windows Security in the text field and click on the relevant search result.
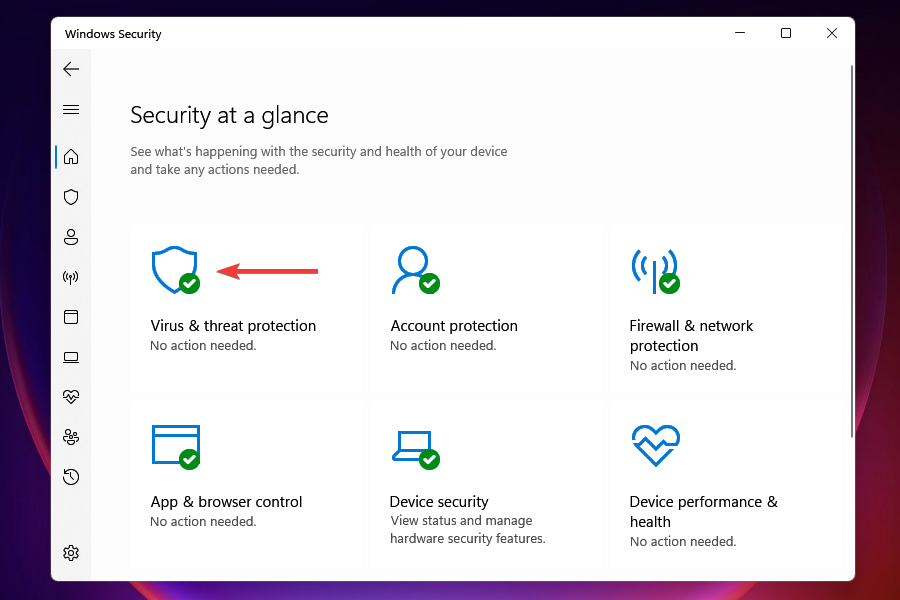
- Select Virus & threat protection.
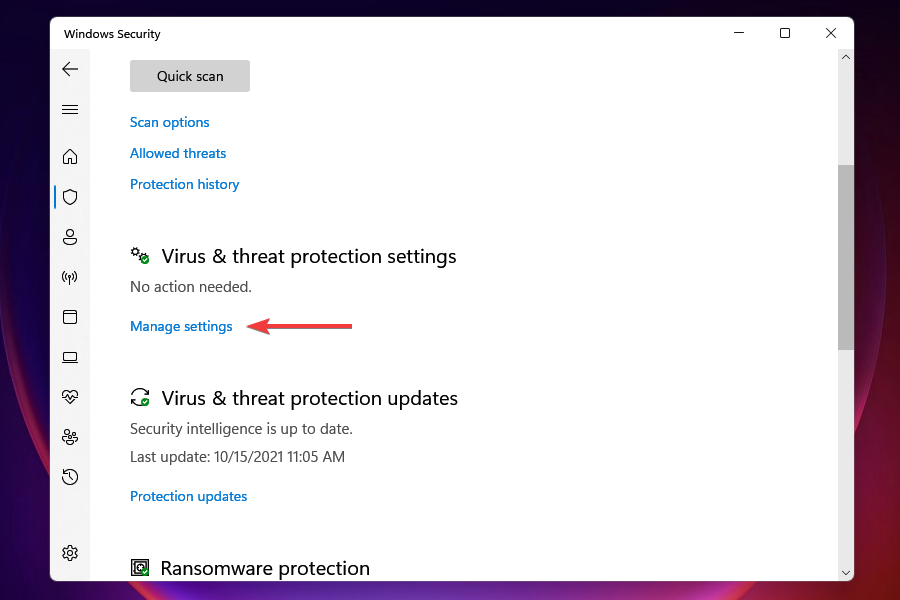
- Click on Manage settings under Virus & threat protection settings.
- Enable the toggle for Real-time protection.
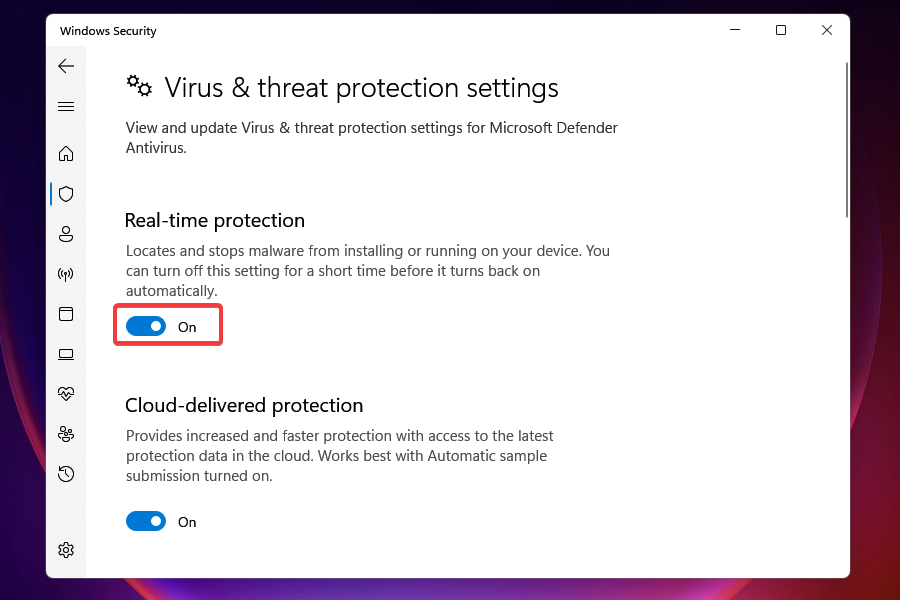
After enabling real-time protection, you should be able to access virus and threat protection. The toggle might be turned off either manually by you, or by the Windows itself in case it detected a third-party antivirus running.
5. Repair the Windows Security app
- Press Windows + I to launch Settings.
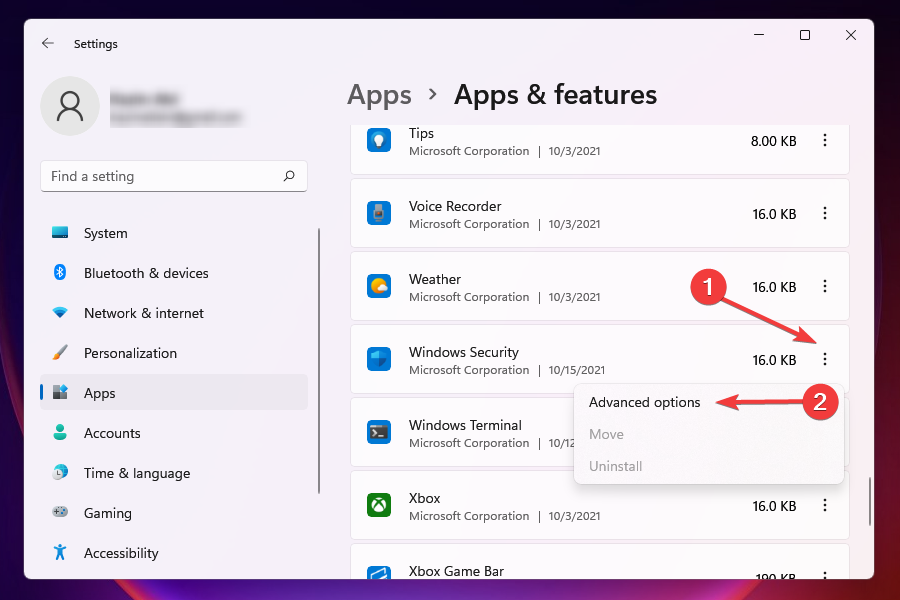
- Select Apps from the tabs listed on the left and click on Apps and features on the right.
- Locate the Windows Security app, click on the ellipsis next to it, and select Advanced options from the flyout menu.
- Click Repair under Reset.
- Wait for the repair process to complete.
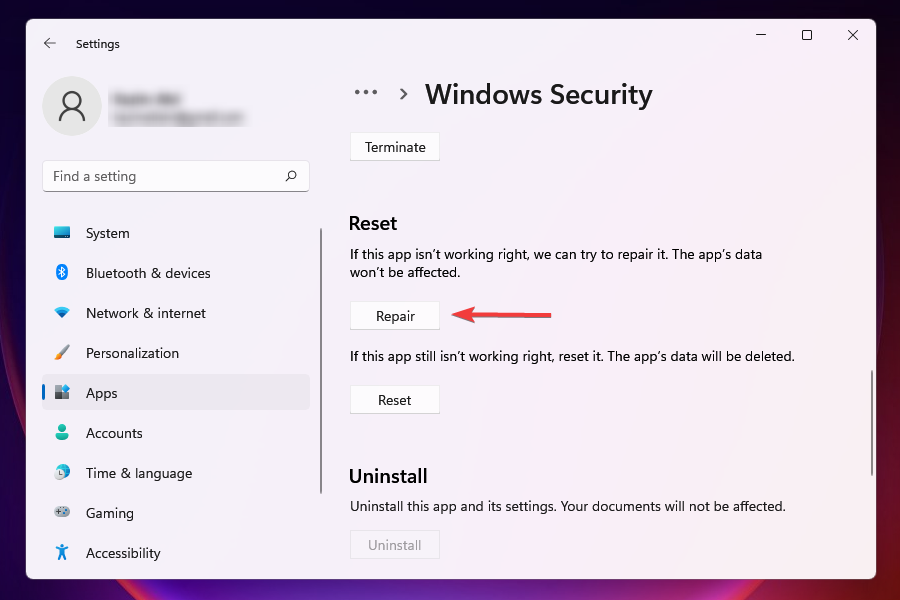
If a program is throwing errors on launch or during its functioning, repairing it could help. When you repair an app, Windows looks through its installation, identifies and replaces any problematic files, and checks its entries in the Registry.
This is a quick troubleshooting method and you don’t lose any data or configured settings.
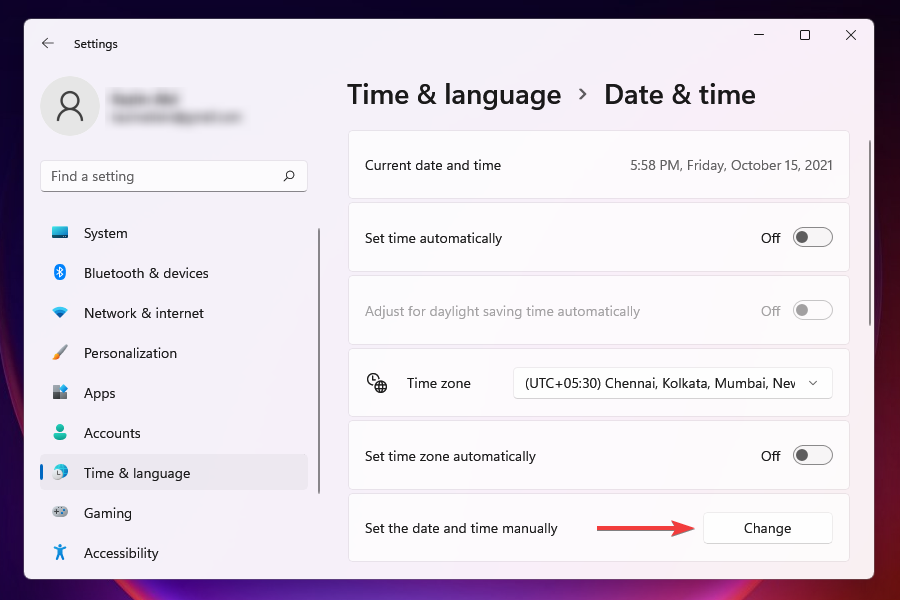
6. Set correct date and time
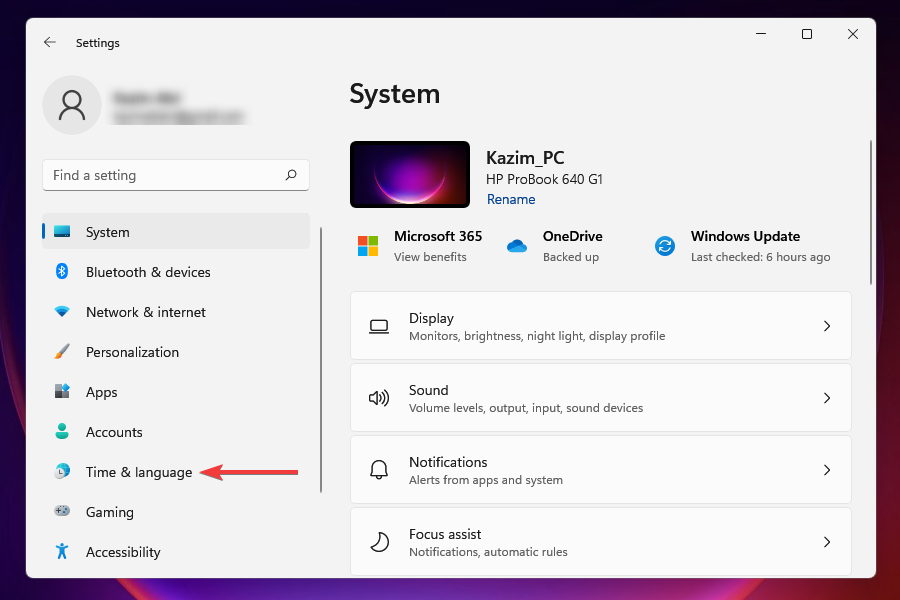
- Press Windows + I to launch Settings.
- Select Time & language from the tabs listed on the left.
- Click on Date & time.
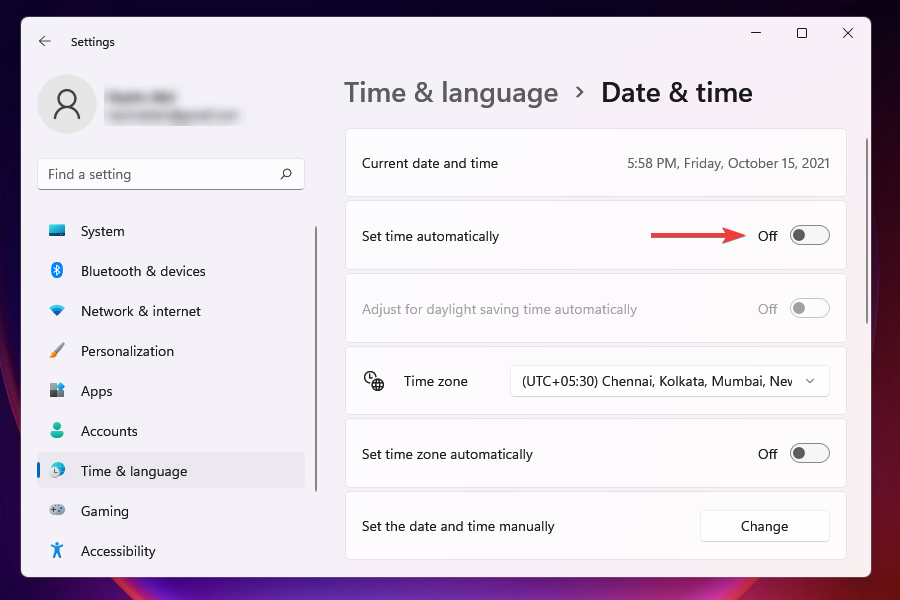
- Disable the toggle for Set time automatically, if it’s turned on.
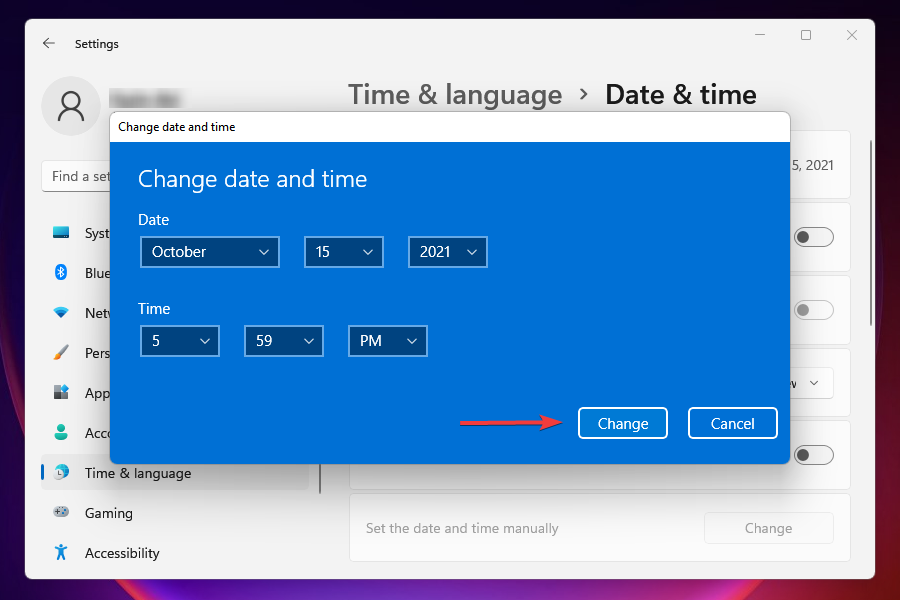
- Click the Change button next to Set the date and time manually.
- Set the right date and time and click on Change.

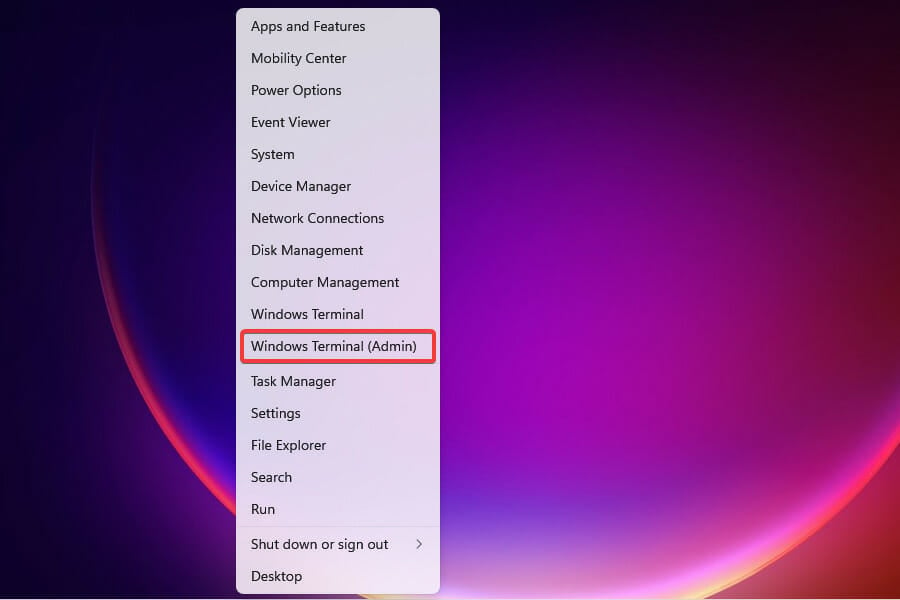
7. Run a SFC (System File Checker) scan
- Press Windows + X to launch the Quick Access menu.
- Select Windows Terminal (Admin) from the list of options that appear.
- Click Yes on the UAC prompt that appears.
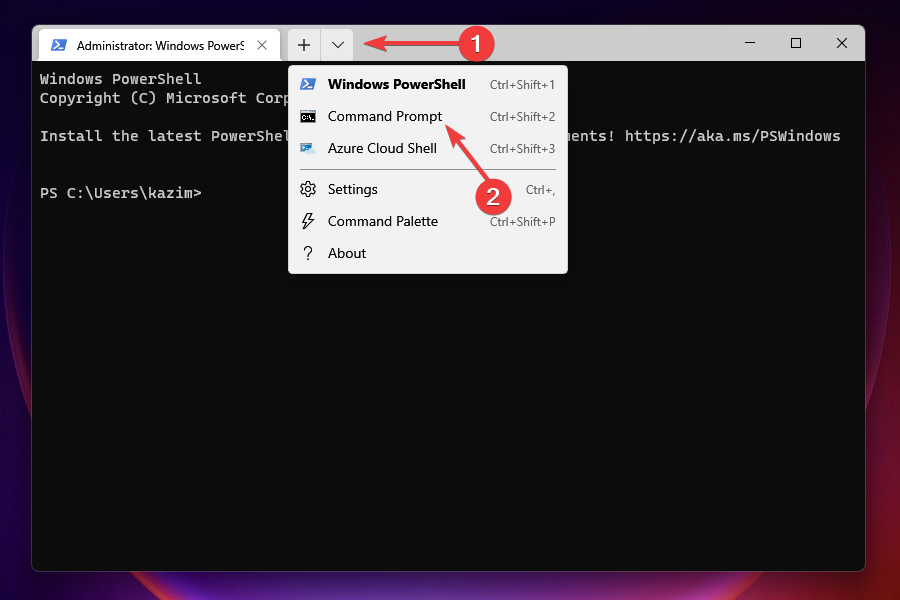
- Up next, click on the downward-facing arrow at the top and select Command Prompt from the menu in Windows Terminal.
- Type or paste the following command and hit enter to run the SFC scan:
sfc /scannow - Wait for the scan to complete, reboot the computer and check if the error is fixed.
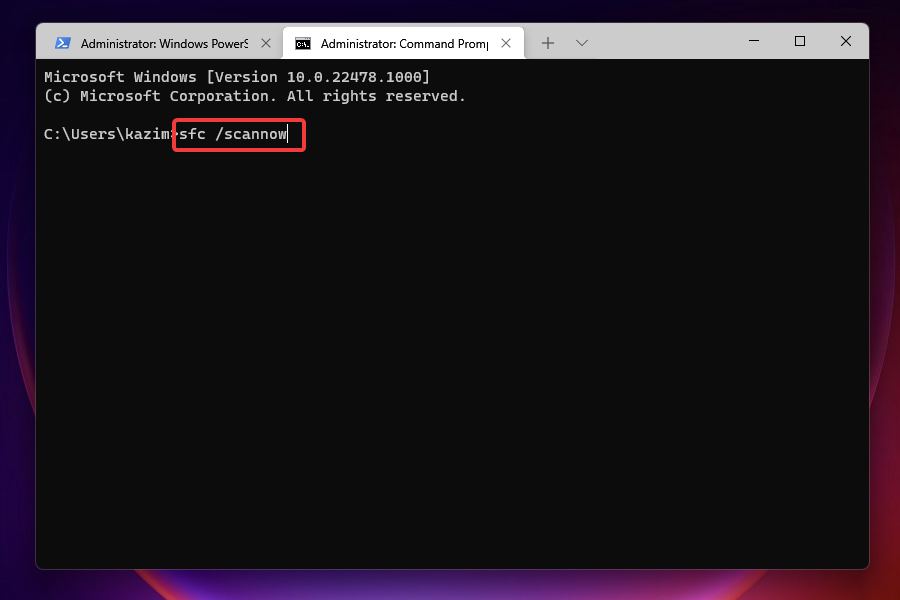
The SFC (System File Checker) scan is used to identify corrupt system files and replace them with their cached copy stored on the system. If Windows Defender is corrupted, running the scan is likely to solve the problem.
8. Run a malware scan
In many cases, it was reported that a malware or virus was causing issues in launching the virus and threat protection. Since the Windows Defender app is not working, you have to use another tool to run a scan.
Check out our list of the best third-party antivirus software for Windows 11 and install the one that suits your requirement. After downloading the program, run a malware scan to find out and eliminate/quarantine any viruses present on the system.
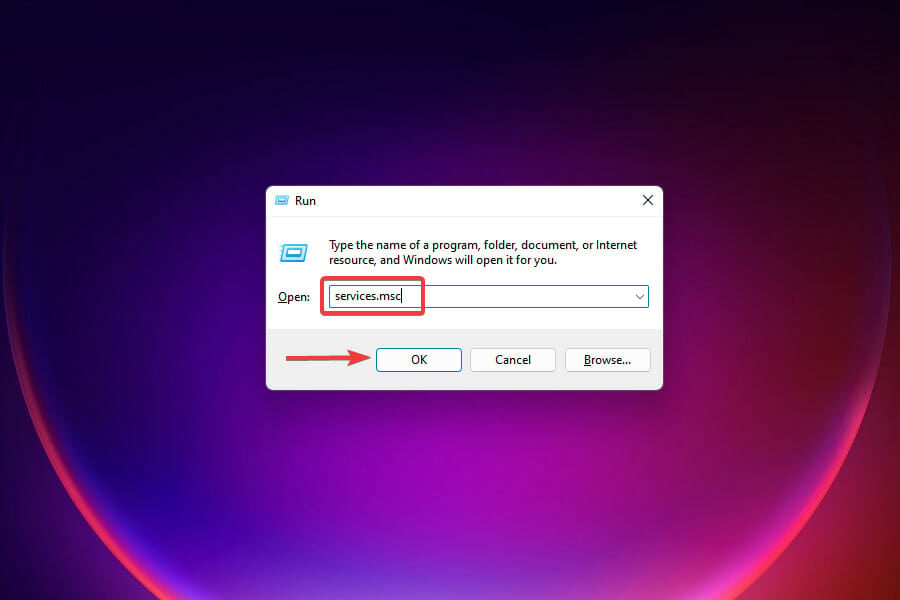
9. Restart Security Center service
- Press Windows + R to launch the Run command.
- Enter services.msc in the text field and click on OK to launch the Services app.
- Locate the Security Center service, right-click on it, and select Restart from the context menu.
- Next, restart the computer and check if the issue is fixed.


NOTE
The services are listed in alphabetical (or reverse-alphabetical) order, thus it shouldn’t be difficult to locate the Security Center service.
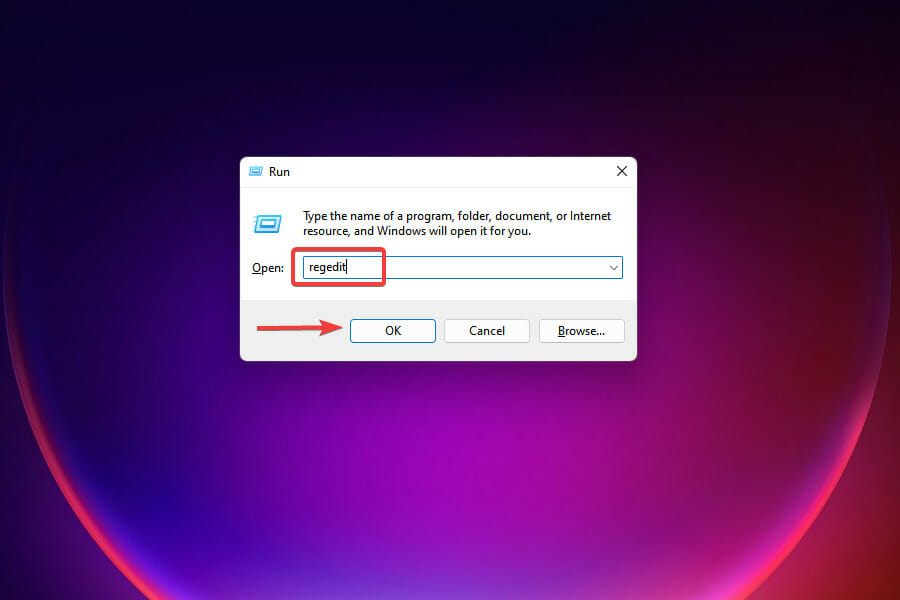
10. Make modifications to the Registry
- Press Winodws + R to launch the Run command.
- Enter regedit in the text field and click on OK to launch the Registry Editor.
- Click Yes on the UAC prompt that appears.
- Paste the following path in the address bar at the top and hit Enter:
HKEY_LOCAL_MACHINESoftwareMicrosoftWindows NTCurrentVersionImage File Execution Options - If you find any of the three entries, MSASCui.exe, MpCmdRun.exe or MsMpEnd.exe, right-click on it and select Delete.
- In case the entries are not present, head to the next fix.
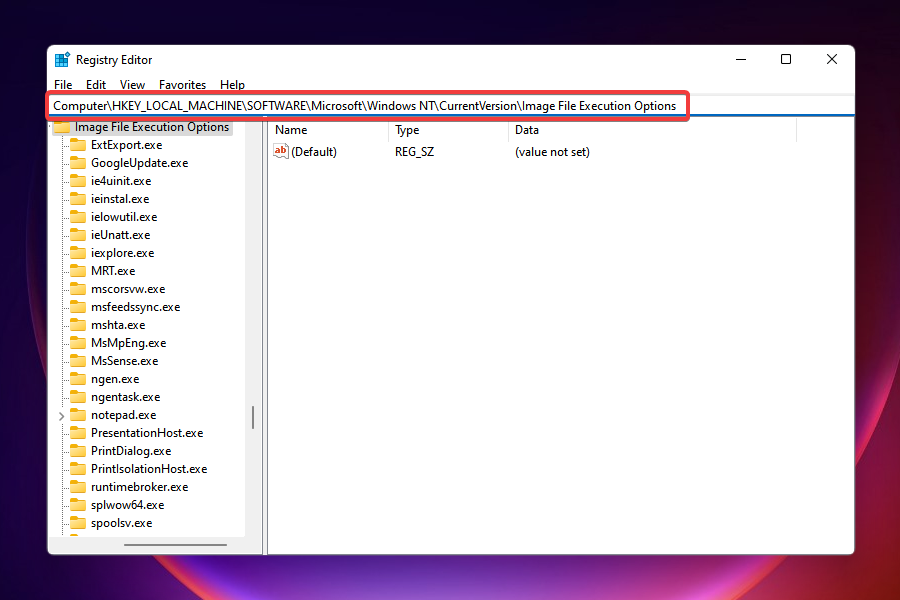
Certain viruses are known to create entries in the Registry which conflict with the functioning of Windows Defender. If that’s preventing you from accessing virus and threat protection, deleting the above entries will solve the problem.
In case the above method doesn’t resolve the issue, you can also try fixing the broken registry items.
11. Enable Windows Defender using Registry
NOTE
You should execute this fix only after trying the ones listed earlier. Also, we recommend being extra cautious when making changes to the Registry since a small lapse on your end can damage the PC and render it unusable.
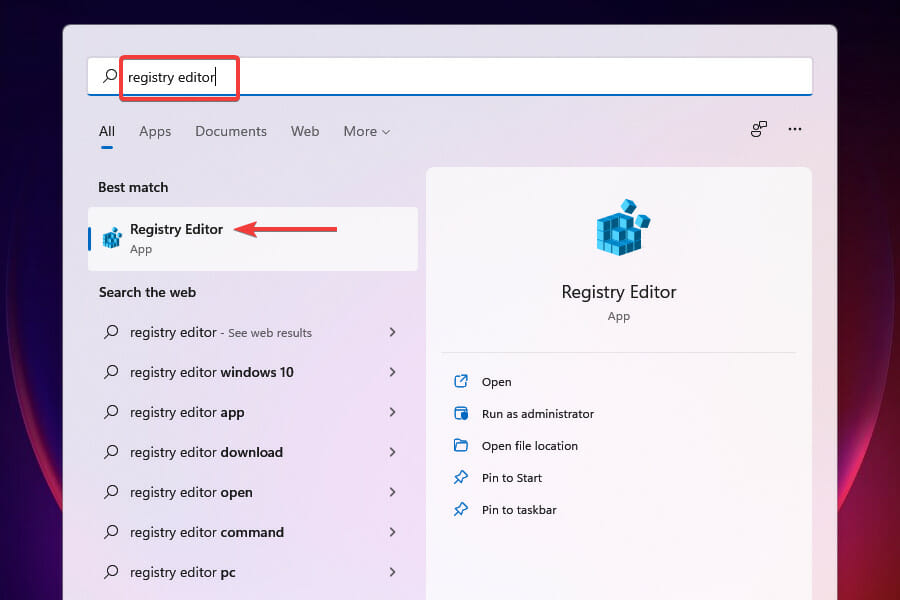
- Press Windows + S to launch the Search menu.
- Enter Registry Editor in the text field at the top and click on the relevant search result.
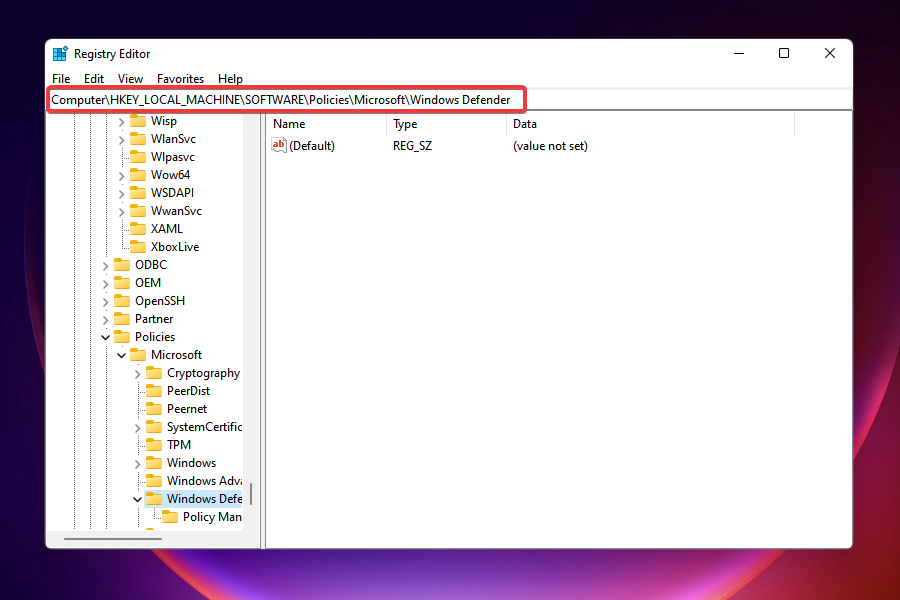
- Paste the following path in the address bar at the top and hit Enter:
HKEY_LOCAL_MACHINESOFTWAREPoliciesMicrosoftWindows Defender - Locate the DisableAntiSpyware entry and set its value to 0.
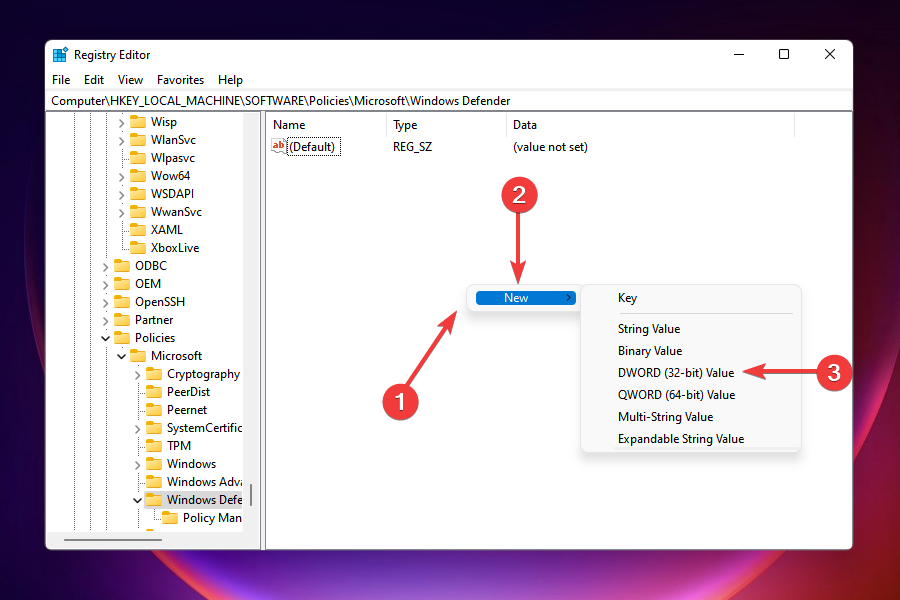
- If the entry ain’t there, right-click on the empty space, hover the cursor over New, and select DWORD (32-bit) value from the menu. Name the entry as DisableAntiSpyware.
- Double-click on the entry and enter 0 under Value data.
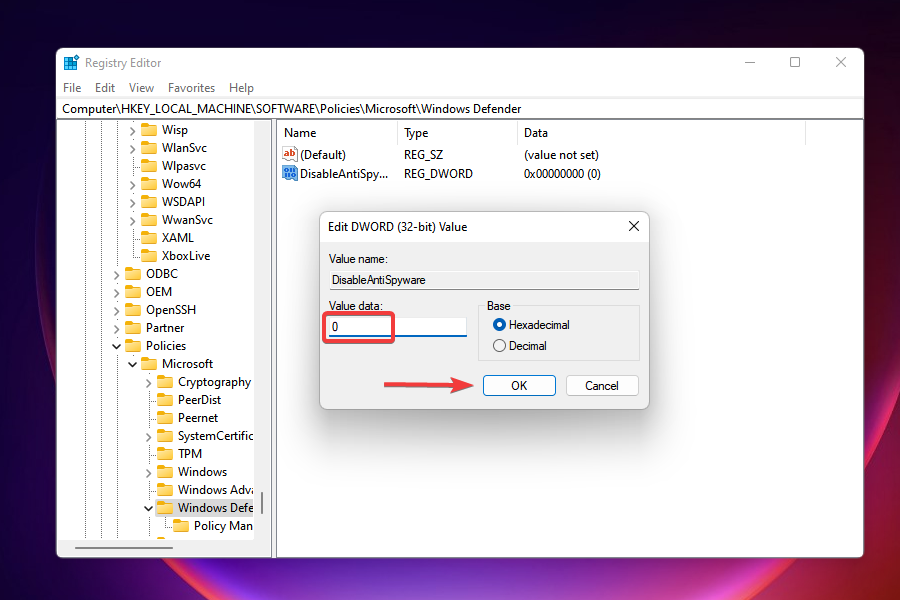
After making changes to the Registry, check if the problem with Windows Defended is solved and you are able to access and make changes to it.
12. Perform a system restore
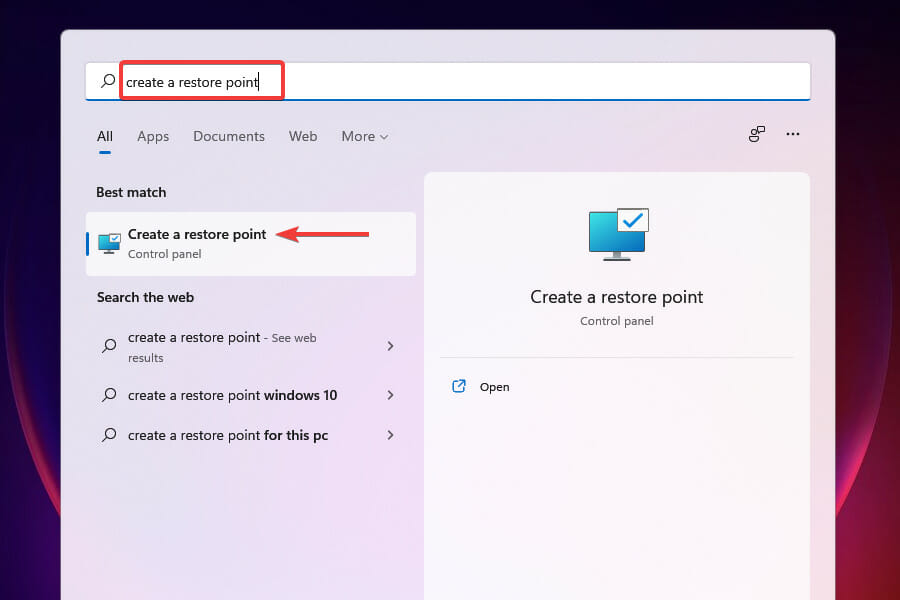
- Press Windows + S to launch the Search menu.
- Enter create a restore point in the text field and select the relevant search result.
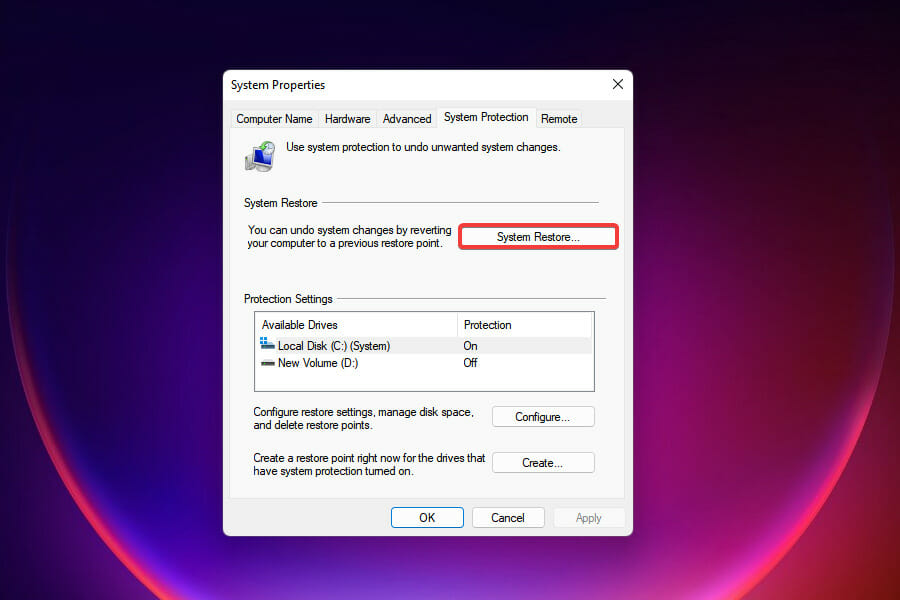
- Select System Restore.
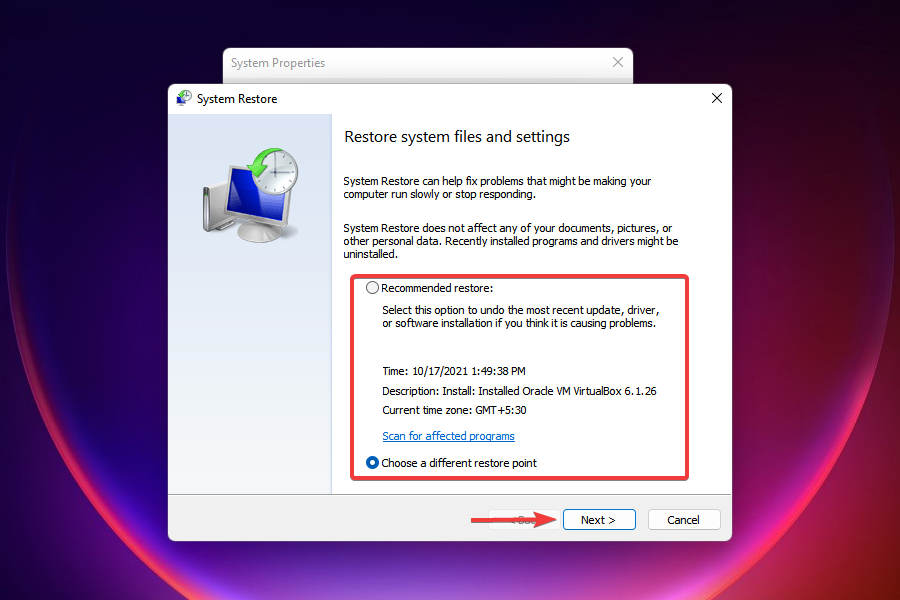
- In the System Restore window, either select the first option to go with the recommended restore settings or the second to manually pick a point, and click Next at the bottom.
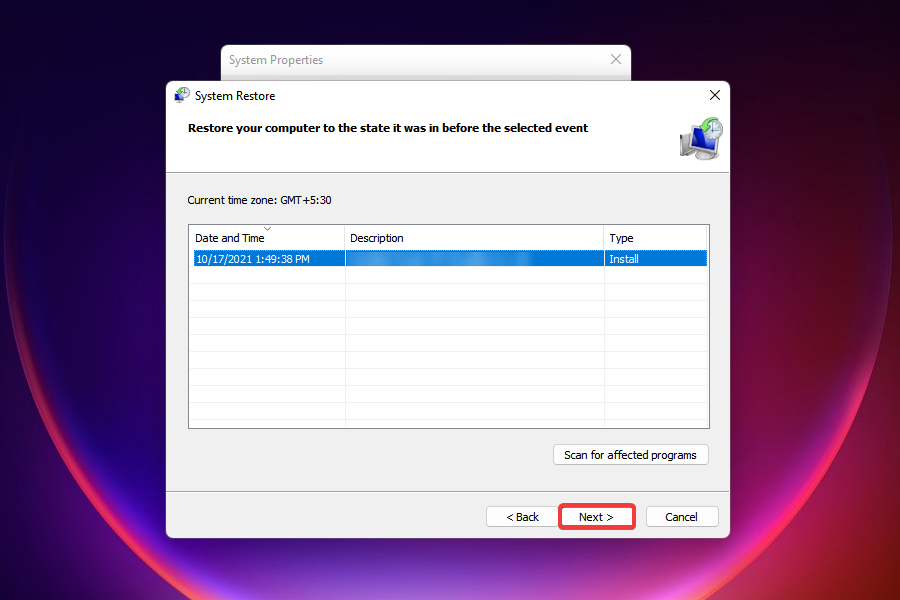
- Select a restore point from the ones listed here and click on Next.
- Review the restore settings and click on Finish.
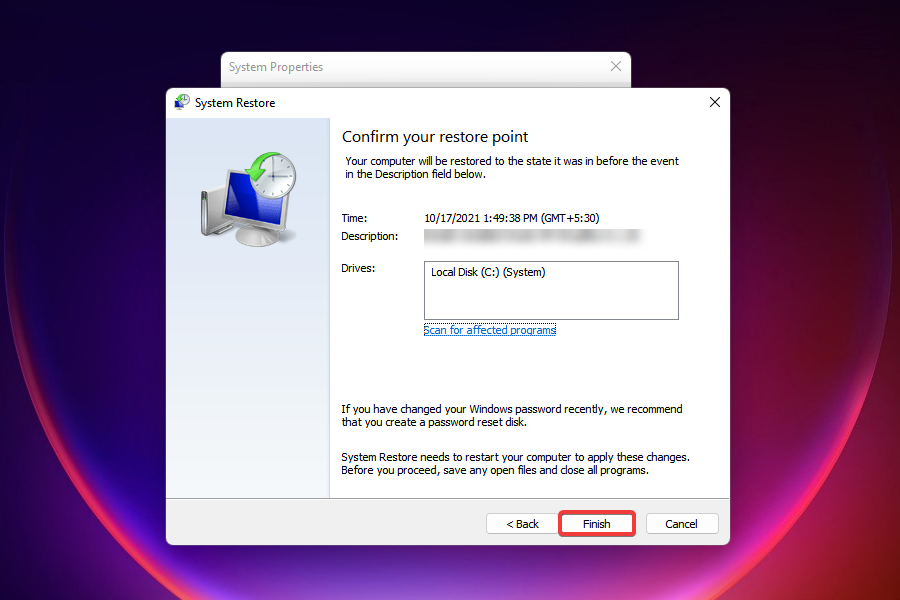
The PC will restart to complete the restore process, hence it’s recommended that you save any open files to avoid loss of data.
System restore basically takes your PC back in time to a point when the error didn’t exist. It might affect the settings or installed applications but does not remove any of the saved files, thus keeping your data safe.
If you don’t remember creating a restore point, don’t worry, Windows should have created one, with the right settings in order. Hence, do try the method and verify if a restore point exists.
Your system automatically creates a restore point before any major or critical task, for instance, while updating Windows or installing a critical application, to revert to the previous stage in case things go wrong.
What can I do if the fixes listed here don’t work?
First of all, that’s a highly unlikely scenario. However, if the solutions didn’t work, a restore point was not available or system restore simply didn’t help, amongst other things, you can always reset Windows 11 to its factory settings. 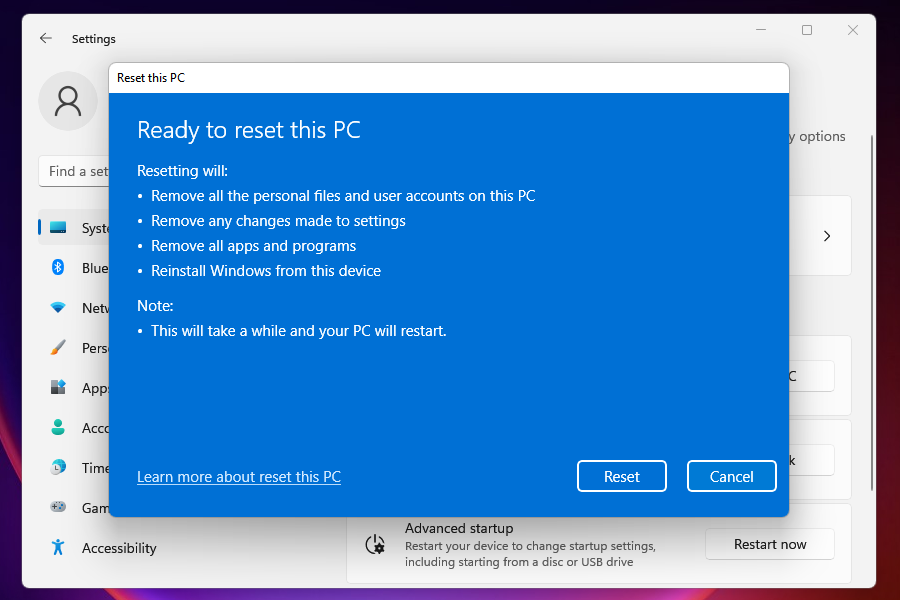
When you do that, the PC returns to the initial stage. In simple words, to the very stage that you first used it, in terms of settings and stored data.
The above fixes should resolve the Windows 11 virus and threat protection not working issue and get things up and running.
Once the virus and threat protection starts working, you do not need to rely on third-party antiviruses or similar tools to keep your PC secure.
Windows Defender alone is more than capable of doing the basic job of protecting the computer unless you are looking for specialized software that offers a plethora of features.
Check out our comparison of Windows Defender and Avast for a better understanding and identify what works best in your case.
Let us know which fix worked for you in the comments section below.
Start a conversation