
- Is the Peer networking error 1068 giving you a hard time? Let’s see how you can easily solve it.
- One confirmed tip is to install the latest updates. Of course, you can also delete the idstore.sst file.
- Since you’re here, also take a closer look at these great managed & unmanaged network switches.
- Our Network & Internet Hub gathers more useful tips like the ones below, so do visit it as well.
Sharing files is rather simple in a local network, but sometimes all sorts of issues can occur. For example, users reported Peer networking error 1068 on Windows 10.
If that’s also the problem you’re experiencing, fear not. Today we’re going to show you how to fix this Windows 10 problem with ease.
How to fix the Peer networking grouping service not running?
1. Check your antivirus
Peer networking error 1068 is a network error, and sometimes this issue can appear due to problems with your antivirus.
Antivirus can sometimes interfere with your system and cause this issue to appear, but you can fix the problem simply by disabling certain antivirus features.
In some cases, you might have to disable your antivirus software altogether. If that doesn’t help, your next step would be to uninstall your antivirus and check if that helps.
If removing the antivirus solves the problem, you might want to consider switching to a different antivirus solution.
There are many great antivirus tools on the market, and if you want maximum protection that won’t interfere with your system go ahead with the most efficient uninstaller software.
With unlimited encrypted traffic and high protection against infections or cyber-attacks, your data is safe from all malware threats and not only.
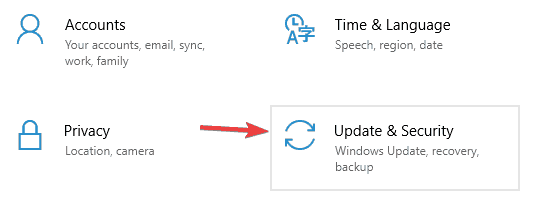
2. Install the latest updates
- Open the Settings app and go to the Update & Security section.
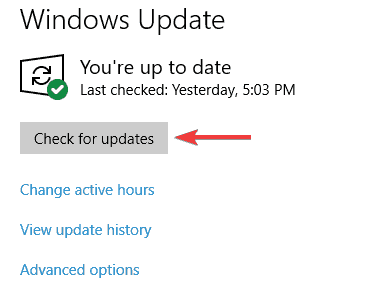
- Now click the Check for updates button.
In some cases, this Peer networking error 1068 can appear due to missing system updates. Sometimes there might be glitches on your system, and that can cause this issue to appear.
Installing updates is rather simple, and for the most part, Windows 10 automatically installs the missing updates. However, you can always check for updates manually by doing as described above.
If any updates are available, Windows 10 will download them in the background and install them as soon as you restart your PC. Once your system is up to date, check if the problem still appears.
Moreover, don’t forget about the importance of also updating your drivers. DriverFix is a tool that will easily keep all your computer’s drivers up to date.
Install it right away and there’s literally one click that stands between your current situation and the one of downloading the latest versions of all your out-of-date device drivers.
3. Check if Peer networking services are running
- Press Windows Key + R and enter services.msc. Press Enter or click OK.
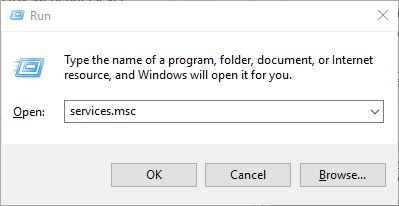
- When the Services window opens locate Peer Name Resolution Protocol, Peer Networking Identity Manager, Peer Networking Grouping, and PNRP Machine Name Publication services and enable them. To do that, simply right-click a service and choose Enable from the menu.
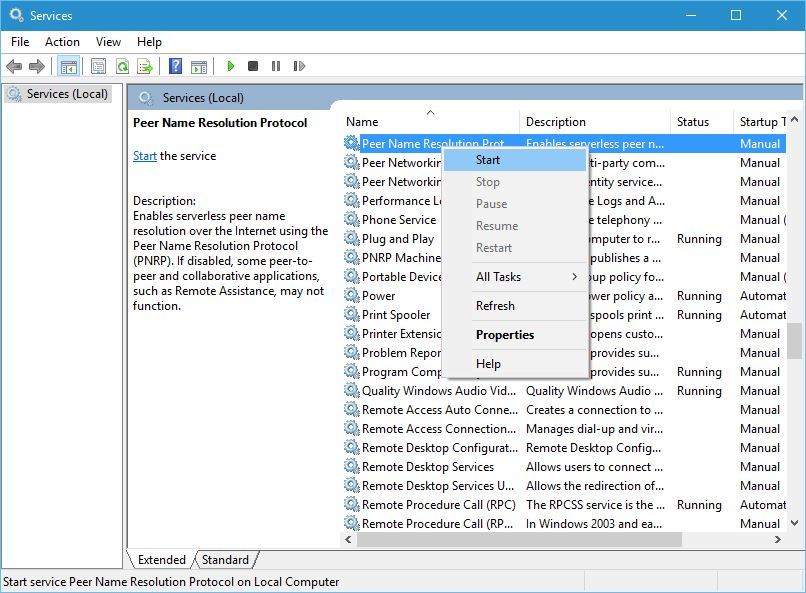
Peer networking relies heavily on its services, and if one Peer networking service isn’t running properly you might get Peer networking error 1068.
In addition to enabling the necessary services, users are also recommended to temporarily disable your antivirus and firewall before starting these services, so be sure to do that.
4. Delete the idstore.sst file
- Go to this folder:
C:WindowsServiceProfilesLocalService - Go to the AppData folder. If that folder is missing, you need to show hidden files. To do that go to the View tab and check Hidden items.

- Now go to the following folder:
RoamingPeerNetworking - Once you enter PeerNetworking folder locate and remove idstore.sst file.
- Some users are suggesting to delete all files from PeerNetworking folder, so you might want to try that as well.
According to users, you can easily fix Peer networking error 1068 by deleting the idstore.sst file. To do that, follow the above steps.
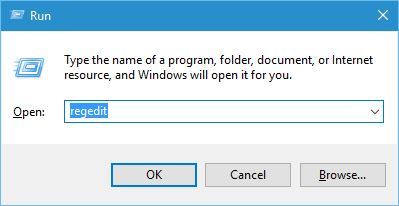
5. Edit the registry
- Press Windows Key + R shortcut and enter regedit.
- Go to the following key in the left pane:
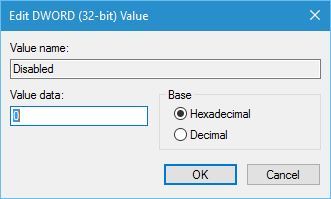
HKEY_LOCAL_MACHINESOFTWAREPoliciesMicrosoftPeernet - Locate Disabled DWORD in the right pane and double-click it.
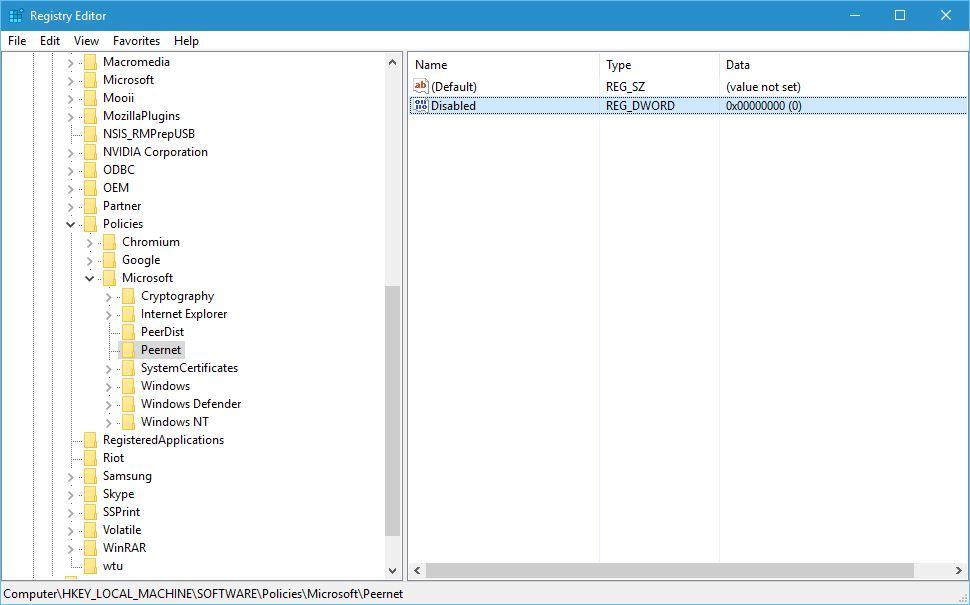
- Make sure the Value data is set to 0. Click OK to save changes.
In order to fix this error, some users are suggesting changing certain values in the registry. Changing the registry can sometimes lead to system instability.
Therefore, you might want to create a backup of your registry in case anything goes wrong.
In addition to editing the registry, users are also suggesting using Local Group Policy. To do that, follow these steps:
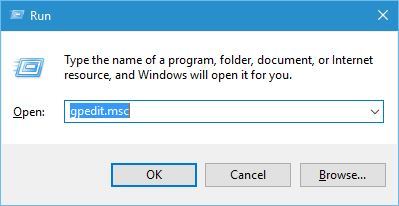
- Press Windows Key + R and enter gpedit.msc. Press Enter or click OK to run it.
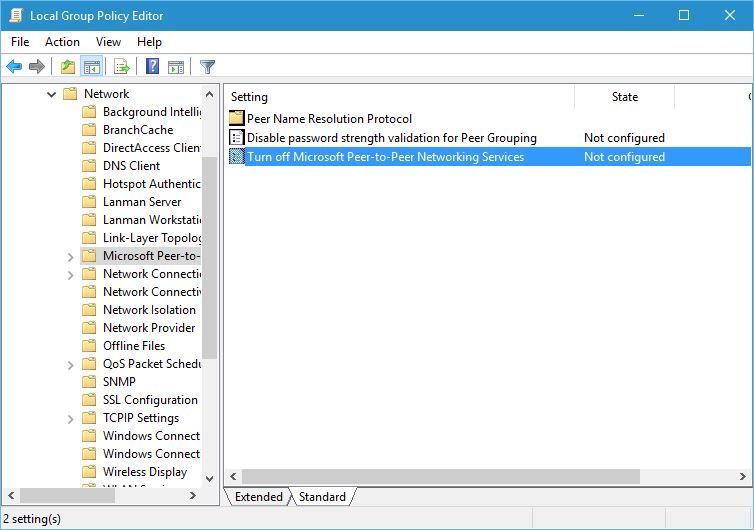
- In the left pane go to Computer Configuration > Administrative Templates > Network > Microsoft Peer-to-Peer Networking Services.
- In the right pane, double-click Turn off Microsoft Peer-to-Peer Networking Services.
- When the properties window opens make sure that Not Configured option is selected.
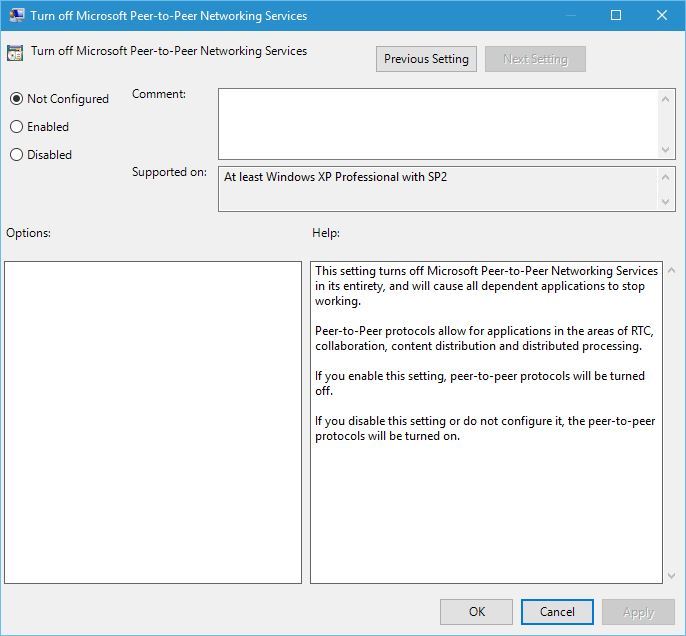
- Click Apply and OK to save changes.
6. Delete all files from the MachineKeys directory
- Go to
C:ProgramDataMicrosoftCryptoRSAMachineKeys - Delete all files from it. If you want, you can copy them to a safe location in case you need them for backup.
- After deleting the files restart your computer.
Users reported that Peer networking error 1068 can be fixed by removing files from the MachineKeys folder. To do that, follow the above procedure.
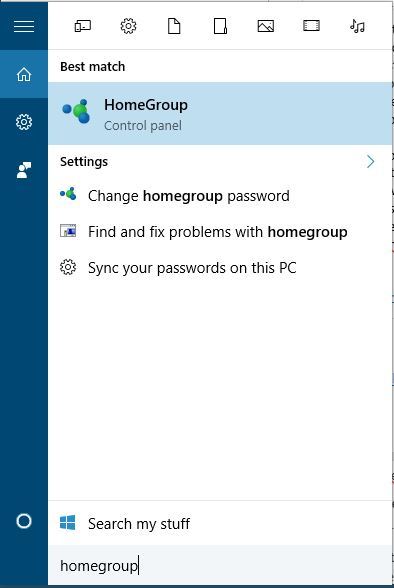
Users are also suggesting to run Homegroup troubleshooter, and you can do that by following these steps:
- Press Windows Key + S and enter homegroup. Select Homegroup from the menu.
- Once the Homegroup window opens click the Start the HomeGroup troubleshooter.
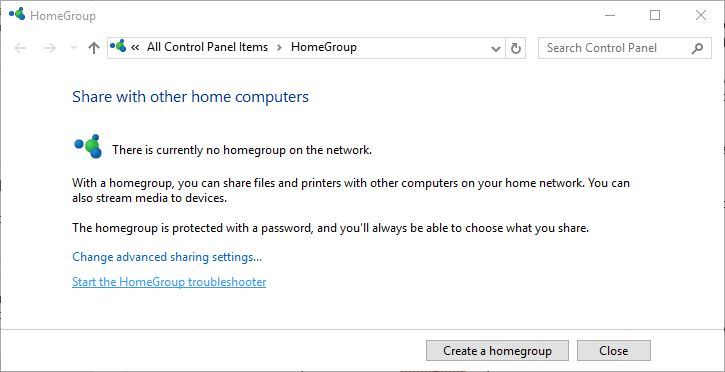
- Wait for the troubleshooter to finish the scan.
Lastly, users are also suggesting to delete your Homegroup or to leave the Homegroup, so you can try that as well.
7. Change the security permissions for the MachineKeys folder
- Go to this folder:
C:ProgramDataMicrosoftCryptoRSA - Right-click the MachineKeys folder and choose Properties.
- Go to the Security tab and click Edit.
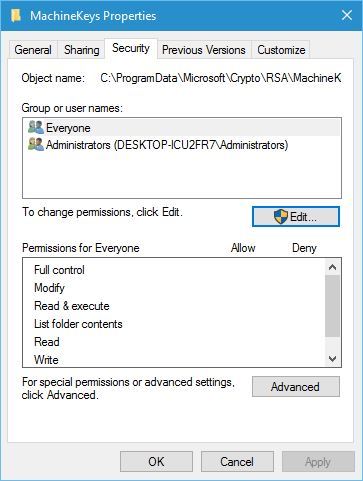
- Select Everyone and check the Full control option.
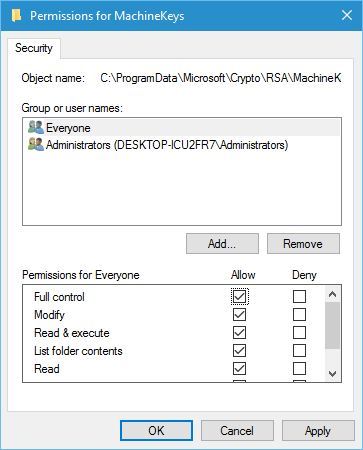
- Click Apply and OK to save changes.
According to users, you can fix Peer networking error 1068 by giving full control of the MachineKeys folder to Everyone. To do that, just complete the above procedure.
8. Use PowerShell
- Press Windows Key + S and enter Powershell. Right-click Windows Powershell from the list of results and choose Run as administrator from the menu.
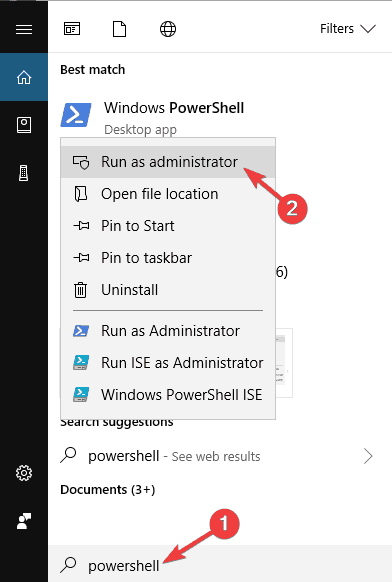
- Now enter the following command: PowerShell Get-NetConnectionProfile.
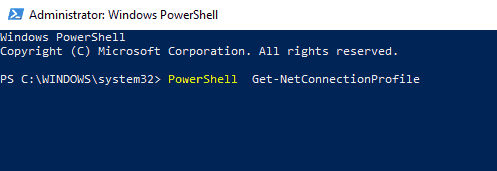
According to users, sometimes Peer networking error 1068 can be caused by IPv6.
However, you can fix that issue simply by running a single command in PowerShell. To do that, you just need to follow the above steps.
After running this command, the issue should be resolved and everything will start working again.
9. Change Peer Name Resolution Protocol settings
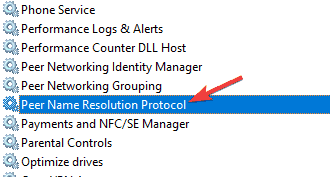
- Open Services window.
- When the Services window opens, double-click Peer Name Resolution Protocol to open its properties.
- Navigate to Log On tab and select Local System account. Now click Apply and OK to save changes.
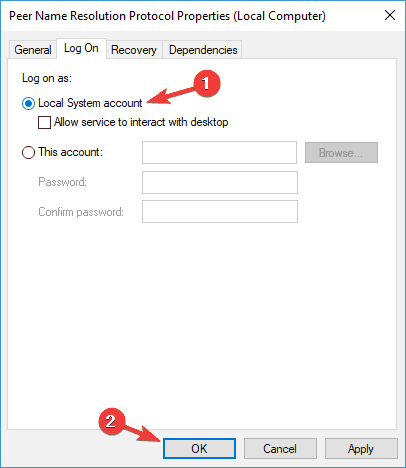
Sometimes certain settings can cause Peer networking error 1068 to appear. However, you can fix this problem simply by changing a couple of settings in the Services window.
After doing that, the problem should be resolved. Alternatively, you can use the Local Service. To do that, follow these steps:
- Repeat the previous steps, but instead of selecting the Local System Account, enter Local Services as the account name and clear the password fields. Click Apply and OK to save changes.
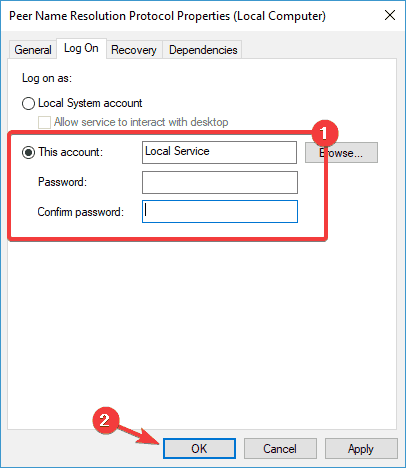
- After doing that, restart Peer Name Resolution Protocol service.
After the service restarts, check if the problem is resolved.
10. Make sure that all required services are running properly
Peer networking error 1068 can appear if the required services aren’t running, and in order to fix it, you need to enable those services.
To do that, open the Services window and enable the following services:
- Application Layer Gateway Service
- Network Connections
- Network Location Awareness (NLA)
- Plug and Play
- Remote Access Auto Connection Manager
- Remote Access Connection Manager
- Remote Procedure Call (RPC)
- Telephony
Keep in mind that you might not be able to enable all services that are on the list such as Remote Access Connection Manager. T
his service is dependent on Windows Event Log service, and if Windows Even Log service won’t start, you’ll need to change certain permissions by doing the following:
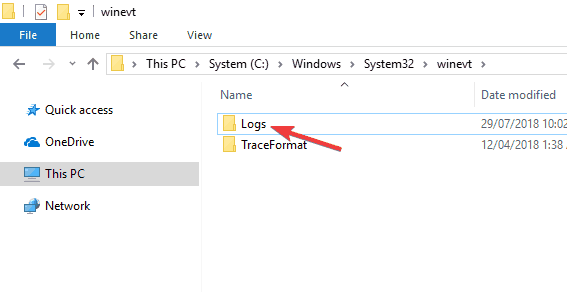
- Navigate to this directory:
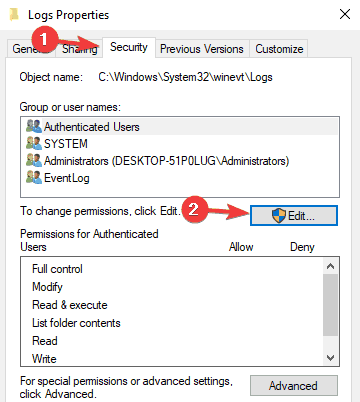
C:WindowsSystem32winevt - Locate the Logs directory, right-click it, and choose Properties from the menu.
- Navigate to the Security tab and click the Edit button.
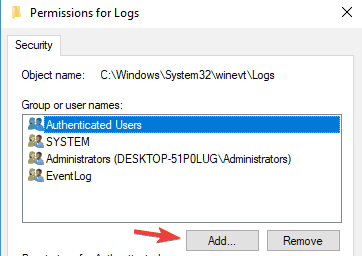
- Now click the Add button.
- In the Enter the object names to select, enter Local Service. Now click Check Names and OK.
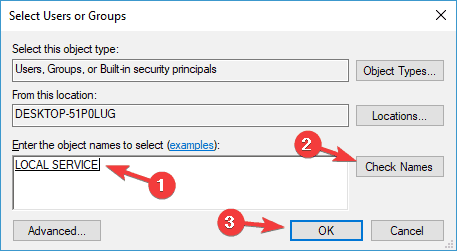
- Now repeat steps 4-5 but instead of Local Service enter Network Service.
- Now Select Local Service, and check Full Control in the Allow column. Do the same for Network Service. Now click Apply and OK to save changes.

After doing that, restart your PC. Once your PC restarts, go back to the Services window and start Windows Event Log along with other services that weren’t able to start before.
Once you enable all the required services, the issue should be resolved and everything will start working again.
Peer networking error 1068 can be problematic, but most users reported that they managed to fix it by deleting the idstore.sst file.
If that solution doesn’t work for you feel free to try any other solution from this article.
In fact, this Peer networking error 1068 can be problematic and cause various issues on your PC. Speaking of issues, here are some similar problems that users reported:
- Peer networking grouping service not running Windows 10 – This is a common problem that can occur on any version of Windows. In order to fix it, you just need to start the required services.
- Peer networking grouping service isn’t running error 1068 – This is a variation of this error, and you can fix it by checking your antivirus.
- Peer networking grouping error 1079 – This is a slightly different error, but you should be able to fix it using one of our solutions.
- Peer networking grouping won’t start – Sometimes this service won’t start at all. To fix that, make sure that the depending services are able to start.
Have you managed to solve your issue? Let us know in the comments area below which solution worked in your case.
Start a conversation