
- If you want to keep all files safe on your drive, it’s important to use device encryption.
- It’s pretty simple to do that by using a built-in tool from Windows 11.
- You will have to protect important data with a password or a USB key but make sure you store them securely or another storage device.
XINSTALL BY CLICKING THE DOWNLOAD FILE
If you want to protect your sensitive data, it’s important to use drive encryption on Windows 11.
And the great news is that the OS (except for the Home version) comes with a built-in tool to do that, called BitLocker.
Here we will explain how to how to encrypt your hard drive on Windows 11 and also how to use BitLocker on Microsoft’s operating system.
However, we will start by telling you a few things you should know about drive encryption and security.
What is drive encryption and why do we need it?
Hard-drive encryption is the process of encrypting the data stored on a hard drive using mathematical functions.
This way, important data will not be seen by anyone who doesn’t have access to the key or password you set up. This is an important layer of security against ransomware and other online attacks.
Here’s how it works: when a file is written to the drive, it is encrypted automatically with the help of specialized software.
In the same way, when you access a file on the drive, the same tool decrypts it, but only if you can provide the password you set up when you encrypted the drive.
There’s a catch! You can’t use BitLocker if your PC doesn’t have a TPM 2.0 chip installed. However, we have a workaround for that too so read on.
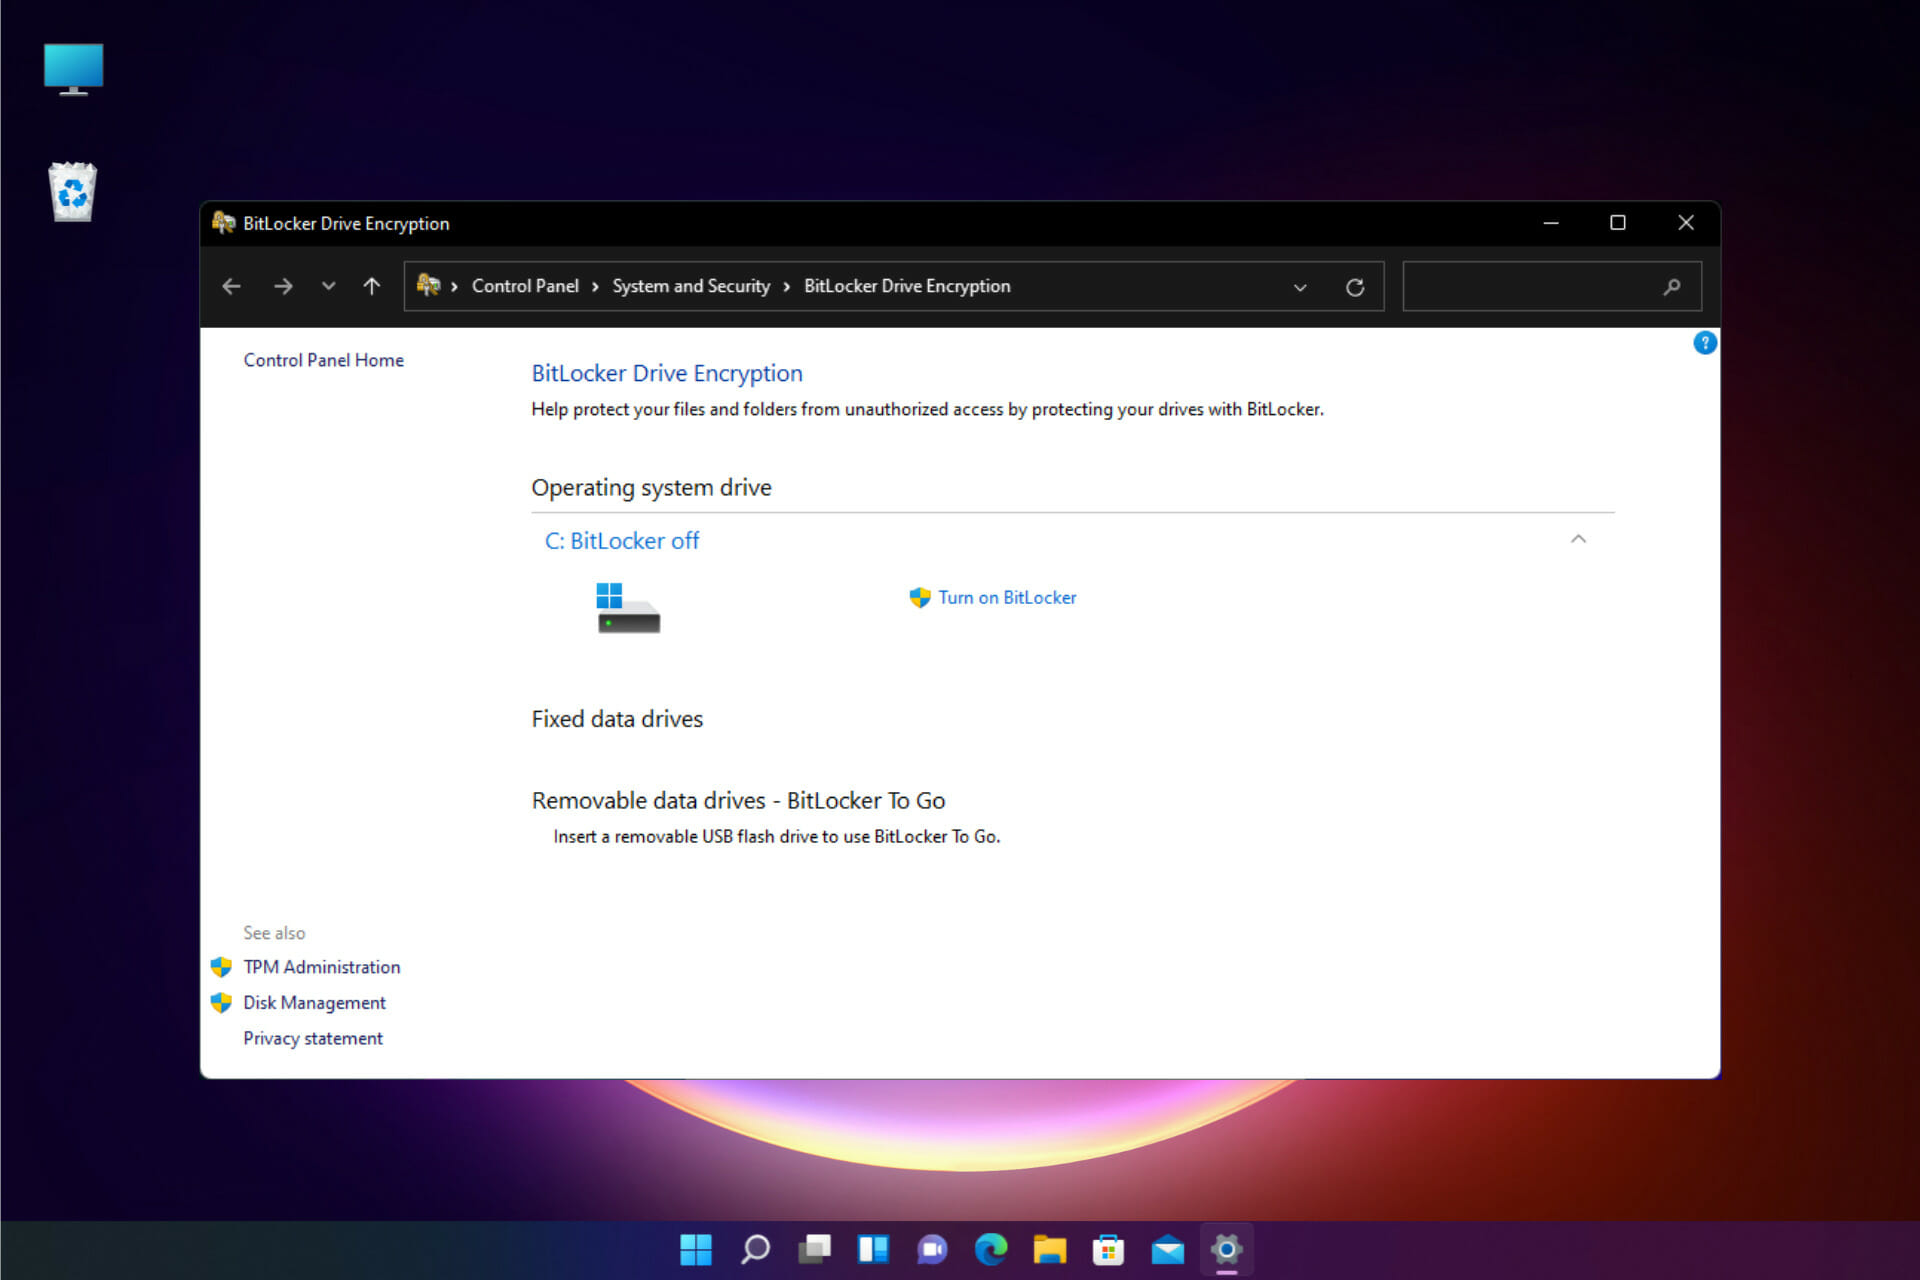
How can I encrypt my hard drive on Windows 11?
1. Enable drive encryption
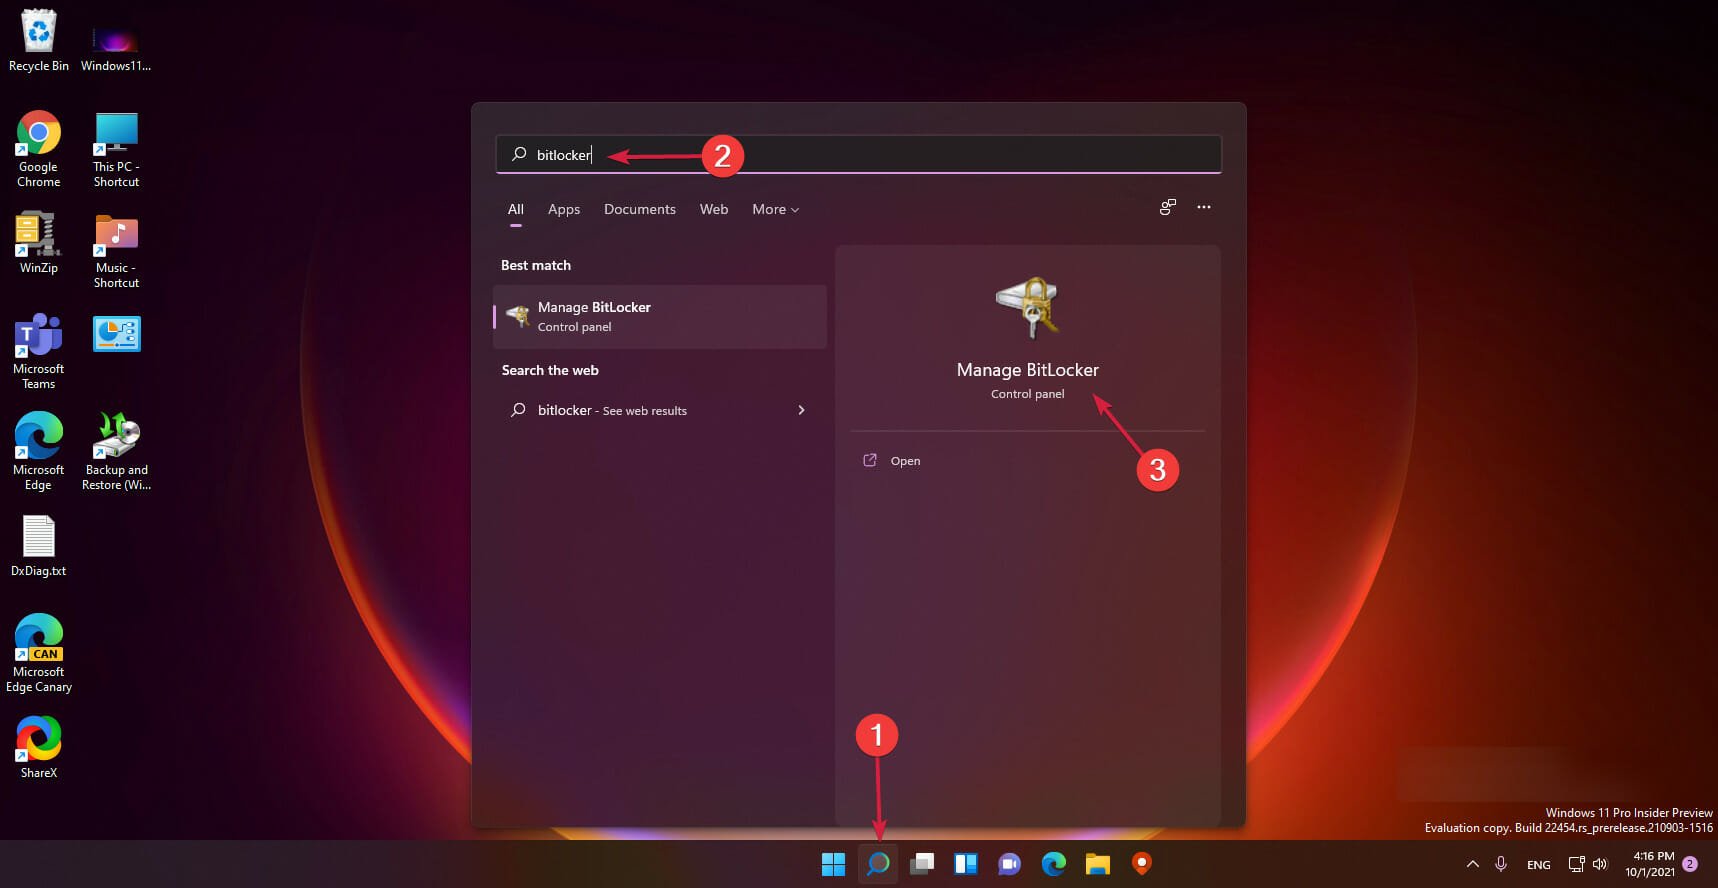
- Click the Search icon on your Taskbar, type BitLocker and click on the app from the results.
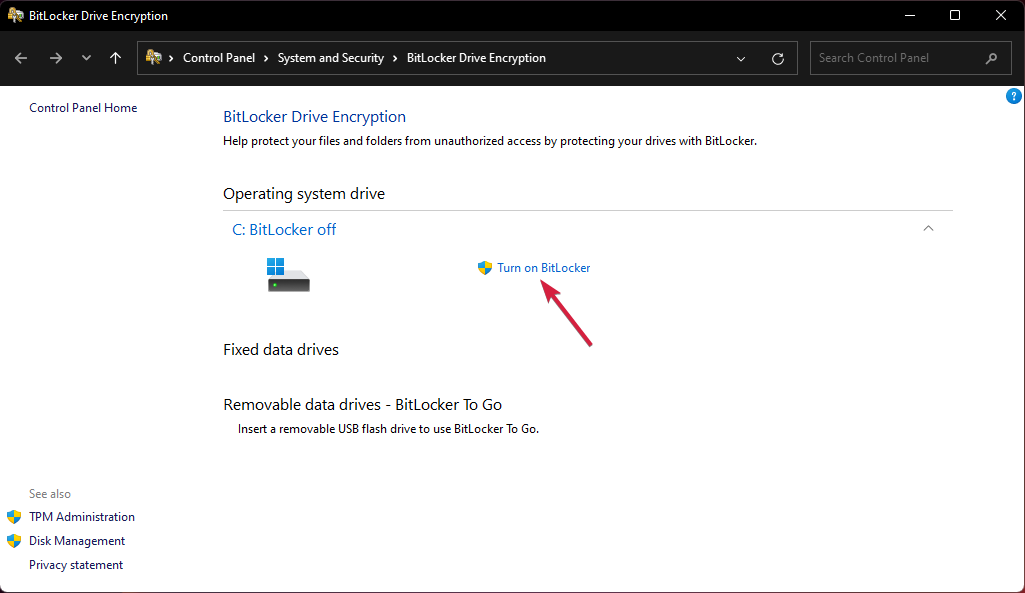
- Select Turn on BitLocker.
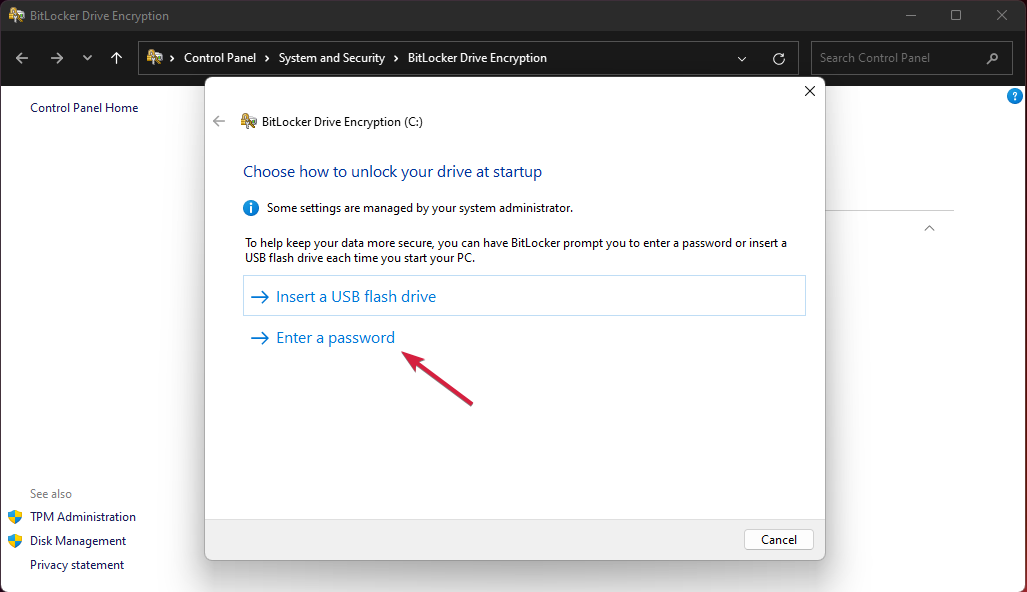
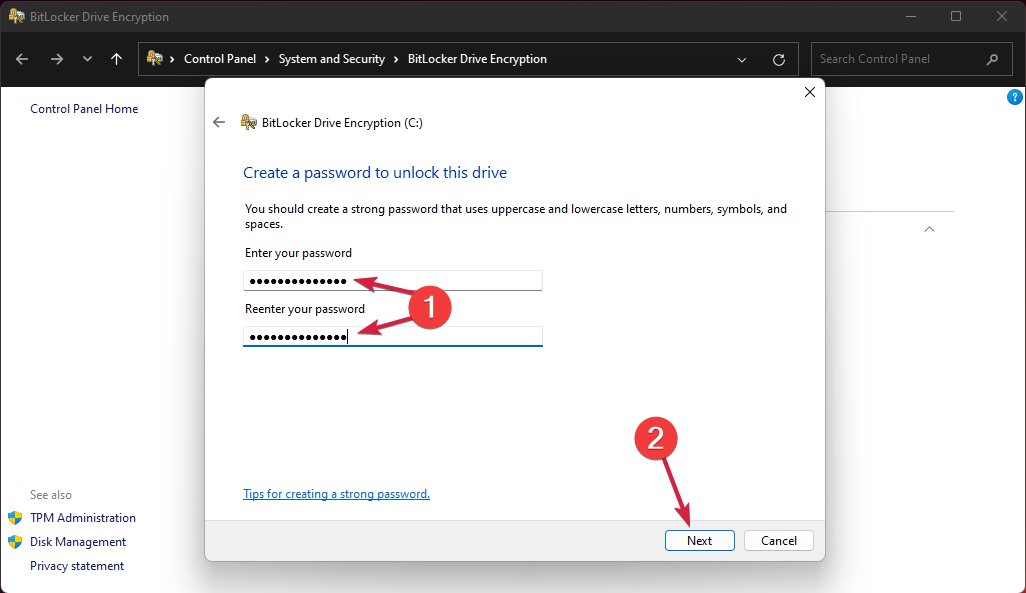
- You will be prompted to select a method to unlock your drive at startup. We recommend using the password method but you can also use a USB key that you need to provide.
- Enter the password and repeat it, then click Next.
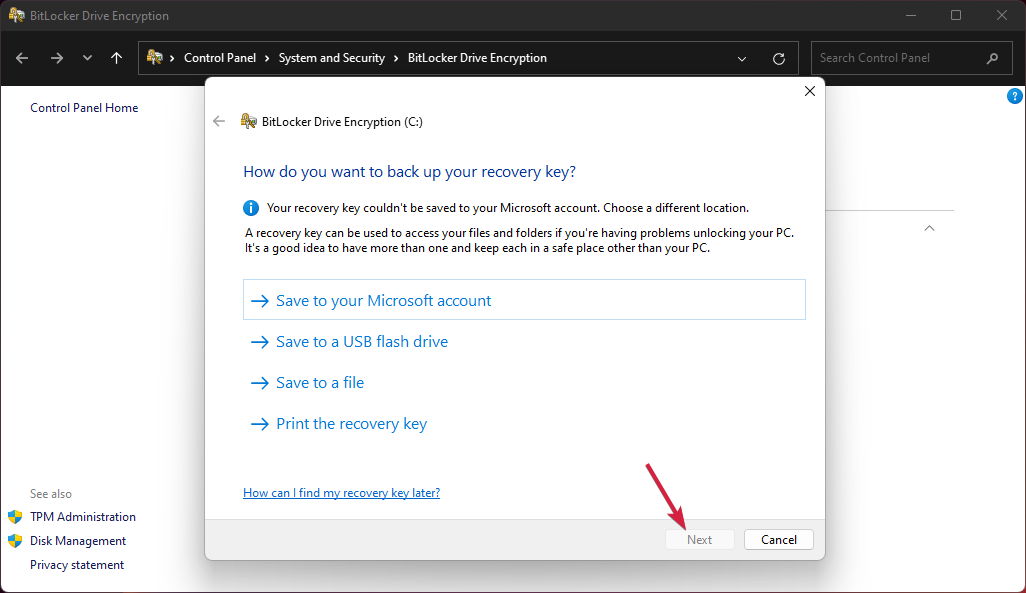
- After that, you will be asked to save the key in another way too. You can save it in your Microsoft account, on a file, on a USB stick or just print it.
- The next step is to choose whether you want to encrypt the whole drive or just the used part.
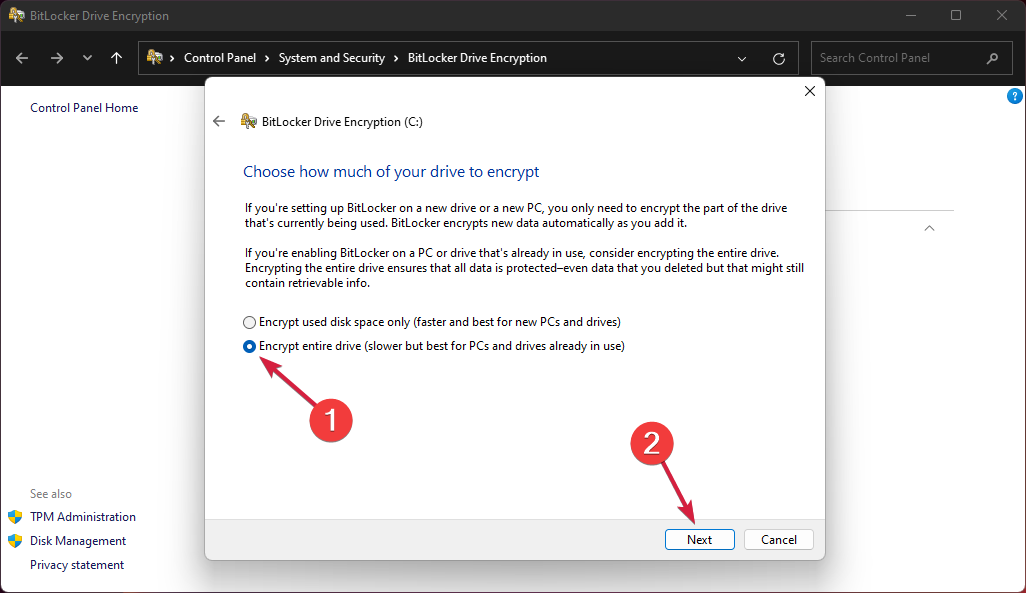
- As you’re using Windows 11, you can go with the first option, for fixed drives, but you can also select the second one if you plan on moving your drive. Click Next to continue.
- At last, check the Run BitLocker system check box and click Continue.
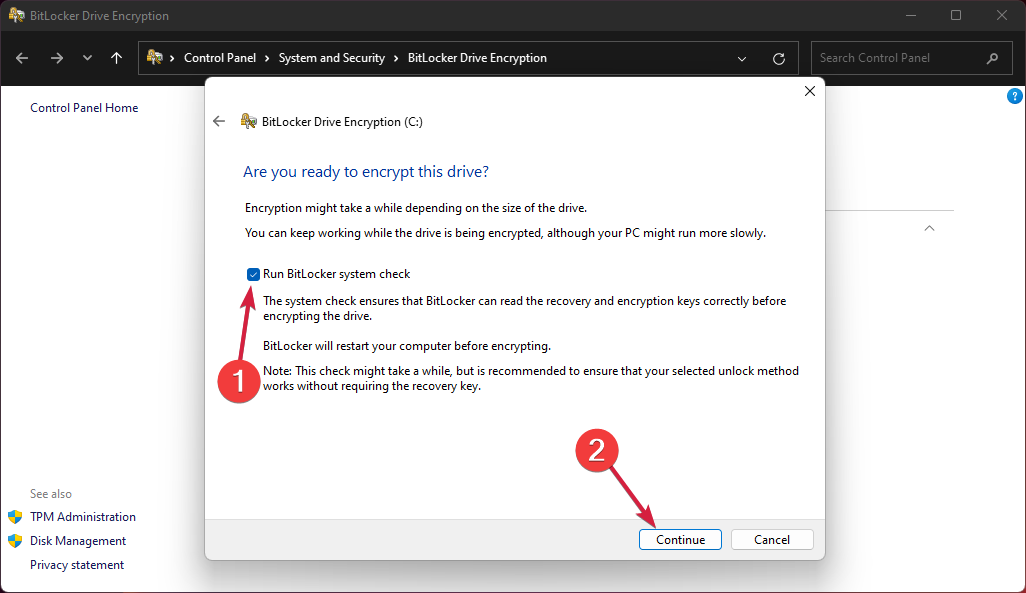
- You will now be prompted to Restart now so click the button.
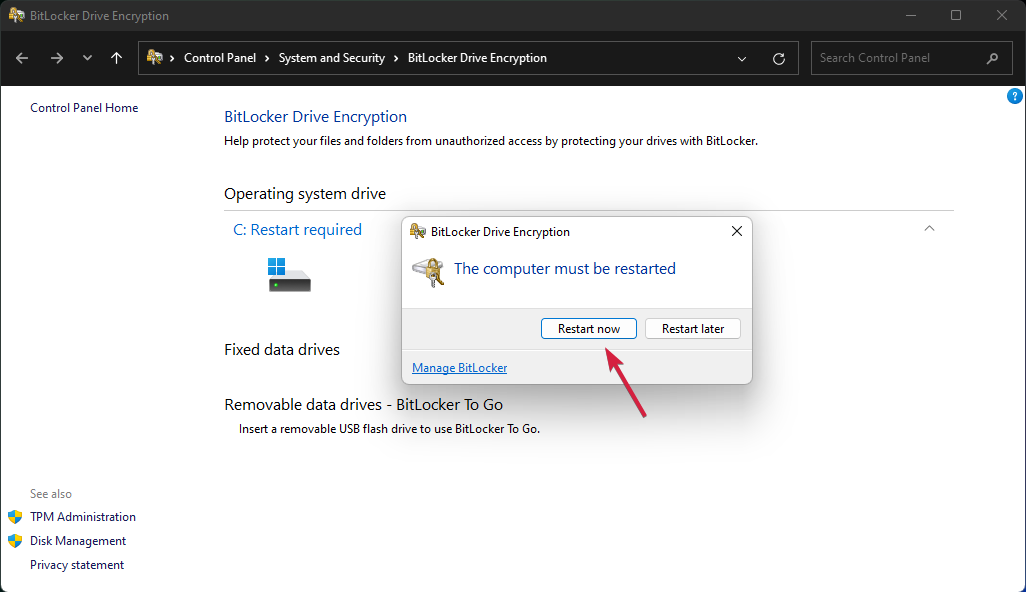
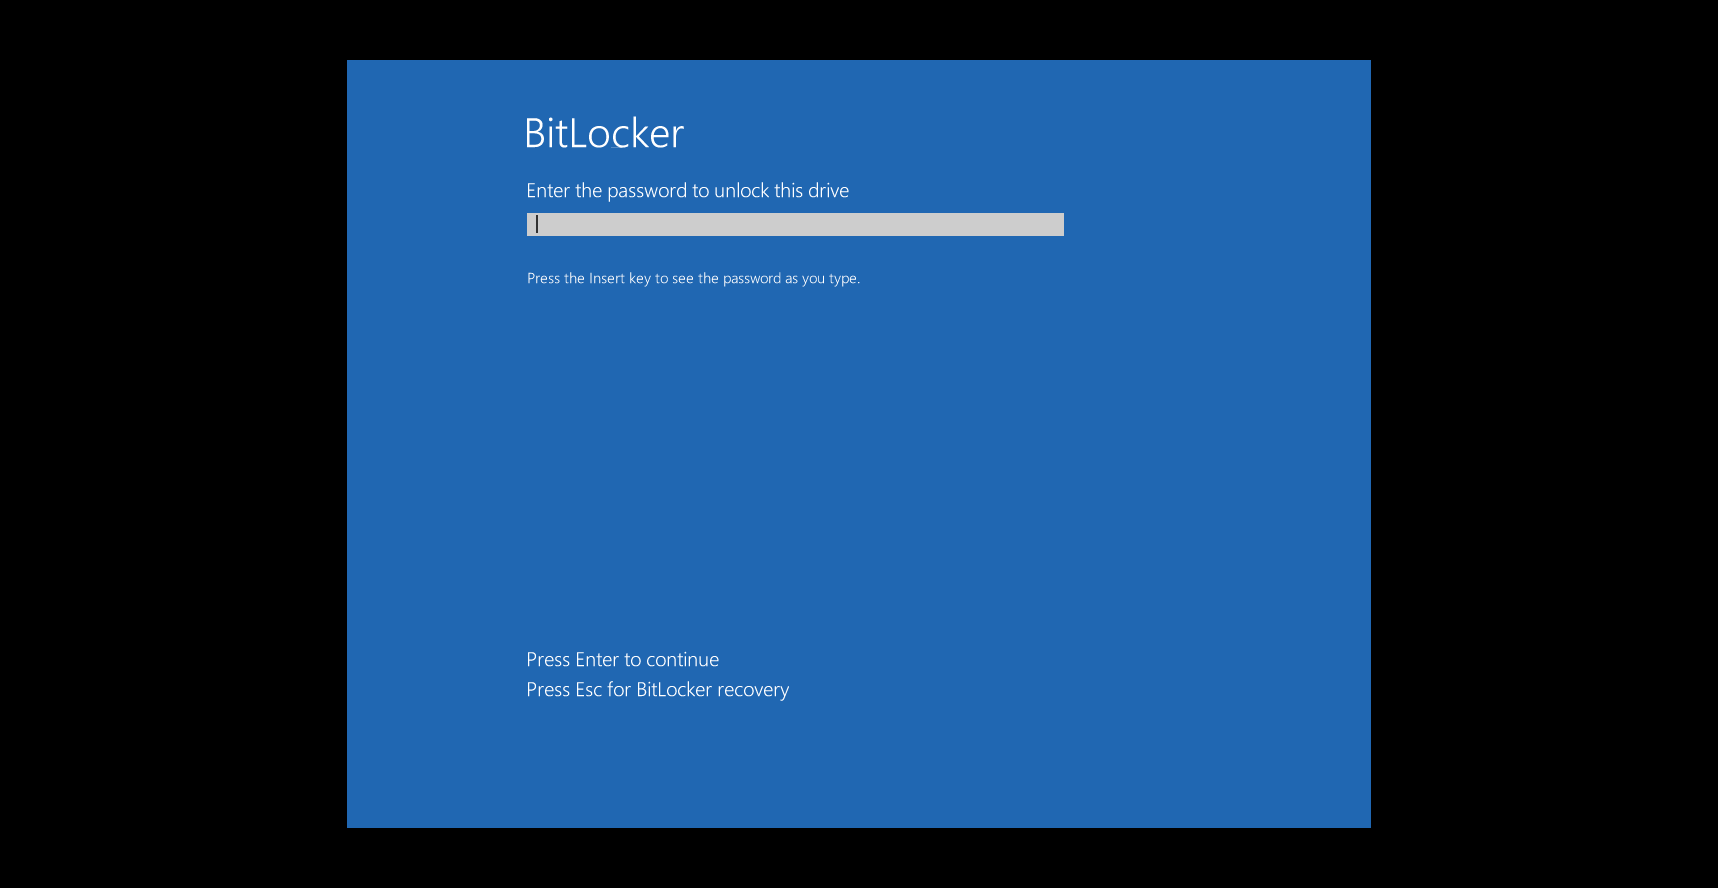
- After the reboot, you will be prompted to enter the password to unlock your drive.
2. Encrypt your drive if your PC is not TPM 2.0 compatible
If after you click on the BitLocker drive encryption from Device encryption you see the message that Device encryption is not available for this device, that means your PC is not TPM 2.0 ready.
Don’t worry, we can take care of that with a few easy steps to perform.
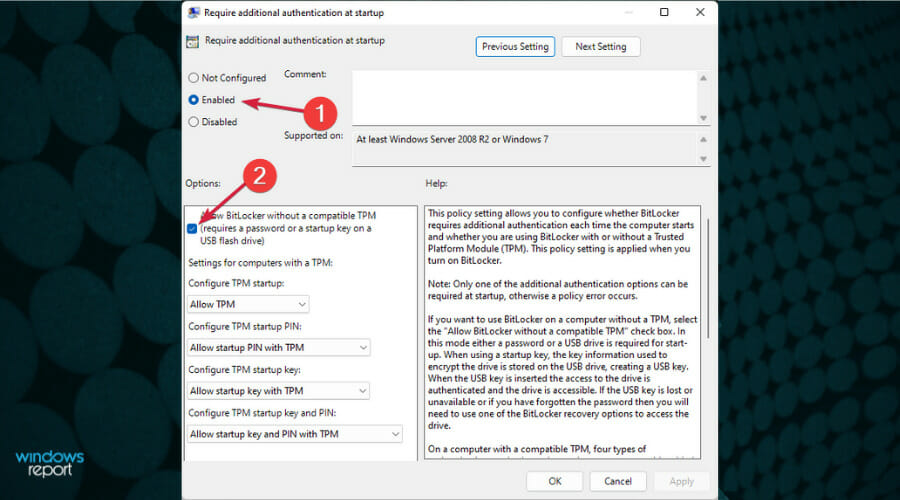
- Press the Windows key + R to start Run, type gpedit.msc and press Enter or click OK.

- In the Group Policy Editor, go to the following path:
Local Computer PolicyComputer ConfigurationAdministrative TemplatesWindows ComponentsBitLocker Drive EncryptionOperating System Drives
- Now double click the Require additional authentication at startup key to open it.
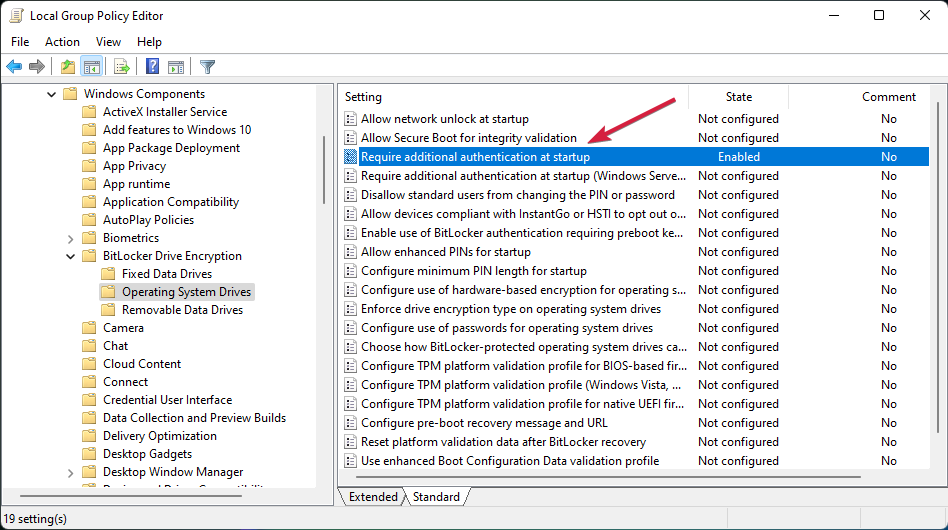
- Check the Enabled option from the top, then check the Allow BitLocker without compatible TPM (requires a password or a startup key on a USB flash drive) box, then click OK.
- Now repeat the steps from the first solution to enable BitLocker encryption.
How to disable drive encryption in Windows 11?
If you have changed your mind and down want to use drive encryption on your Windows 11 PC, you can do that by following these steps:
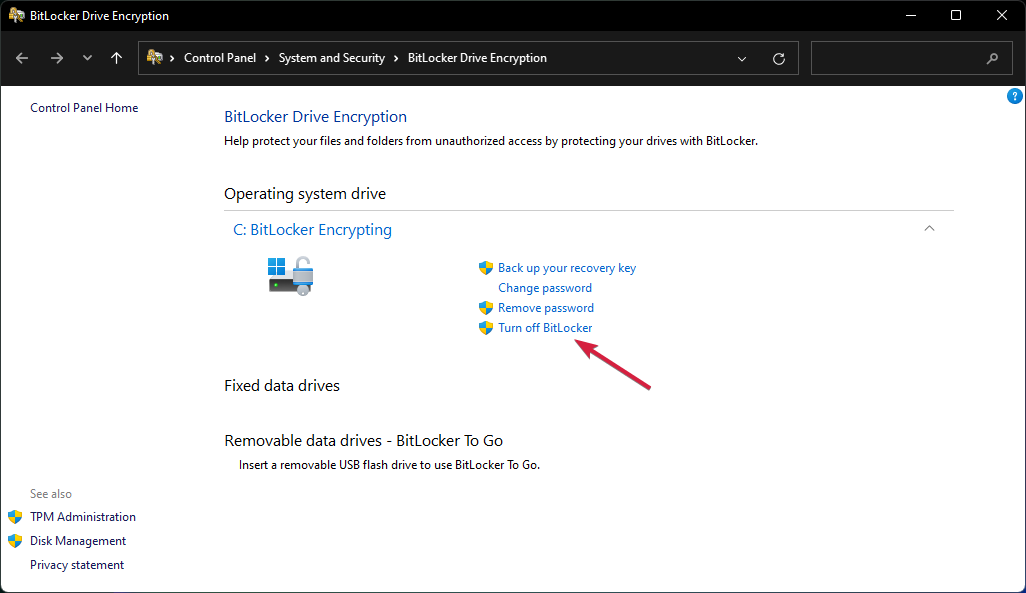
- Click the Search icon from the Taskbar, type bitlocker and select the app from results.

- Now click on Turn off BitLocker.
- Confirm your choice clicking again on Turn off BitLocker.
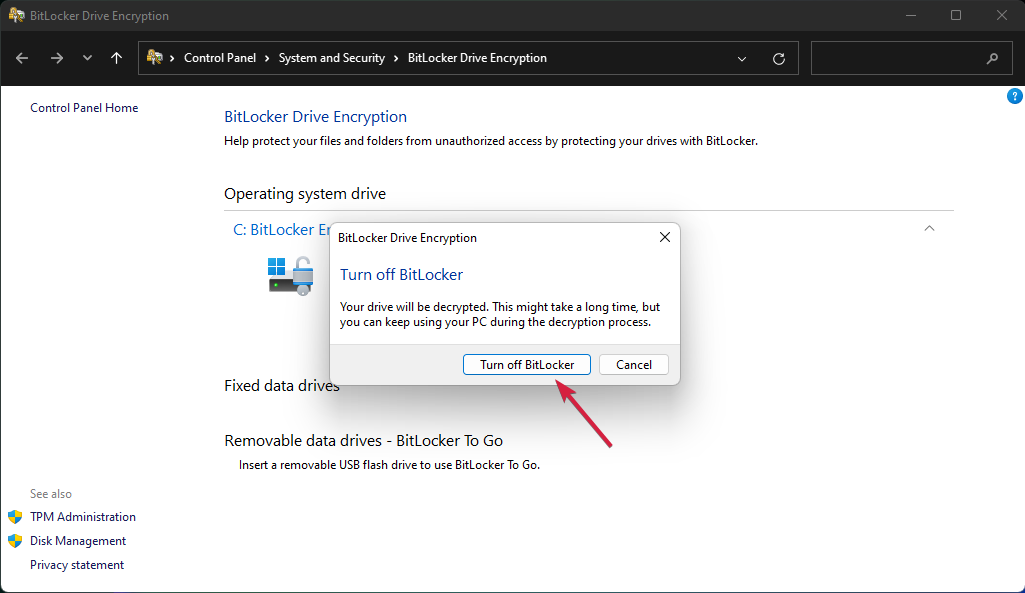
- Wait until BitLocker finishes to decrypt your drive before restarting or shutting down your PC.
Encrypting the drive is essential for all sensitive data from your PC and will enforce an additional layer of protection against attacks and even prying eyes.
However, this can be a two-way street because if you don’t take all precautions in managing your unlocking keys or your password, you will end up not being able to access your data yourself.
You might also be interested in our guide on how to protect a folder in Windows 11 and only secure certain files.
We hope that our guide helped you enable drive encryption on Windows 11 and your data is safe now.
If you have any questions or suggestions, write them down in a comment on the dedicated section below and we will get back to you as soon as possible.
Start a conversation