Source: Bryan M. Wolfe / iMore
Apple’s built-in Time Machine app in macOS Monterey makes it simple to back up Mac data. To create backups with Time Machine, you’ll need an external storage device.
After you connect the storage device and select it as your backup disk, Time Machine automatically makes hourly backups for the past 24 hours, daily backups for the past month, and weekly backups for all previous months. The oldest backups are deleted when your backup disk is full.
How to set up Time Machine
As explained by Apple support, you can use any of the following backup methods:
- External drive connected to your Mac, such as a USB or Thunderbolt drive
- Network-attached storage (NAS) device that supports Time Machine over SMB
- Mac shared as a Time Machine backup destination
- AirPort Time Capsule, or external drive connected to an AirPort Time capsule or AirPort Extreme Base Station (802.11ac)
Follow these instructions to begin using Time Machine for backup purposes on your Mac.
How to enable Time Machine backups on your Mac
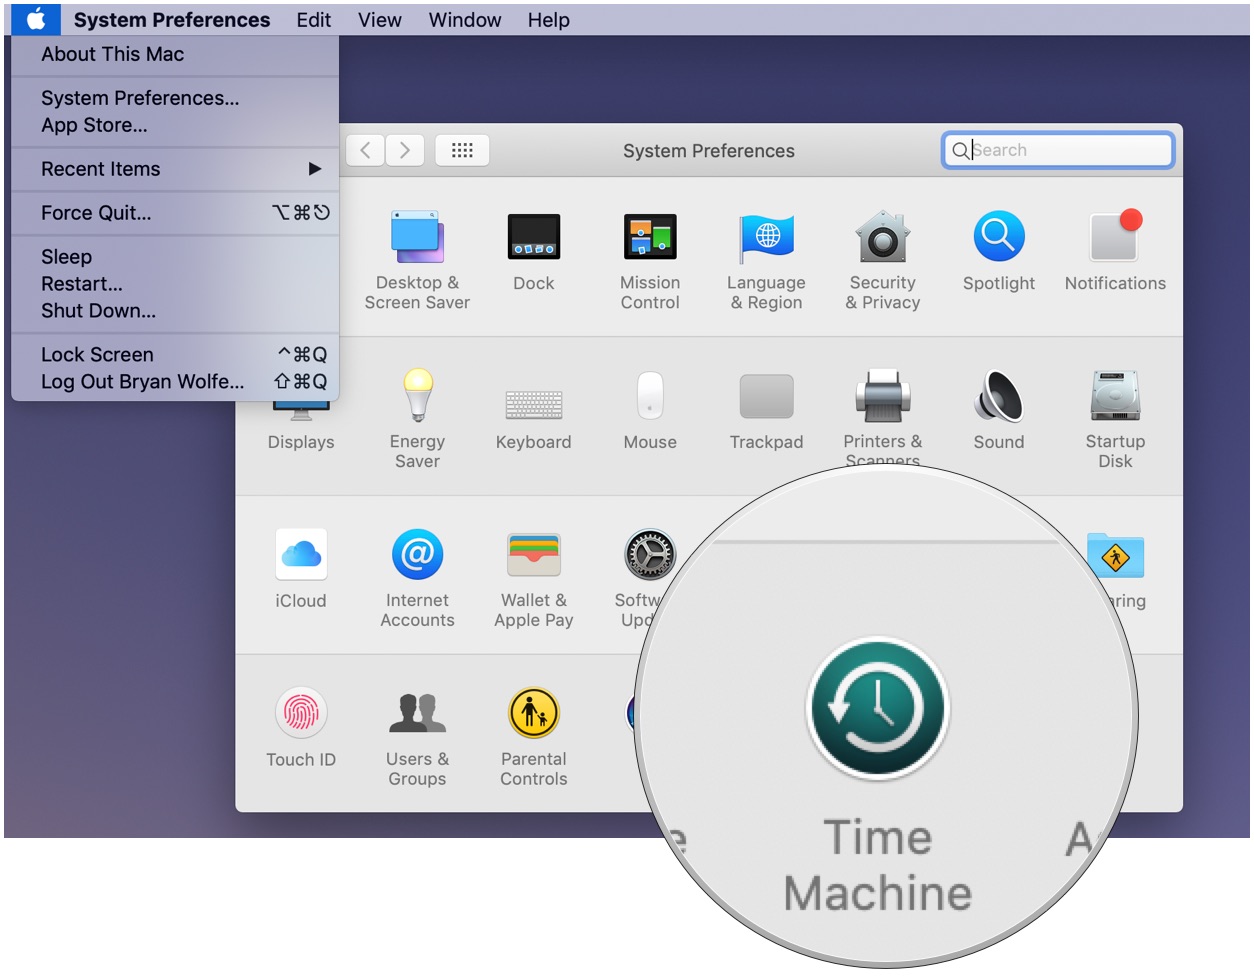
- Select System Preferences from the Apple menu.
-
Choose the Time Machine icon.

Source: iMore
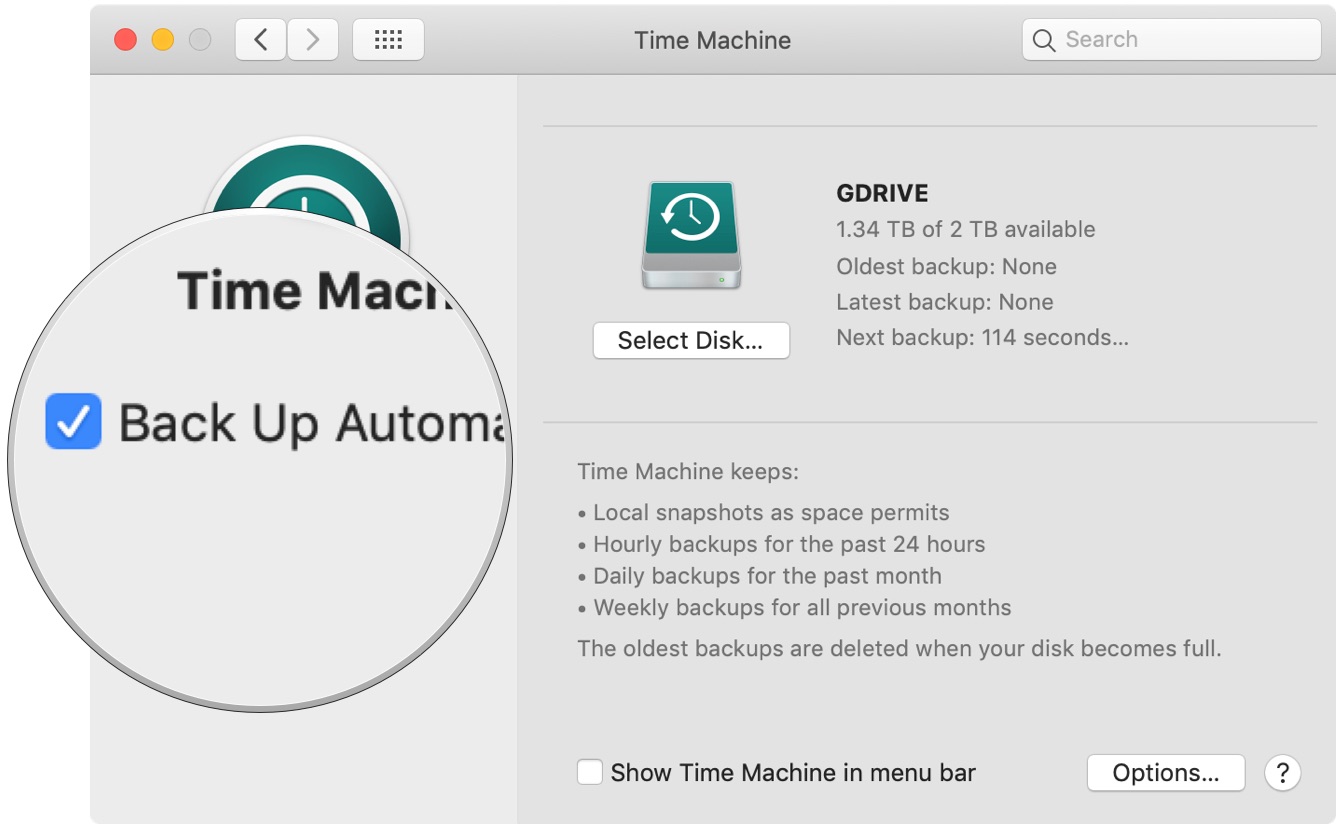
- Click Select Backup Disk.
-
Select which disk you’d like to use as a Time Machine backup.

Source: iMore
-
Check the Back Up Automatically box in order to automatically back up your Mac to your chosen disks.

Source: iMore
Your hard drive is now ready to accept backups through Time Machine.
How to restore files from a Time Machine backup
- Select System Preferences from the Apple menu.
-
Choose the Time Machine icon.

Source: iMore
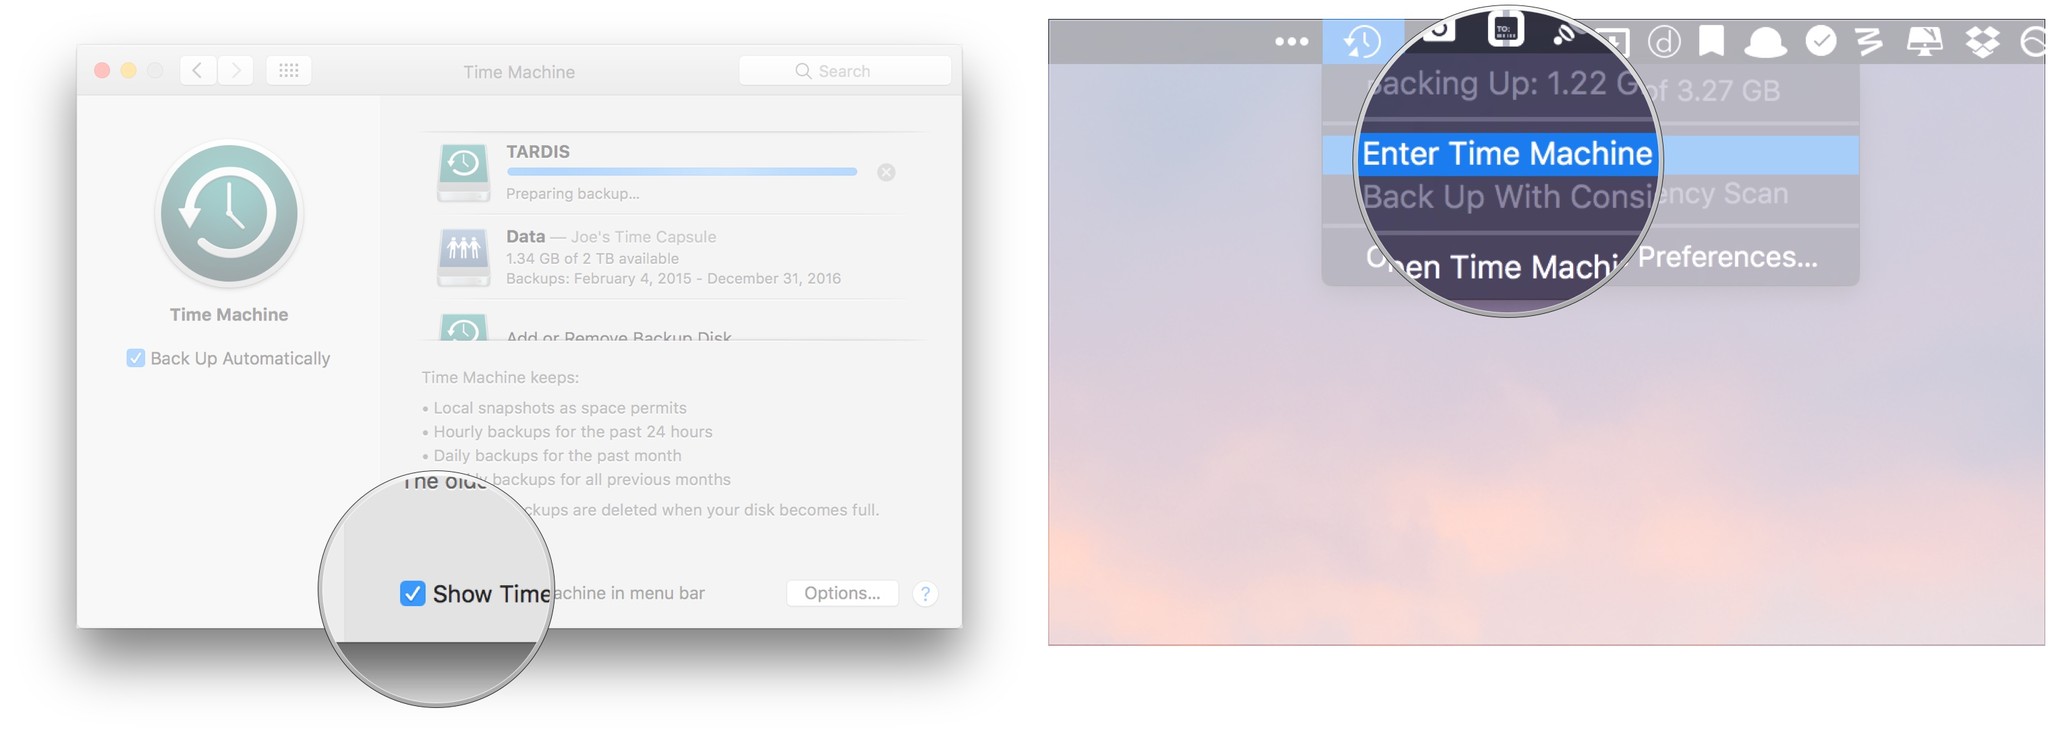
- Check the box next to Show Time Machine in menu bar.
-
Click Enter Time Machine after clicking the Time Machine icon in the Menu bar.

Source: iMore
-
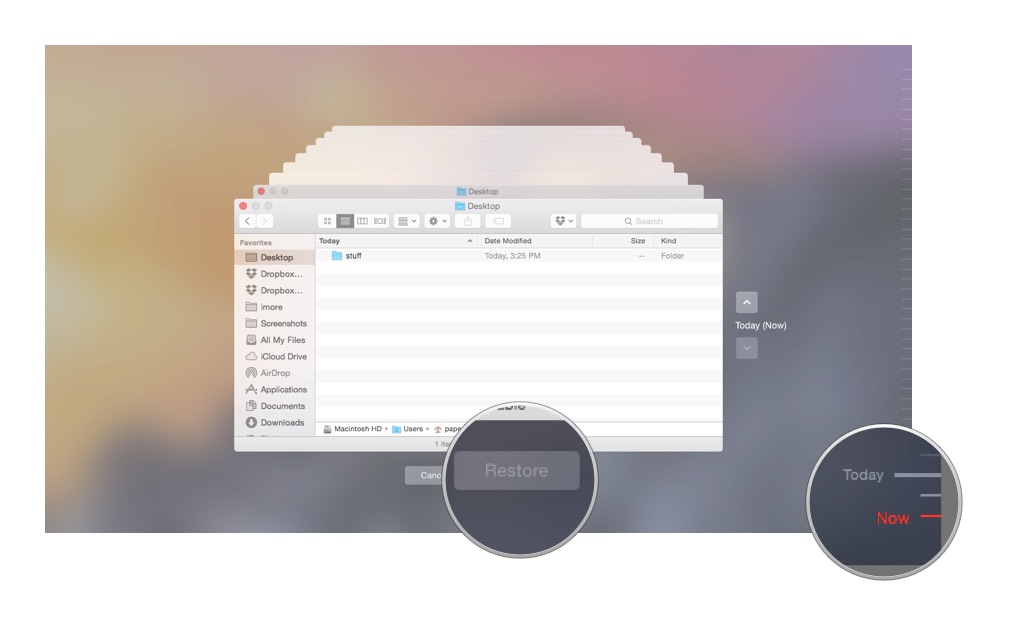
Find the file or folder in question and click Restore.

Source: iMore
You’re set! Time Machine will copy that file back to its original location on your hard drive.
Go further
Looking for a fresh, new backup drive? Be sure to look at our favorite external hard drives for Mac and the ones that use USB-C. You’ll be happy you did!
We may earn a commission for purchases using our links. Learn more.