
We don’t all have two or three terabytes of memory available, so we know how important it is to properly manage your disk space.
And, most of the time, the ones who have access to that amount of space usually have a lot to store, so again, making sure you don’t run out is of paramount importance.
Of course, you can always buy all sorts of internal or external storage units to add to your device, but still, managing your available space is important.
How can I schedule Disck Defragmentation?
Luckily, there is a built-in tool within the Windows operating system that allows us to better sort files on our devices.
And it’s not at all hard to use, so you should really think about a Disk Defragmentation every once in a while, especially if you constantly add files or software to your PC.
When a program saves a file on a disk, it puts the file into an empty space on said disk. Defragmentation takes all the pieces of each file and stores them in one place.
It also makes sure programs are each in one place, and that unused space on the hard disk is altogether.
We’re only human and we can sometimes forget to do it ourselves. The bright side is that the Disk Defragmentation tool has a scheduling option that eliminates the need for us to manually do it every time.
It will only take a few minutes so don’t be discouraged. Here’s what you need to do:
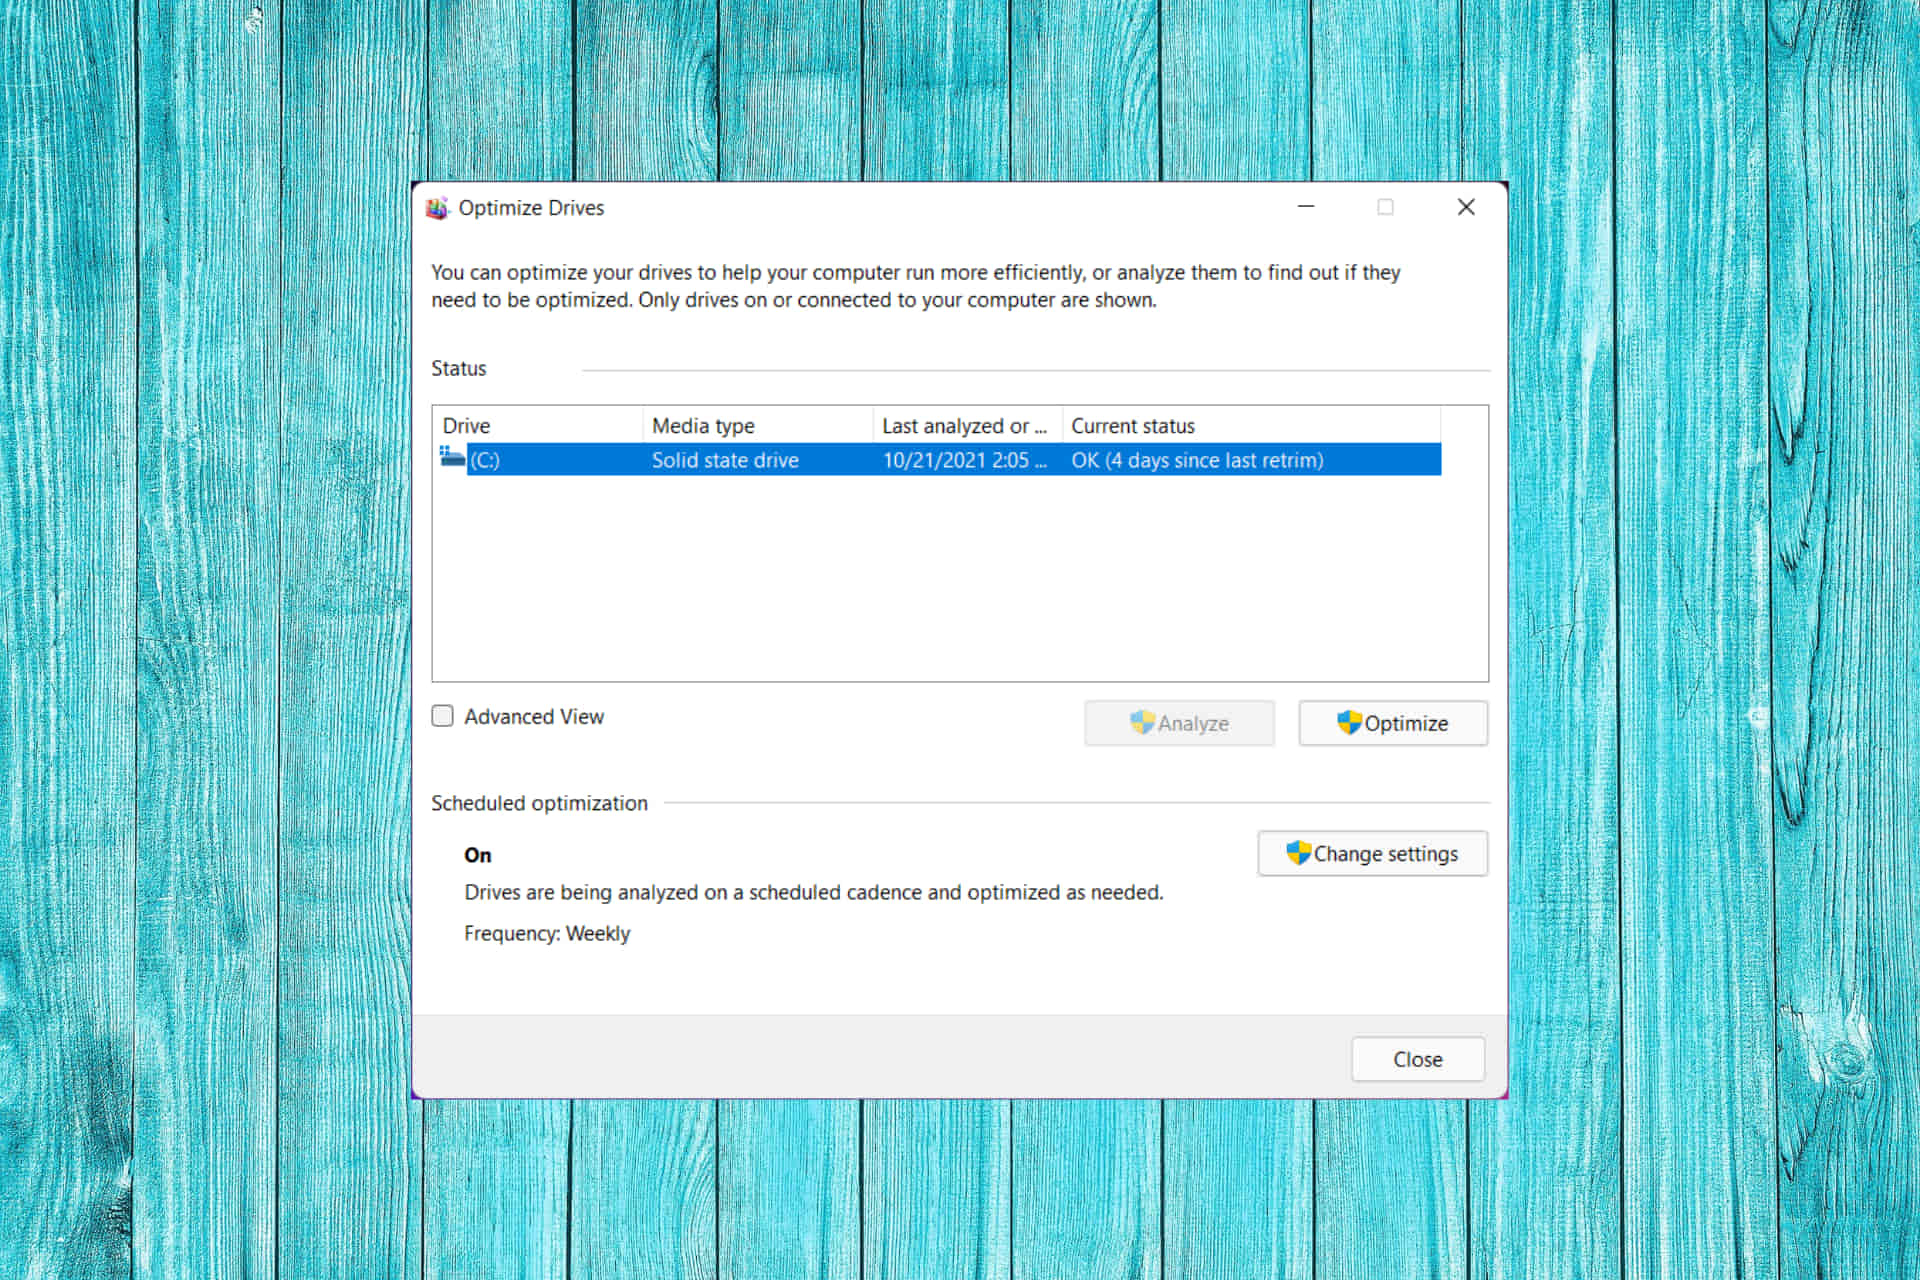
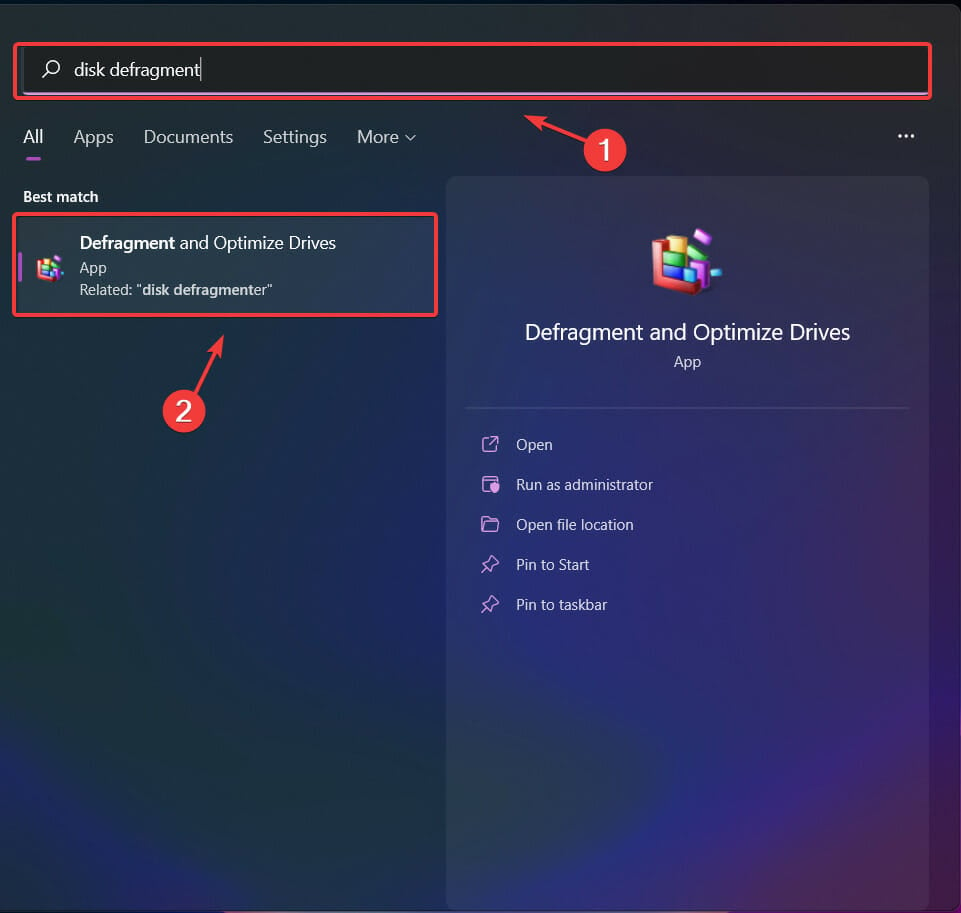
- Open Search and type disk defragment, then click to open the app.
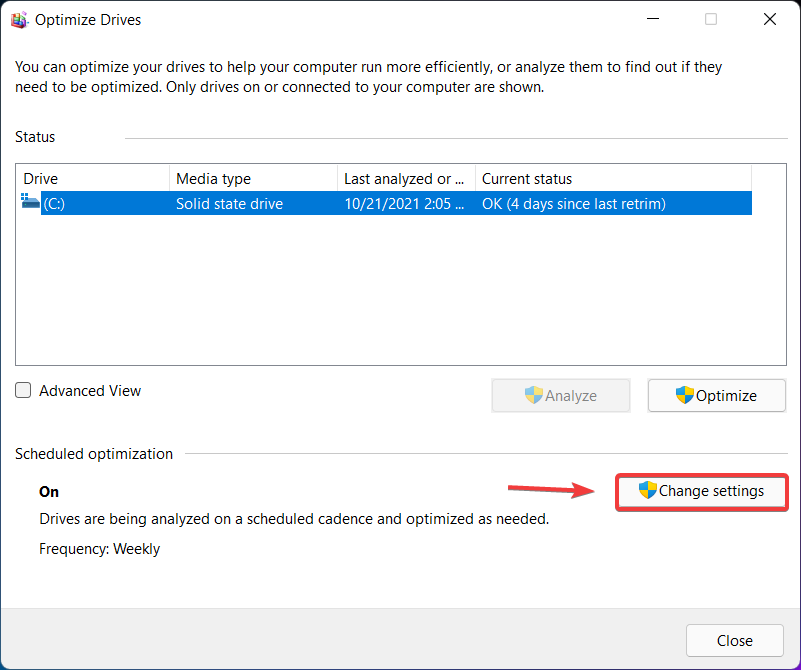
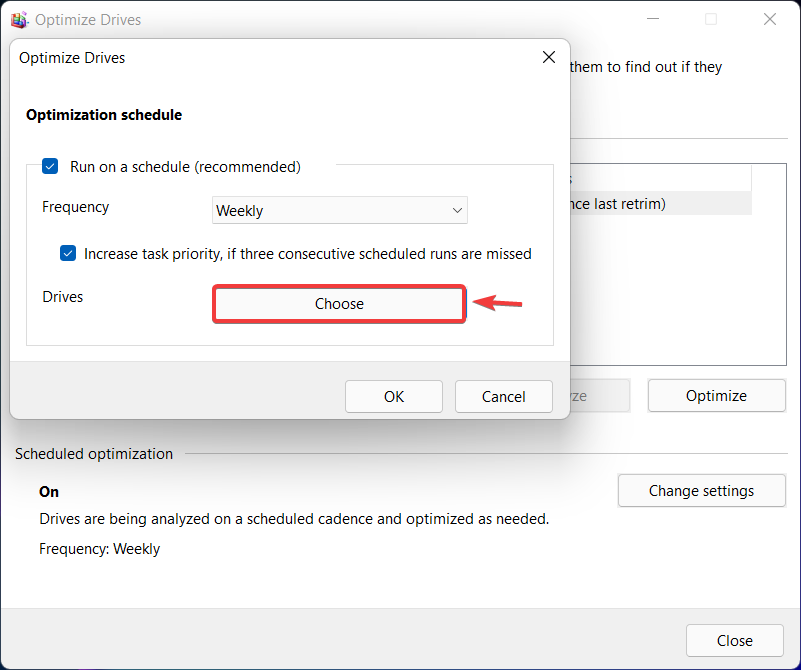
- Press the Change settings button.
- Tick the box next to Run on a schedule (recommended) and then choose the desired frequency.
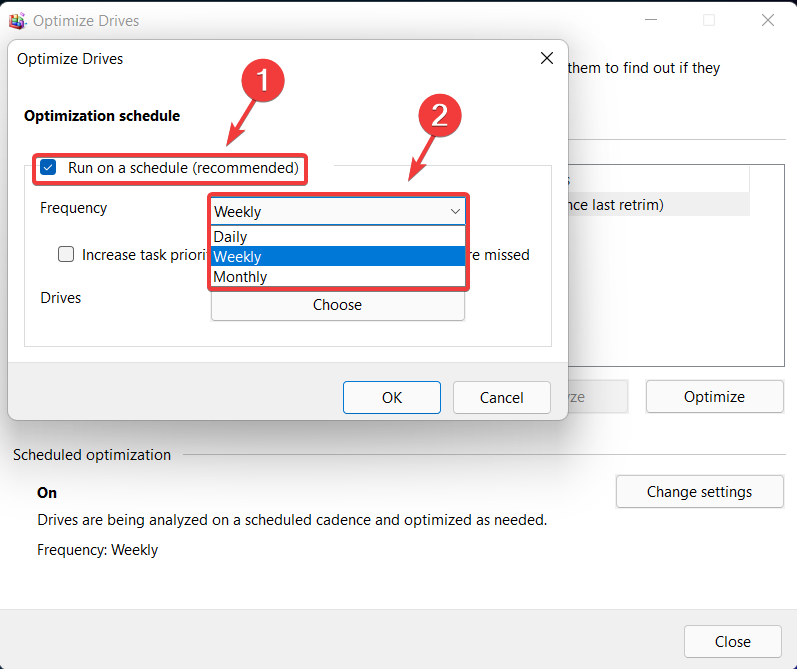
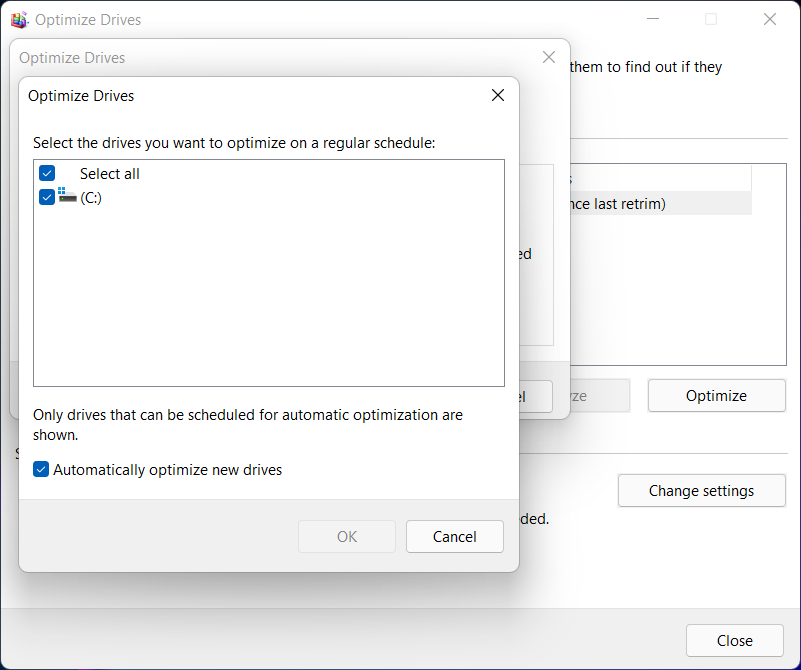
- Click on the Choose button.
- Select on what drives you would like the defragmentation tool to act and then press the Ok button.
That’s it! After going through this process you don’t have to worry about this anymore, as the operating system will automatically do it for you.
Not at all hard, but extremely efficient. This way you can make sure that all you need is at its proper place and you don’t have to spend hours simply trying to locate certain files.
Was this article helpful to you? Let us know in the comments section below.
Start a conversation