How to install Lineage OS on your Android device

PLEASE NOTE: Flashing software like Lineage OS on a device is an “at your own risk” activity. Even if you follow our guide to the letter, we can’t accept any responsibility if your device breaks. Our guide is meant for educational purposes, and we offer no guarantees of success.
One of the wonderful things about most Android devices is how many choices you have for which version of the operating system to use. If you buy a smartphone with terrific hardware but the software doesn’t meet your needs, you can usually install something different (eat it, iOS!).
Depending on the device, there are potentially dozens of versions of Android you can install. Some are created and maintained by a team of developers, while others have just a single developer overseeing all aspects. Best of all, they are all free.
See also: A look at the major Android skins
The biggest and most popular custom Android experience is Lineage OS. Formerly known as CyanogenMod (and later just Cyanogen), Lineage OS is a close-to-stock version of Android with additional features that make your device more powerful and customizable.
One of the best things about Lineage OS is that it lets you update many devices to the latest version of Android — even if stock updates for that device ended long ago. This breathes new life into otherwise-forgotten smartphones and tablets.
Installing a new operating system on your Android device might seem daunting, but if you break it down into steps, it’s fairly easy. There’s also a wide margin for error so beginners don’t need to worry about breaking their devices.
First, a primer

Robert Triggs / Android Authority
Before you get all crazy messing with the software of your device, you should know some basics. There are some terms and protocols that many sites and walkthroughs will assume you already know, which could make things confusing if you don’t.
Here’s a quick glossary of terms for you to refer to later on if you’re confused:
- ROM — Stands for “read-only memory.” This is where the core software of Android lives. Lineage OS will often be referred to as a “custom ROM,” as it is a customized version of pure Android.
- Flashing — When you overwrite one piece of software with another piece of software, that’s called “flashing.” This guide you’re reading goes over how to “flash” Lineage OS.
- Bootloader — When you power on a device, the first thing that turns on is the bootloader, which is responsible for starting up other processes. Most Android devices come with locked bootloaders — i.e., you can’t alter what it does. Luckily, most bootloaders can be unlocked, which allows you to then flash new software.
- Recovery — After the bootloader loads, the recovery software system will launch the operating system (Android). In almost all cases, to launch a custom ROM you will also need a custom recovery that differs from the one your device comes with.
- Wipe — Various parts of the flashing process will result in a “wipe” — the erasure of data from your device. A full wipe would eliminate all operating system files from your device, causing your device to boot into the recovery and then stop.
- Packages — Lineage OS, Google apps, custom recoveries, etc., will usually download to your device in a “package” of some kind, usually in ZIP format. In most cases, you can simply assume “package” is equivalent to “ZIP file.”
- ADB — Stands for “Android Debug Bridge.” This is a tool that allows communication between a personal computer and an Android smartphone. In most cases, you will need ADB on your computer to complete a flash.
- Fastboot — This diagnostic tool comes with most Android installs and allows you to flash a new ROM. You usually access fastboot through ADB. Some device manufacturers (including Samsung and a few others) use the term “Download mode” instead, but the functions are relatively the same.
- Brick — If something goes wrong with a flash, in rare cases it could cause your device to cease functioning. If your phone doesn’t even turn on, it’s as useful as a brick, hence the name. Some people will say things like “soft brick” to clarify that the device is unusable but has the potential to be fixed. It is very difficult to brick a device, and usually only happens when people don’t follow instructions carefully (hint hint).
Flashing Lineage OS: The Basics
C. Scott Brown / Android Authority
When you flash Lineage OS (or any custom ROM), there are a set of steps you almost always must follow. How you complete those steps — and the tools needed to do the job — differs from device to device. But overall, the basic steps are the same.
Here’s what you’ll need to flash a ROM:
- Compatible Android smartphone or tablet
- USB cable for that device
- Laptop or desktop running Windows, macOS, or Linux
- An internet connection
- Time (this could take an hour or two, depending on how comfortable you are with the technologies involved)
Here are the steps one usually performs to flash a ROM:
- Install necessary computer software (ADB, drivers, etc.)
- Download packages (ROM, recovery, apps, etc.)
- Backup and prepare device
- Unlock bootloader
- Flash custom recovery
- Flash custom ROM
- Install Google apps
- Reboot and personalize
Each step begets the next. You install the computer software first because it accesses the device’s bootloader. Then, you unlock the bootloader because it accesses the recovery. You then change the recovery to a custom one because it flashes the ROM. You then flash the ROM, and on and on. It’s a very linear process.
With that in mind, it is imperative you follow the third step and make a backup before performing any changes to your device. If something goes wrong after you unlock the bootloader, there will be no way to get your phone back to the way it used to be. Instead, your phone will be set back to factory default like it was when you first turned it on.
One other thing to keep in mind: unlocking the bootloader usually voids your device’s warranty. Devices will permanently record an unlocked bootloader so even if you unlock it and then lock it again the company will know. If something goes wrong and you give it to the OEM, there’s a good chance it will refuse to help if it sees you unlocked the bootloader.
Step 1: Install the necessary software

Some rare devices out there allow you to flash new ROMs without needing to hook up to a computer first. However, the vast majority of devices will require access to a PC running Windows, macOS, Linux, or even Chrome OS. This can be a ten-year-old laptop or high-performance desktop — it doesn’t take a lot of computational power to flash a ROM.
Usually, the software you need is ADB. Google hosts and maintains ADB, so there are no concerns about viruses or malware when downloading and installing the program.
Except in rare cases, you’re going to need ADB on your computer to do this.
You can visit this page to follow explicit instructions on how to download and install ADB for your computer platform. It doesn’t take long and the instructions are very straightforward.
Once you’ve installed ADB, you’ll access it through a command prompt on Windows or a terminal window on Linux and macOS. This might seem daunting, but don’t worry: the commands are extremely simple and easy to just copy and paste.
Pro Tip: Eventually you’ll hook your Android device to your computer to connect to ADB. When you do this, make sure you are using the USB cable that came with the device. If you don’t have access to that, use a high-quality, short-and-thick cable. Cheap cables you get for $1 each could cause problems with flashing, so don’t use them.
Step 2: Download packages
To get Lineage OS for your device, you’ll need to first check to make sure your device is compatible with the ROM. Go to the Lineage OS wiki on your computer and do a search for the device you’d like to flash.
Lineage OS supports the most popular devices from almost all major manufacturers. Unless you have a very unpopular or low-priced budget device, chances are good you can install at least one version of Lineage OS.
One of the first steps is getting all your packages downloaded on your computer.
When you find the device you want to flash, click on its photo. That will take you to a page filled with information on that particular device as it relates to Lineage OS. On this page, you’ll find a link to download packages.
When you get to the list of files associated with your device, you might wonder which one to download. Just download whichever file has the most recent upload date under the column labeled “File.” You’ll also want to download the file right next to it under the column “Recovery image.” Remember, we’re downloading these files on a computer, not your phone!
Got the files! Now what?
Once you have those two files downloaded to your computer, you can leave the Lineage OS site. However, you don’t just need the Lineage OS and recovery packages; you also need the Google apps package.
Why do you need a Google apps package? The rules of open-source systems state that Lineage OS cannot come with Google apps pre-installed. Without Google apps, you won’t have access to the Play Store to find the apps you want. Furthermore, if you don’t install these during the initial flashing process, you will not have any Google products on your device when you boot. You can’t install the apps later — you must install them during your original flash.
Required reading: Everything you need to know about Google Play Services
You can get the appropriate Google apps for your device here. Refer to the Lineage OS installation guide for your particular device for help on choosing the Google apps package you need. For most devices, you’ll choose the Arm64 package for the most recent version of Android.
Once you have those three packages downloaded (Lineage, recovery, Google apps), move the files into the same location as the ADB files you installed in the previous step. Then rename them to simpler things; for example, the recovery file name is very long and tricky (lineage-18.1-20220109-recovery-instantnoodlep.img, for example). Change it to just RECOVERY.img. This will make it easier to find the files later and also save you some command line typing.
Rename each file you downloaded as such:
- lineage-xx.x-xxxxxxxx-recovery-xxxx.img > RECOVERY.img
- lineage-xx.x-xxxxxxxx-nightly-xxxx-signed.zip > LINEAGE.zip
- MindTheGapps-xx.x.x-xxxxx-xxxxxxxx_xxxxxx.zip > GAPPS.zip
Don’t forget to move them to the ADB folder (for Windows, that’s %USERPROFILE%adb-fastbootplatform-tools). Once the files are all organized, you’re ready for the next step!
Pro Tip: Your device has a code name that Lineage OS will use to identify it. The code name is shown on the Lineage OS compatible devices list — use this to search for compatible packages, that way you know you’re always downloading the right one!
Step 3: Backup and prepare device
There are many different ways to backup your device. There are free and paid apps on the Google Play Store, as well as free and paid software for personal computers.
There’s no one right way to backup your device. Figure out whichever method works best for you and make the backup.
After you’ve backed everything up, you need to do two things on your device before you move on to the next step: enable USB debugging and OEM unlocking. These are two toggles in your device’s settings panel, hidden in a section called “Developer Options.”
Don’t skip this step: backup everything first!
Do a Google search for “access Android developer options [your device name here]” to find instructions on how to access these two toggles (it usually involves tapping a bunch of times on your Android build number in Settings). Once you have access to developer options, toggle on both USB debugging and OEM unlock. If OEM unlock isn’t there, don’t worry: just make sure USB debugging is turned on.
Once you’ve done all that, connect your device to your computer with a good USB cable. You might see a notification on your phone asking if you trust the computer. Confirm you trust the connection and exit out of settings. You might see drivers are installing on your computer, which is normal.
You’re ready for the next step!
Pro Tip: Do not skip anything in this step. This stuff is here for a reason. It could take you hours to reinstall all your apps, log in to all your accounts, move over all your photos, and all that. You also don’t want to risk losing any important data. Be safe!
Step 4: Unlock the bootloader
C. Scott Brown / Android Authority
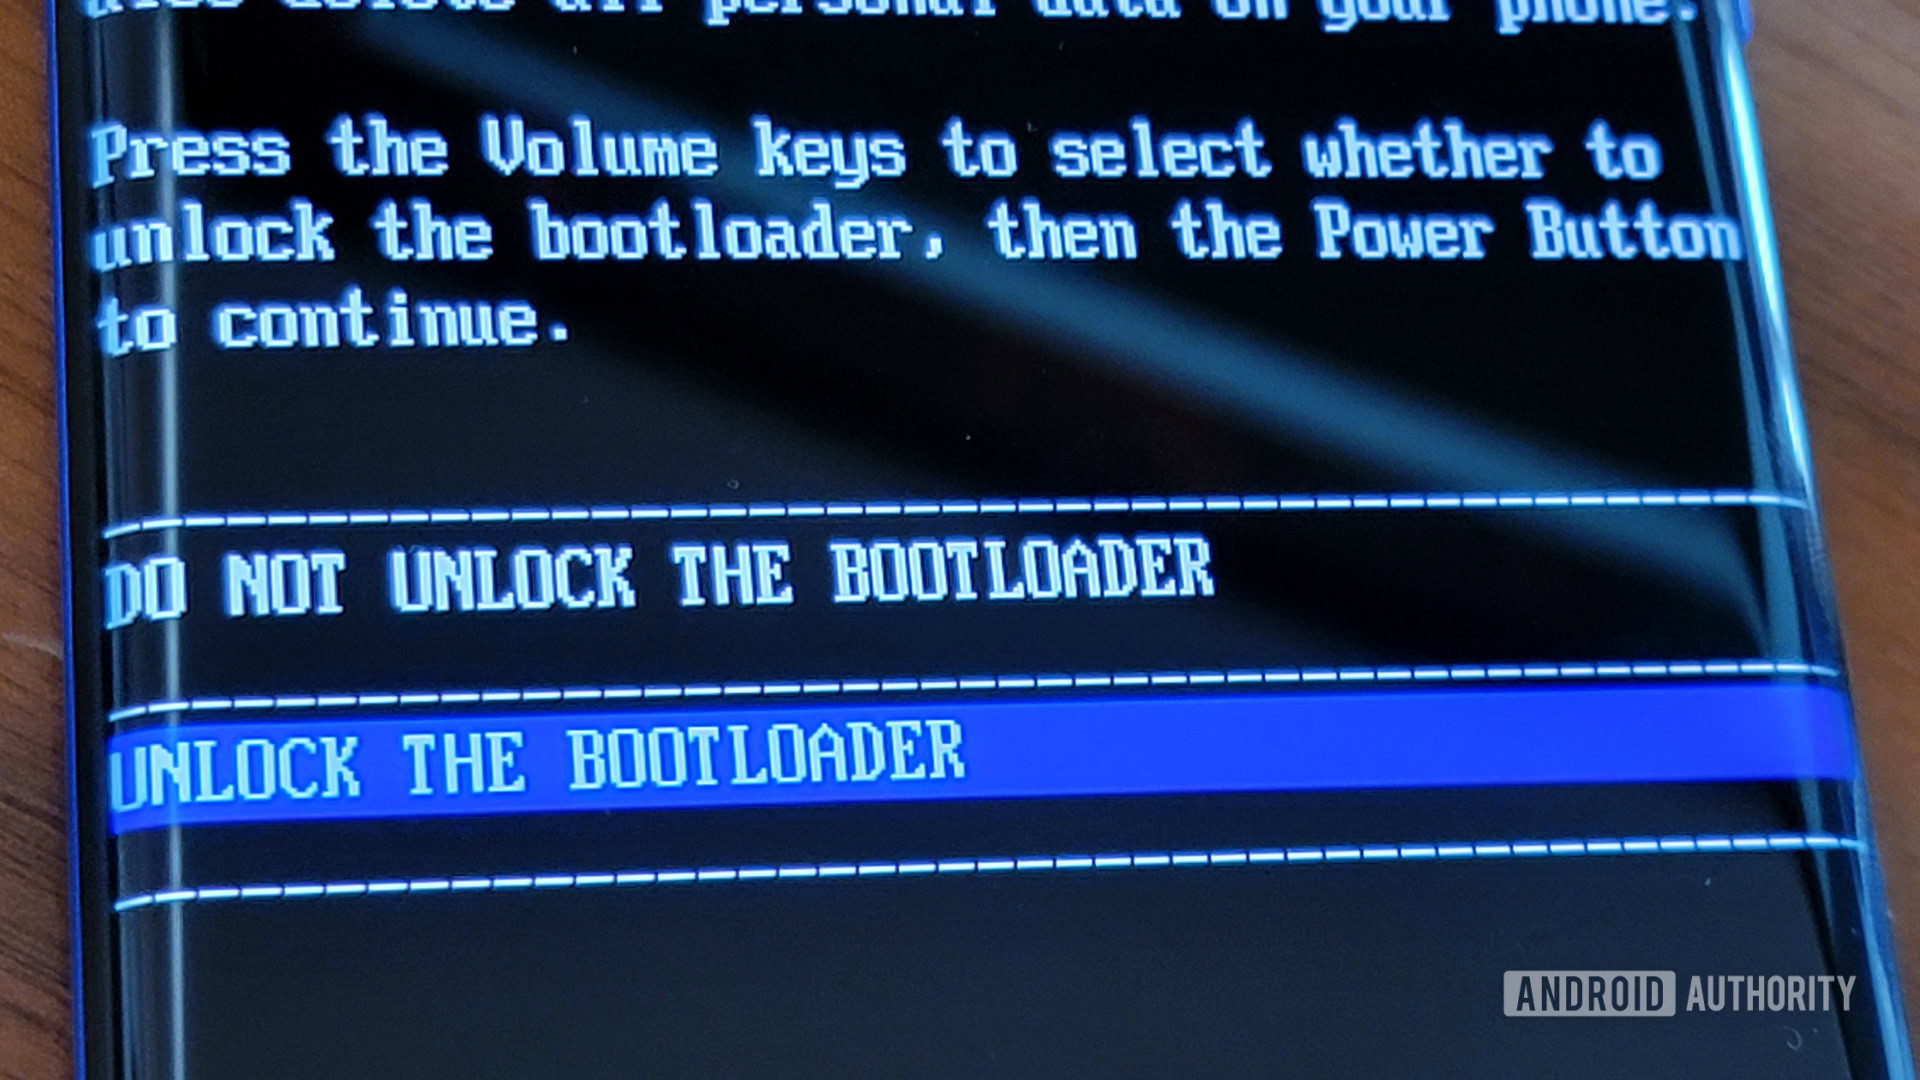
The steps for unlocking the bootloader of your device will vary depending on the make and model of your smartphone or tablet. Some OEMs make the process incredibly easy, while others purposely make it difficult (or even impossible).
To make your life easier, head over to XDA Developers and find the forum for your device. Skim through the threads and see if other users have successfully unlocked the bootloader. If everyone else seems to be having no trouble, you’ll be fine.
If you find other users are having trouble with the bootloader, it could be for a few reasons. It might be because the device is too new, so no one has figured out the process yet. It might also be that the bootloader is protected and difficult or impossible to unlock; Samsung is notorious for this.
Basics for unlocking a bootloader
Once you are sure the bootloader is unlockable, head to the Lineage OS installation guide for your particular device. There you’ll find step-by-step instructions on how to unlock your bootloader.
Remember: this will wipe your device’s data.
In most cases, to unlock the bootloader you hook your device up to your computer using a USB cable and then run a few ADB and fastboot commands to unlock the smartphone or tablet:
- An ADB command to make sure your device is properly connected
- An ADB command to reboot the device into fastboot mode (see glossary above)
- A fastboot command to check that the device is in fastboot mode and properly connected
- A fastboot command to unlock the bootloader

If you are on Windows, you might run into an error when you try the steps listed on your device’s bootloader page. The problem might be that your command prompt is not in the right location. With the command prompt open, type the following command (see above):
cd %userprofile%adb-fastbootplatform-tools
The first thing to do after hooking your device up to the computer is run an ADB command to ensure a proper connection (see above):
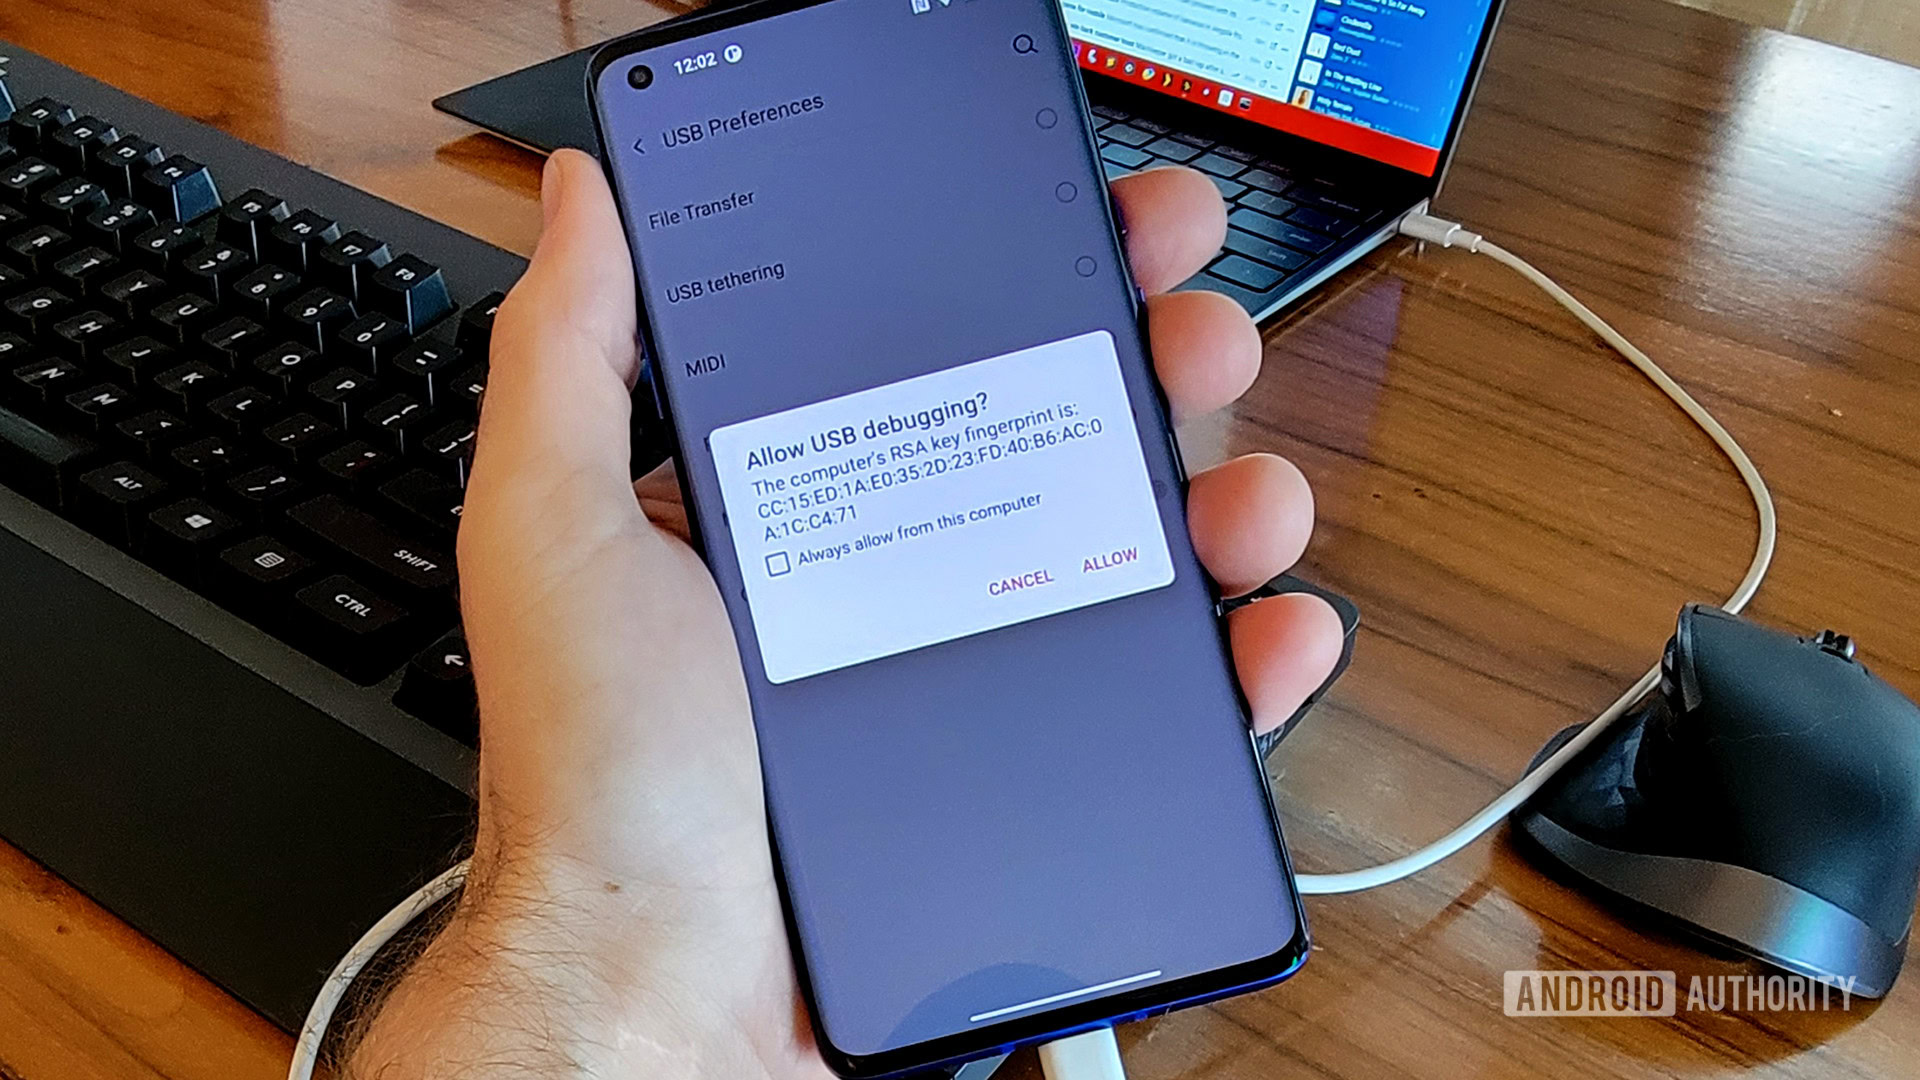
If you don’t see any devices listed after running that command, check your Android device — it might have this screen:
C. Scott Brown / Android Authority
Click the “Always allow” box and hit “Allow.” That should solve the problem, but run the “adb devices” command again just to be sure.
If after successfully connecting to ADB and rebooting into fastboot mode you face some problems, that likely means you need to update the drivers on your computer. Do a Google search for “[device name here] drivers” and download and install the latest version.
With all that done, you should be able to successfully unlock the bootloader. After your bootloader is unlocked, your device will reboot and enter Android setup, just like after a factory reset. You’re ready for the next step.
Pro Tip: YouTube is your friend! A quick YouTube search could net you a video walkthrough of how to unlock your device’s bootloader. Watch it and this whole process will likely be so much easier!
Step 5: Flash a custom recovery

C. Scott Brown / Android Authority
Now that the bootloader is unlocked, it’s time to actually flash something onto your device. This is a big step! You will be flashing software onto your smartphone or tablet that will drastically change how your device functions.
You already downloaded the appropriate custom recovery from Lineage back in step two. However, if you haven’t done this already, head back to that step and get the recovery file that exactly matches your device model.
As one final warning: flashing the wrong custom recovery onto a device could cause a brick. Be absolutely certain that the file you downloaded matches the model of your device. You’ve been warned.
Flashing your Lineage OS recovery
Once you’re all set, plug your phone into your computer and fire up ADB via a command prompt and perform the following command:
Just like before, the command above ensures your device is properly connected to your computer. After that, run this one:
Also as before, that command gets you into fastboot mode. Next, run this command:
That performs one final check before the flash that your device is connected and fastboot is ready to go. Finally, you run this command:
fastboot flash recovery RECOVERY.img
Check out the screenshot below to see how this should all look:

Once you’ve flashed your new recovery, reboot your phone. The easiest way to do this is right from the command prompt:
Your phone will reboot as normal. Once it’s done, you’ll have terminated your fastboot connection and be back in ADB. You’ll now use ADB to boot into your new recovery with this command:
Since you just flashed over your original recovery, your device will boot into Lineage recovery. You’ll be greeted first by the screen below:

C. Scott Brown / Android Authority
Once you’ve booted your device up into Lineage recovery, you are ready for the next step: flashing Lineage OS!
Pro Tip: There are numerous YouTube videos and online tutorials on how to flash a custom recovery. In fact, there’s probably a video specific to your device! Search Google for “flash Lineage recovery on [device name here] video” and see if you can watch someone else go through this process first so you’ll have a better idea of what to do.
Step 6: Flash Lineage OS
C. Scott Brown / Android Authority
You downloaded the appropriate Lineage OS file to your computer way back in the second step. Remember that it needs to be in the ADB folder and renamed to LINEAGE.zip.
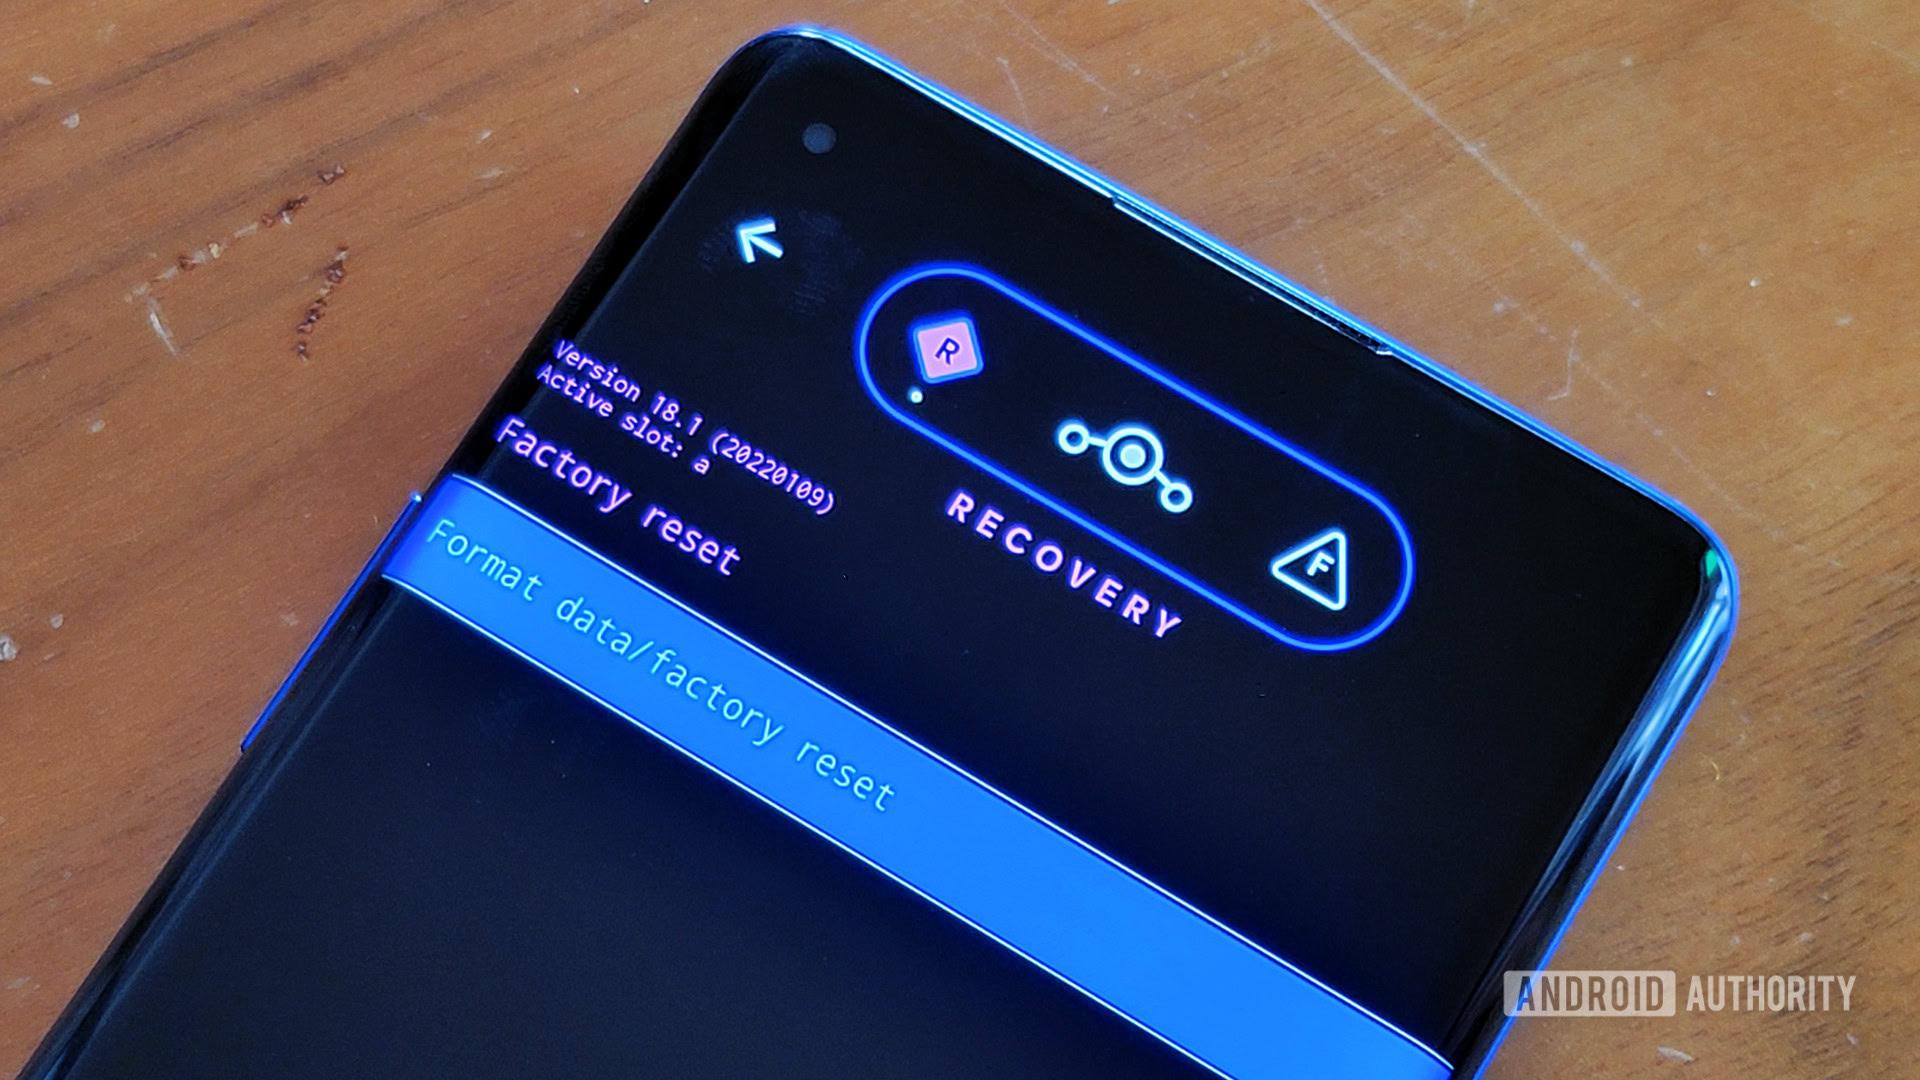
From the main menu of Lineage recovery, tap Factory reset, and then tap Format data/factory reset. Lineage will warn you this is serious business, but since you made a backup in the third step you have nothing to worry about (right?!). Follow the prompts and complete the format process.
After you get a “Data wipe complete” message at the bottom of the screen, hit the back button until you’re back at the recovery’s main menu. Hit Advanced and then hit Enable ADB. Now you’ve factory reset Android and are ready to use ADB commands again.
Once that’s done, you’re ready to flash Lineage OS.
Moving files and flashing
With your device still in recovery mode and connected to your computer, fire up a command prompt or terminal window in the ADB folder and perform a device check. Once checked, from the main menu of the recovery, tap Apply update > Apply from ADB. Now, type in this command:
After you type that in and press Enter, ADB will begin flashing the Lineage OS file to your device. This could take some time, and sometimes there’s no progress bar to watch how fast it’s going. Give it a while (at least five minutes) before touching anything. Eventually, you’ll see a “Total xfer” notification. This means it worked!
Do note that sometimes you could see “adb: failed to read command: Success” or “adb: failed to read command: No error.” Either way, this still means the sideloading worked.
Now that you’ve flashed Lineage OS, you’re ready for the second-to-last step. Stay in recovery!
Pro Tip: If sideloading your Lineage OS file isn’t working, make sure the file is in the same computer directory as ADB. If the Lineage OS package is on your desktop and ADB is in its own folder, ADB won’t know where the file is when you type in its name. All the files you are pushing and flashing should be in the same folder as the ADB program. Refer back to the second step if you’re confused!
Step 7: Flash necessary applications
Jimmy Westenberg / Android Authority
You’ve come a long way so far! You are so close to being done. You have an unlocked bootloader, a custom recovery, and a fresh install of the latest version of Lineage OS.
The only thing you’re missing is Google apps such as the Google Play Store, Google Play Services, Gmail, and Google Maps. You’re going to flash the ZIP file of Google apps you downloaded in the second step in the same fashion as you flashed Lineage OS.
With your device booted into Lineage recovery, head to the main menu. Tap on Advanced > Reboot to Recovery. Your phone will reboot, so give it a second. Once it’s rebooted and back to the main menu of your recovery, tap Apply Update > Apply from ADB. As before, you’re going to sideload the Google apps:
Usually, your Google apps package is smaller than your Lineage OS package, so this sideload won’t take as much time. Halfway through the sideload, the recovery will alert you that the Google Apps package failed a verification test. This is normal and expected behavior. Just tap on Yes to install the package anyway.
After you tap Yes, you can watch your apps installing. You have finished! Navigate back to the main menu of recovery and tap Reboot.
Pro Tip: If you want to root your device, you can also flash a root file at this stage (before rebooting into the system). There are multiple root methods and files available for different devices, so I’m not going to go over them here. If you want root access, this would be the perfect opportunity to flash that file too.
Step 8: Reboot and personalize

C. Scott Brown / Android Authority
Your first boot into Lineage OS will take a minute — give it time. You just installed a new operating system and don’t want to rush it!
If your first boot takes longer than 15 minutes, though, something is wrong. Do a hard reboot by holding down the power button until the device restarts. Let it try to boot again. If it still doesn’t boot, something didn’t flash correctly, so head back to the sixth step above and start again.
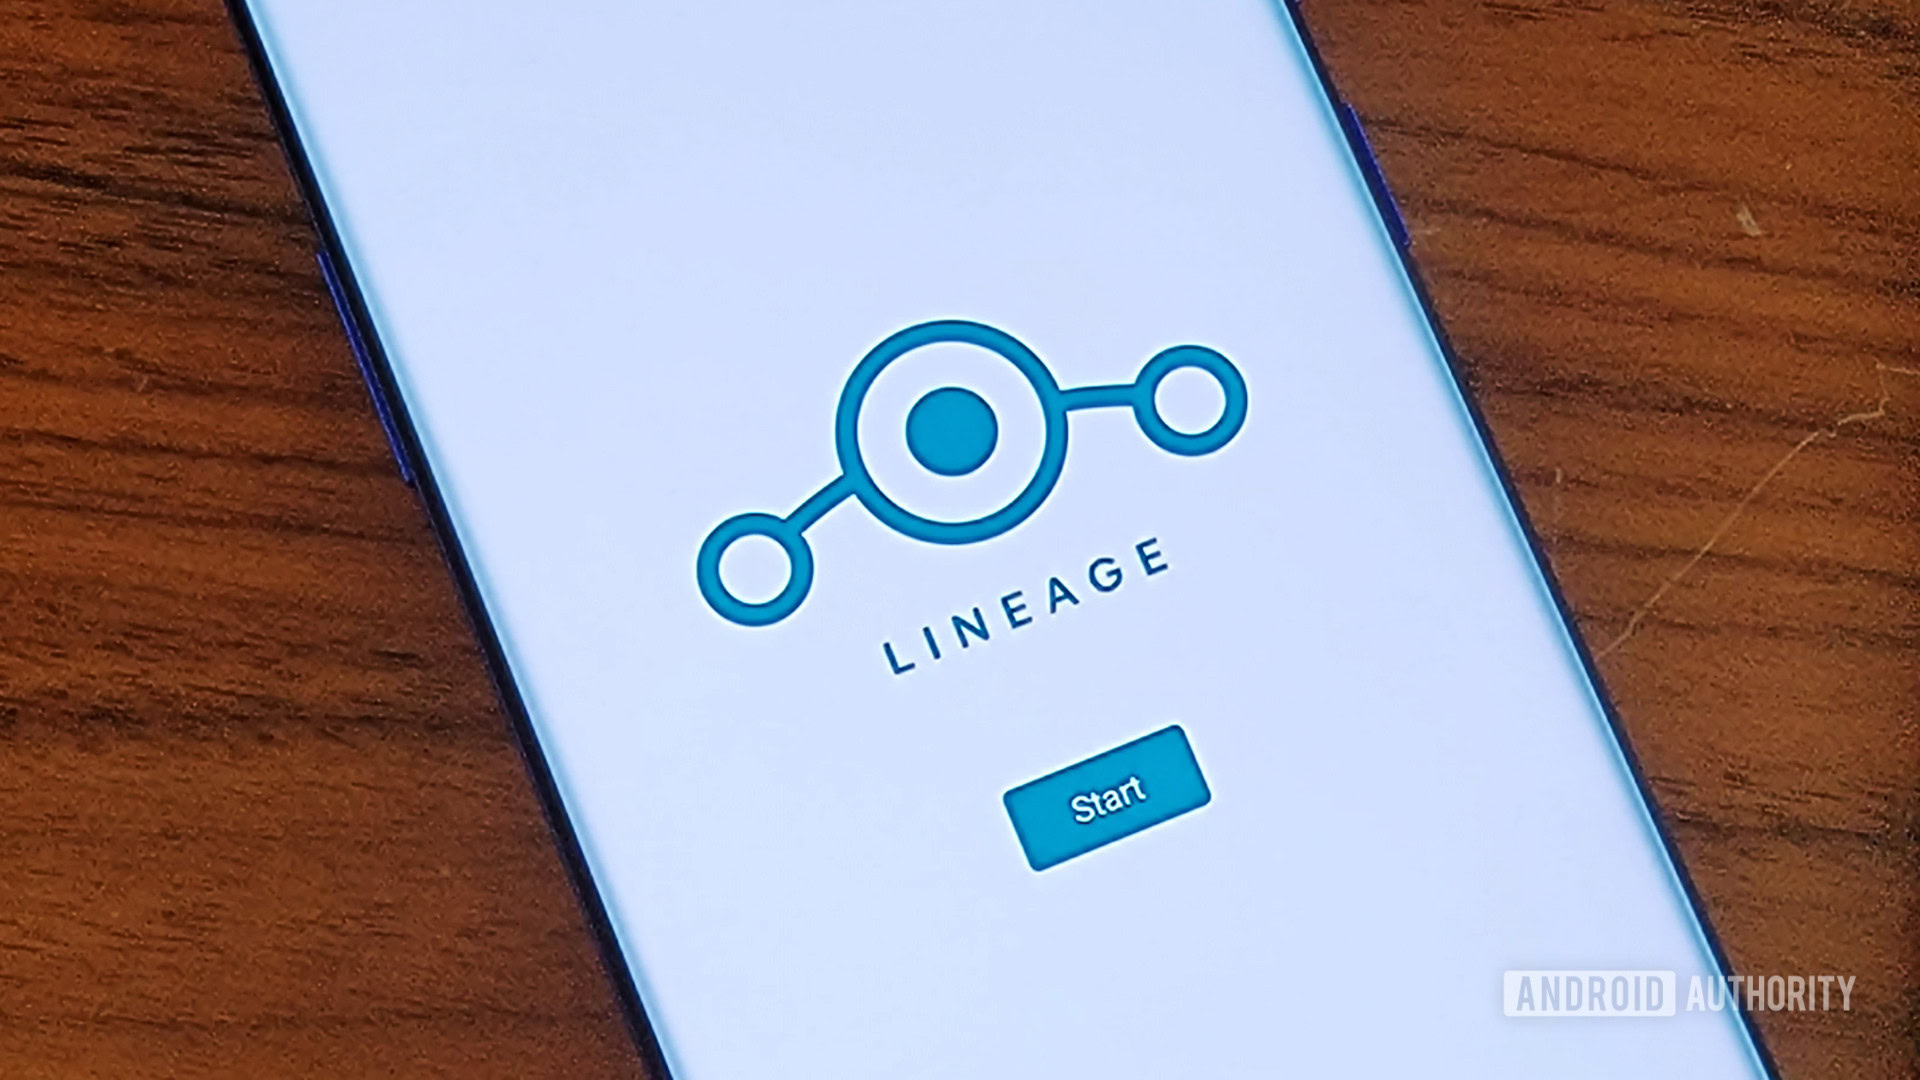
The first thing you’ll notice upon a successful boot is a new boot animation, with the Lineage OS logo’s three circles on a curved line.
Once the boot is complete, you’ll be at the startup screen of Android, where you’ll pick your language, add your Google Account, connect to Wi-Fi, and so on. This is all very similar to what you previously performed when you first got your device, so there shouldn’t be any surprises.
Once you get to the home screen, you are officially done — you have Lineage OS on your device! Now head to YouTube to learn about all the nifty features you can play with in this new version of Android.
Pro Tip: This is a great time to restore all the apps you backed up in the third step. You can also manually re-download them all if you skipped that step. We’ll talk to you in a few hours.
Final thoughts
C. Scott Brown / Android Authority
Depending on your device, there are likely a lot of other custom ROMs out there besides Lineage OS. Now that you know how to flash a ROM, you can get flash-happy and try out all sorts of new flavors. All you need to do is find ROMs that match your device’s model number and then repeat steps six through eight. You don’t need to unlock the bootloader or install a custom recovery again.
However, you’ll need to backup your device again. Don’t forget this vital step!
If you try out custom ROMs and decide you don’t like them anymore, it is incredibly easy to switch back to the stock ROM your device originally had. There’s a different set of instructions for flashing back to stock, but the essence is essentially the same. Do some Googling to figure out how to flash your particular device back to its factory defaults by searching for “flash [device name here] back to stock.”
I hope this guide has been helpful to you! If you get stuck, ask some questions in the comments and someone will surely help you out!