
- You can add a wireless printer in Windows 11 with its built-in options in three different ways.
- The Settings app enables you to add printers both automatically and manually.
- Alternatively, you may add wireless printers in Windows 11 from the Devices and Printers Control Panel applet.
XINSTALL BY CLICKING THE DOWNLOAD FILE
Microsoft’s latest desktop platform is now upon us. Since October 2021, users across the world have been upgrading to Windows 11. After that, the first thing you will need to do is add your printer and other external devices to Windows 11.
There are a few ways you can do so – both automatically and manually via Settings. Or you can utilize the Control Panel’s built-in tool for adding new devices.
Many users will no doubt need to add printers of the wireless variety to Windows 11. You can easily add wireless and non-wireless printers with the same built-in options and tools. Thus, there isn’t much difference between adding wireless and non-wireless ones.
Will my printer be compatible with Windows 11?
Some users might wonder if their printers are compatible with Microsoft’s latest desktop platform. Most Windows 10 device drivers are compatible with 11. If you have utilized your printer with Windows 10, it will probably work ok on the latest platform.
However, if you were utilizing your printer on an older Windows platform, like Vista or 7, you can’t be so sure. Older printers are less likely to be compatible with the latest desktop platforms.
This article on how to install the latest Windows 11 printer driver might help you. This is mandatory if you want to enjoy all the features of your printer.
To check if your printer is compatible with the latest platform, look for Windows 11 compatibility details on the manufacturer’s website. For example, the Dell and HP websites both include Windows 11 printer compatibility pages that list supported models for that platform.
If your wireless printer is Windows 11 compatible, you can add it to the latest platform with the three methods below. First, make sure your printer is fully set up with reasonably full cartridges installed as outlined within its manual.
The wireless printer also needs to be turned on and connected to your PC’s Wi-Fi network to add it to Windows 11. Your printer’s manual will provide specific details for how you can connect it to local networks.
How do you add a printer in Windows 11?
1. Automatically add a new printer
- First, click Start on your taskbar to bring up that menu.
- Select Settings on the Start menu.

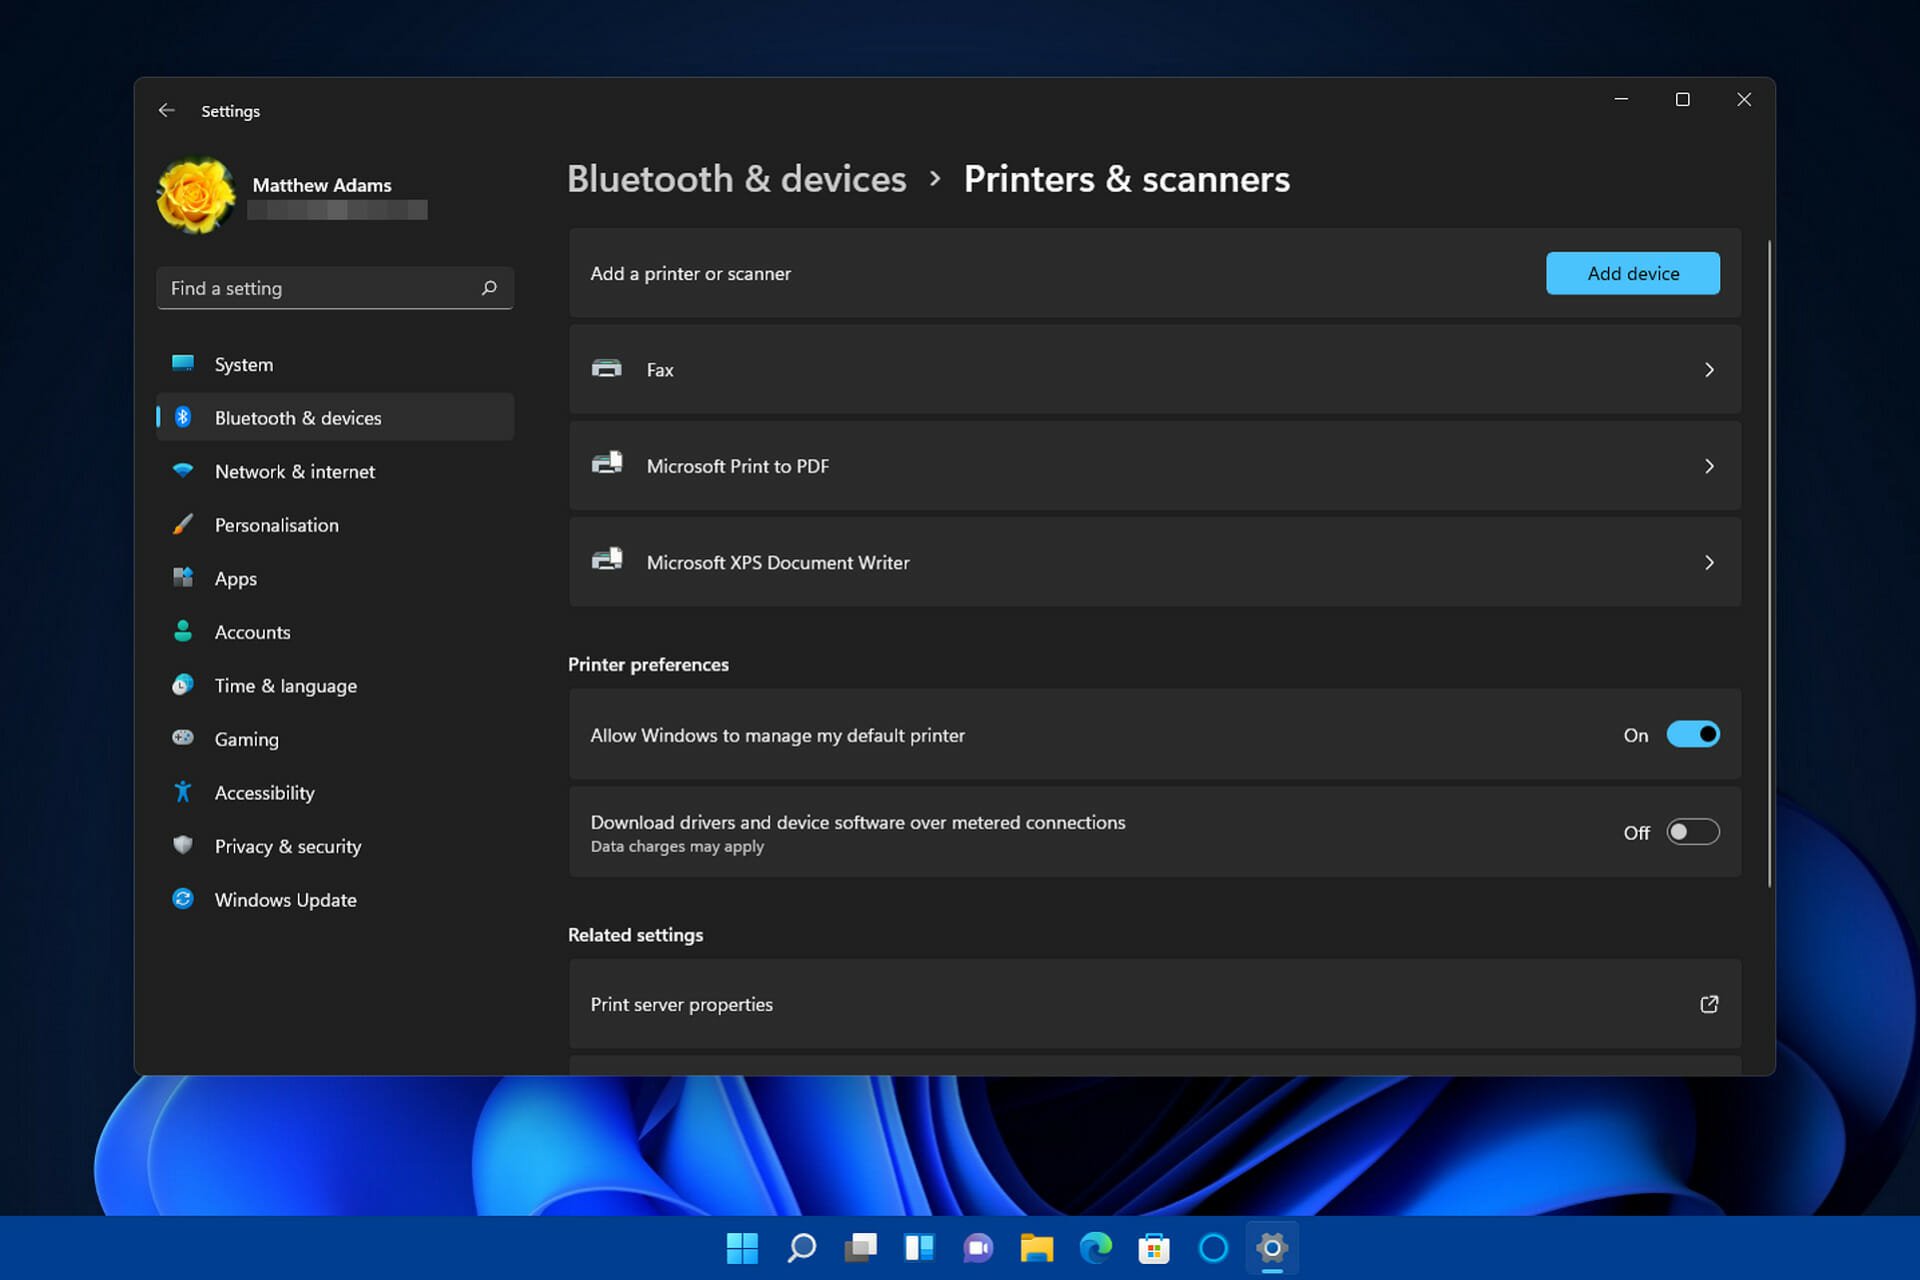
- Click the Bluetooth & devices tab in Settings.
- Then select Printers & scanners on that tab.

- Press the Add device button.

- Click the Add device button for your detected wireless printer.

NOTE
Some users might also need to enter password or PIN authentication for their wireless printers after clicking Add device.
2. Manually add a wireless printer
- Open Settings as covered in the first method.
- Click Printers & scanners on the Bluetooth & devices tab in Settings.
- Press the Add device button.
- Then click the Add manually option.

- Select the Add a Bluetooth, wireless or network discoverable printer option.

- Then choose your wireless printer on the Add a device window, and click the Next button.

- Thereafter, follow additional instructions in the Add Printer wizard to finish.
3. Add a new printer via the Control Panel
- Click the taskbar’s magnifying glass icon.

- Type Control Panel within the search tool that opens.
- Select Control Panel to open that window.
- Next, select Large Icons on the View by drop-down menu.

- Click Devices and Printers in the Control Panel.
- Then press the Add a printer button.

- Choose a printer on the Add a device window, and press the Next button to install it.
- Press the Finish button after the printer has been added.
How do I set a printer to be the default one?
After adding a printer, make sure it’s the default one for your PC. Then it will be selected by default to print all your documents. You can set a printer to be the default one via the Control Panel:
- Press the Windows key + R hotkey.
- Type this Run command in the Open box:
control printers - Click Run’s OK button.
- Next, right-click the wireless printer you’ve added to Windows 11 to select the Set as default printer option for it.

- Press the OK button on the confirmation prompt. Now your default wireless printer will have a green checkmark by it in the Control Panel.
How do I remove a printer in Windows 11?
When you get a new printer, you should remove the old one from Windows 11. You can remove added printers via Settings as follows:
- Press the Windows key + I keyboard shortcut for opening Settings.
- Click Bluetooth & devices on the left of Settings.
- Select Printers & Scanners to view your added printers.
- Double-click the added printer you want to remove to open settings for it.
- Then press the Remove button.

- Click Yes to confirm you want to remove the printer.
How come my wireless printer isn’t detected when I try to add it?
Network discovery needs to be enabled for Windows 11 to detect it. If your wireless printer isn’t detected, it might be because that feature is disabled on your PC. This is how you can enable network discovery on your computer:
- Open the Control Panel as specified in the first three steps of the third method.
- Select the Network & Internet category.
- Click Network & Sharing Center to open that applet.

- Next, click Change advanced sharing settings on the left of the window.

- Select the Turn on network discovery radio button for your private profile if that option is disabled.

- Also, click the Turn on automatic setup of network connected devices checkbox to select that option.
- Press the Save changes button to apply the setting.
Some printers from the bigger manufacturers have supporting software. So, you might also be able to add your printer to Windows 11 with its supporting app instead. If your printer model has supporting software, you’ll probably be able to download it from Microsoft Store.
However, you can always add a wireless printer or non-wireless one to Windows 11 with its built-in options. Adding wireless printers to that platform with the above three methods is usually quick and straightforward.
Check out this guide if the printer is not working on Windows 11. Most commonly, it is recognized by the OS, but an error appears every time you try to print.
As for those times when your Brother printer won’t connect via USB on Windows 11, you need to take action as well since you can’t change printer settings or plug more than one printer through USB.
If you have any other thoughts or opinions regarding this subject, do not hesitate to leave a comment in the section below.
Start a conversation