
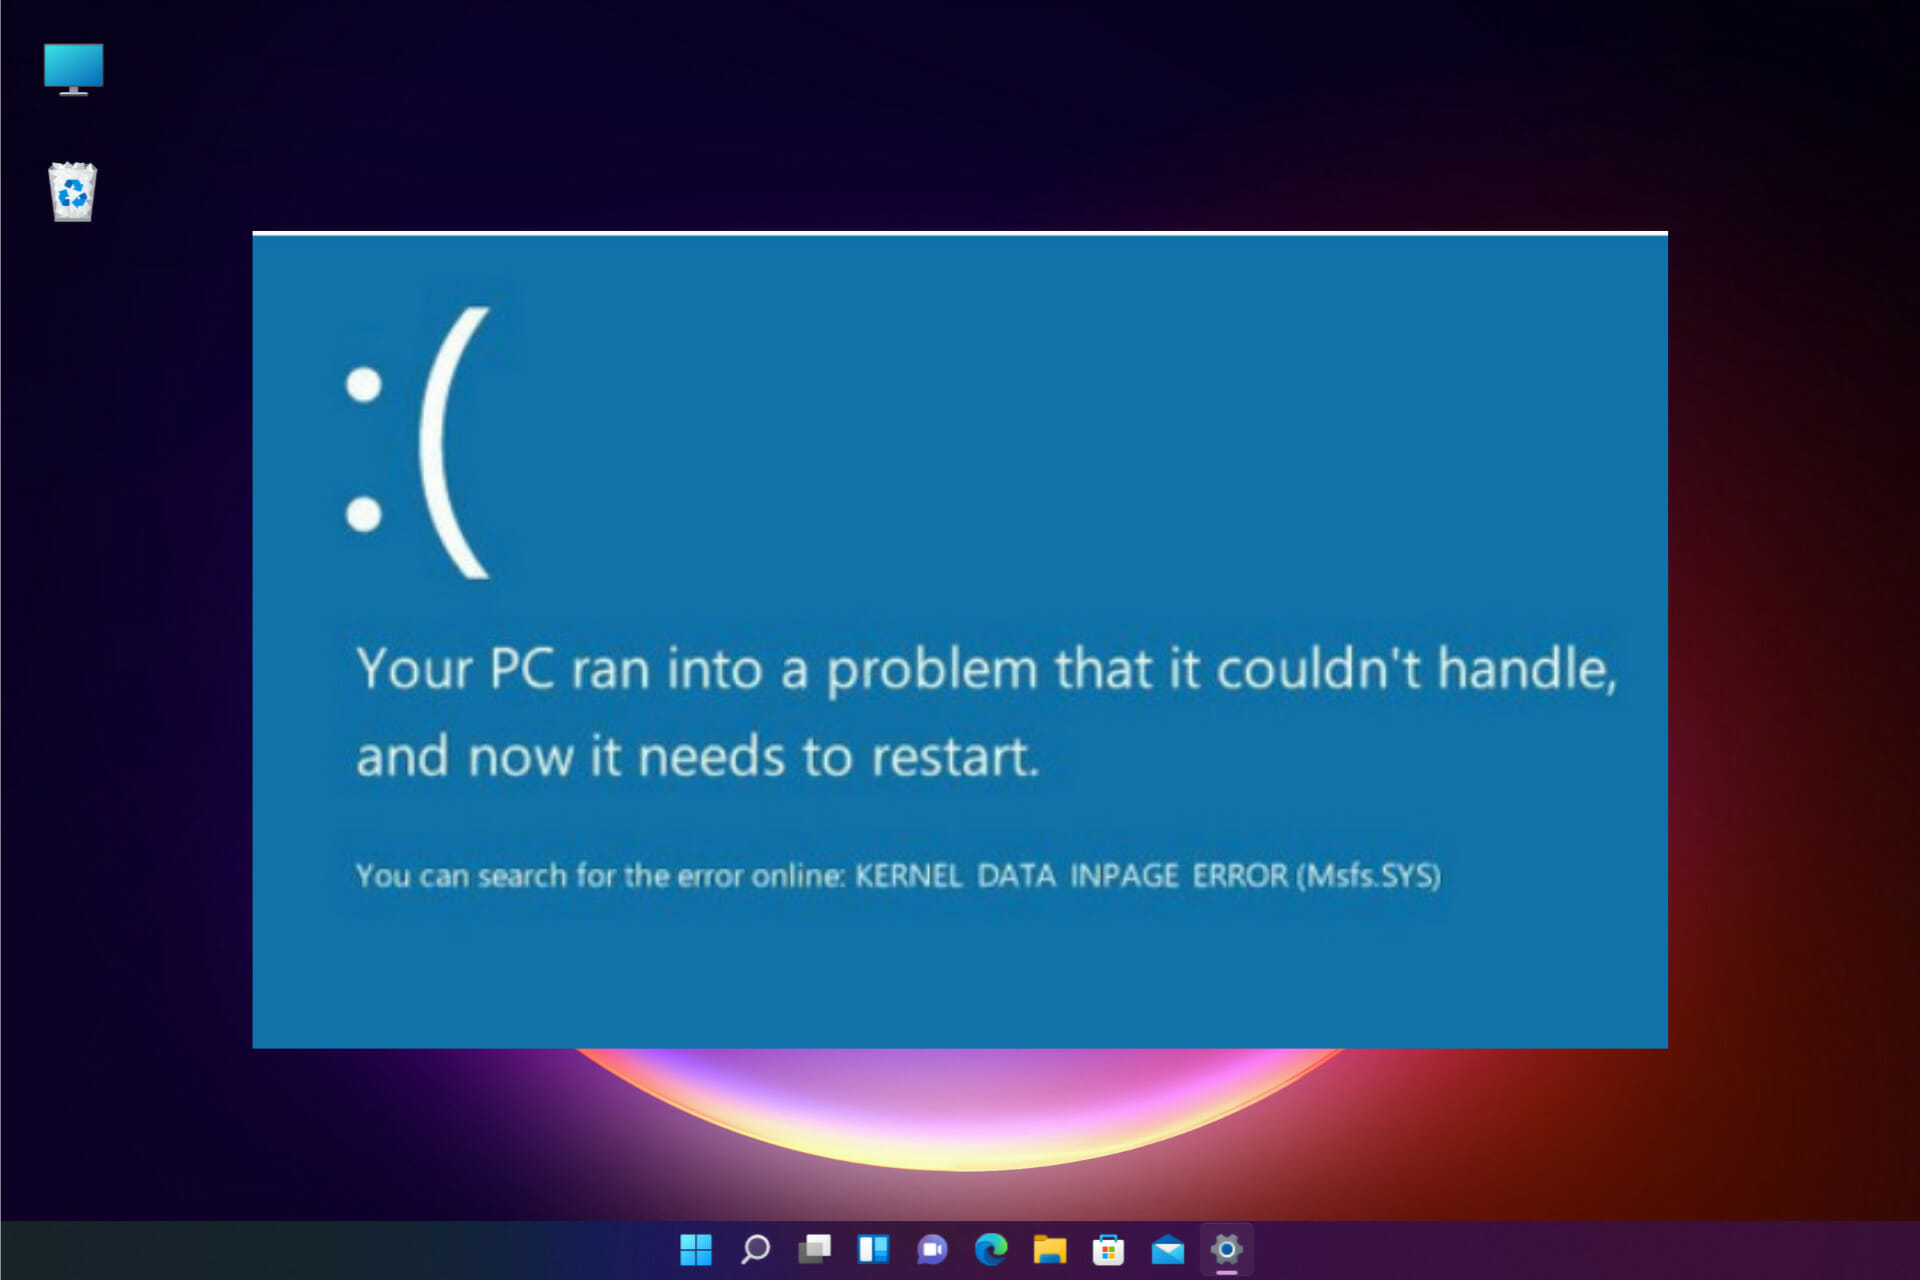
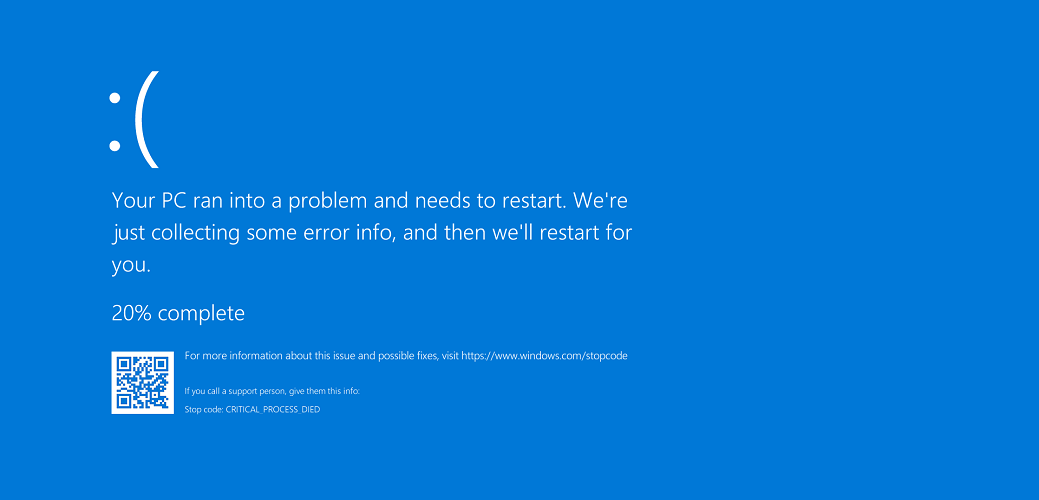
- The KERNEL DATA INPAGE ERROR in Windows 11 is a very serious BSoD because it can affect your stored data.
- This usually signals problems with your drive so you should perform a backup of your files as soon as possible.
- Check the cables before starting to tweak the software because this can be caused by a connection issue.
XINSTALL BY CLICKING THE DOWNLOAD FILE
Windows 11 has a lot of new features and a great design, but it also inherited some of the bugs from Windows 10.
For instance, the KERNEL DATA INPAGE ERROR known by Windows 10 users too is pretty serious because it can lead to corrupted files and even data loss.
The KERNEL DATA INPAGE ERROR BSoD is directly related to storage drive issues and it’s a problem that you need to address as soon as possible.
Back up your data and make the preliminary checks
As this stop code can signal problems with your storage drive, before starting any software troubleshooting, you need to take a few preliminary measures.
➡ Back up your data
First of all, try to back up your data as soon as possible. If your drive is having any malfunctioning problems, this can get even worse and you might lose your data.
So, you can manually copy and paste your sensitive data on an external drive or on another drive installed on your PC.
Make sure you copy them on another drive, not on another partition from the same drive because all partitions from that drive might be affected.
➡ Check the cables and connections
If you have access to the inside of your PC case, check all the cable connections to and from your hard drive.

One of them might be loose or have an improper connection and this might cause the KERNEL DATA INPAGE ERROR.
However, if opening the case voids any warranty or if you’re not familiar with this operation, leave this procedure for the manufacturer or the service center.
This may come with error codes that can help you identify the cause a lot faster. Here are some of the possible error codes:
- 0x0000007A – This error can be causes by file access errors
- 0xC000009C – Bad hard drive sectors may be the reason for this code
- 0xC000009D – The code signals possible imperfect connections or hard disk failure
- 0xC000016A – It’s triggered by bad sectors on your hard drive
- 0xC0000185 – Check the cables for any damage or improper connections
How can I fix the KERNEL DATA INPAGE error in Windows 11?
1. Use the Startup Repair
- Start Windows 11 with a bootable media or use a hard power off for three times in a row to boot the OS into Recovery Mode.
- Select Troubleshoot.
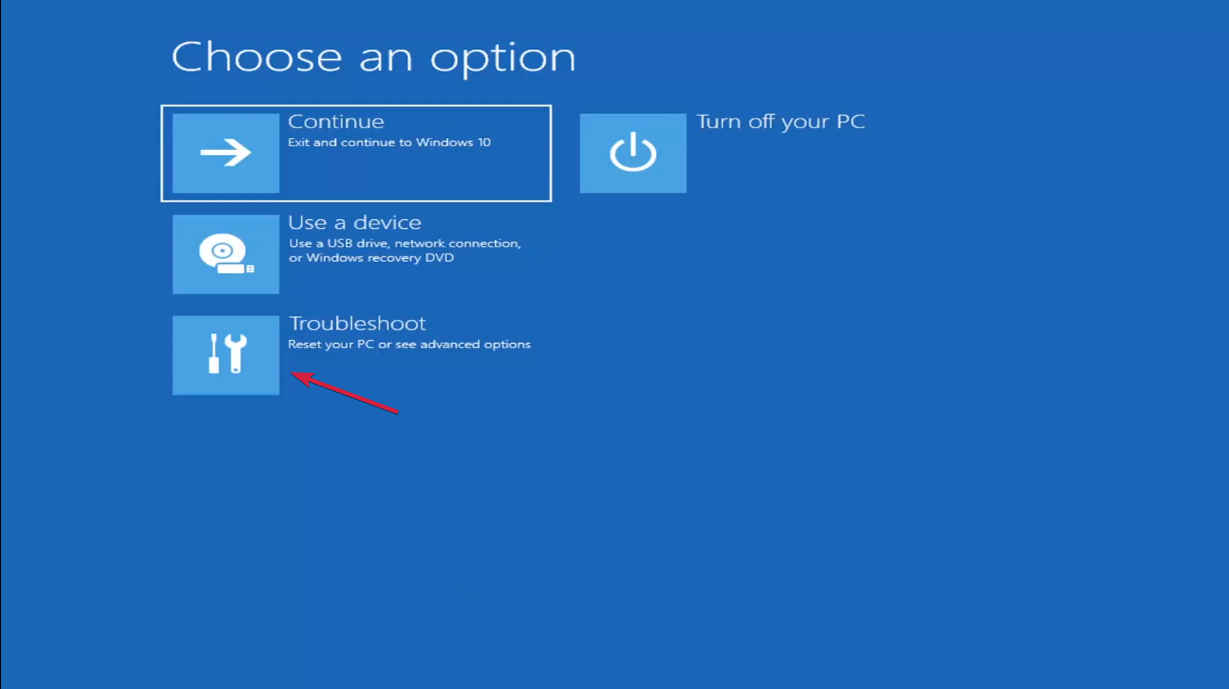
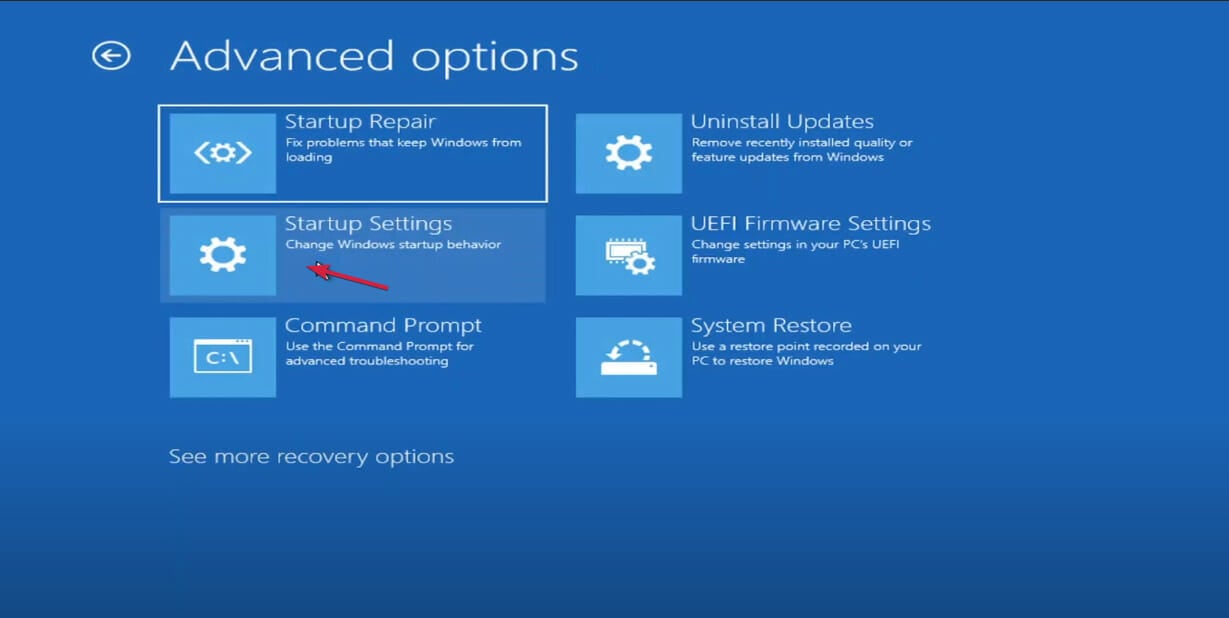
- Click on Advanced options.

- Next, choose Startup Repair.

- If the system detects any issues, it will start fixing them. If you get the message that Startup Repair couldn’t repair your PC, click on the Advanced options button.
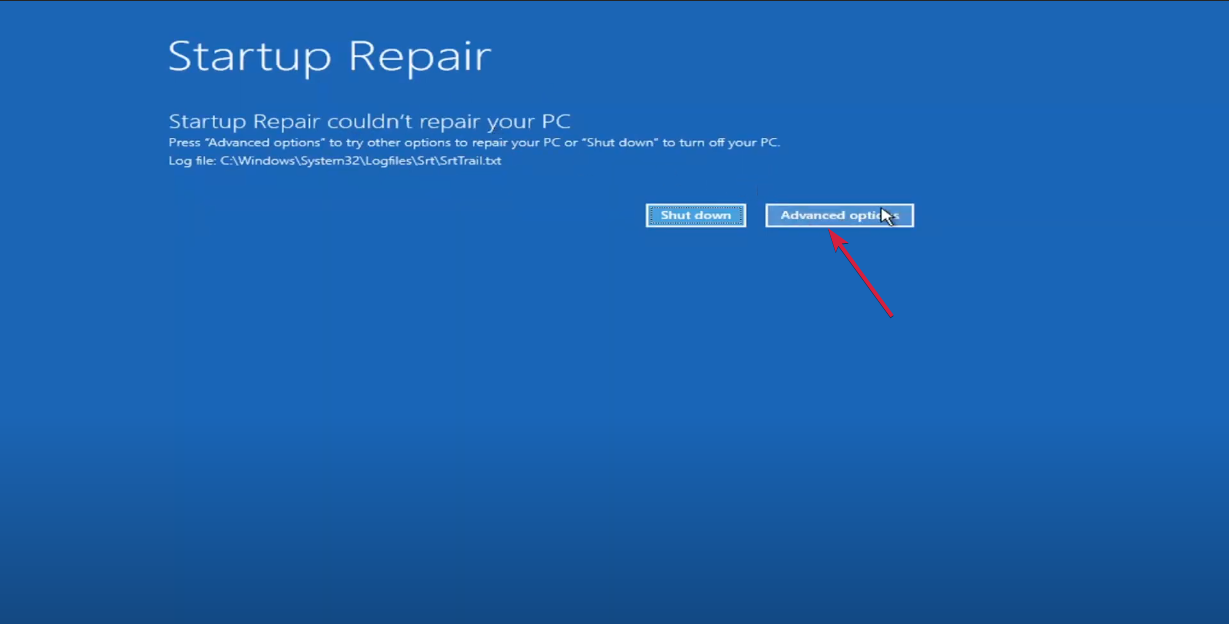
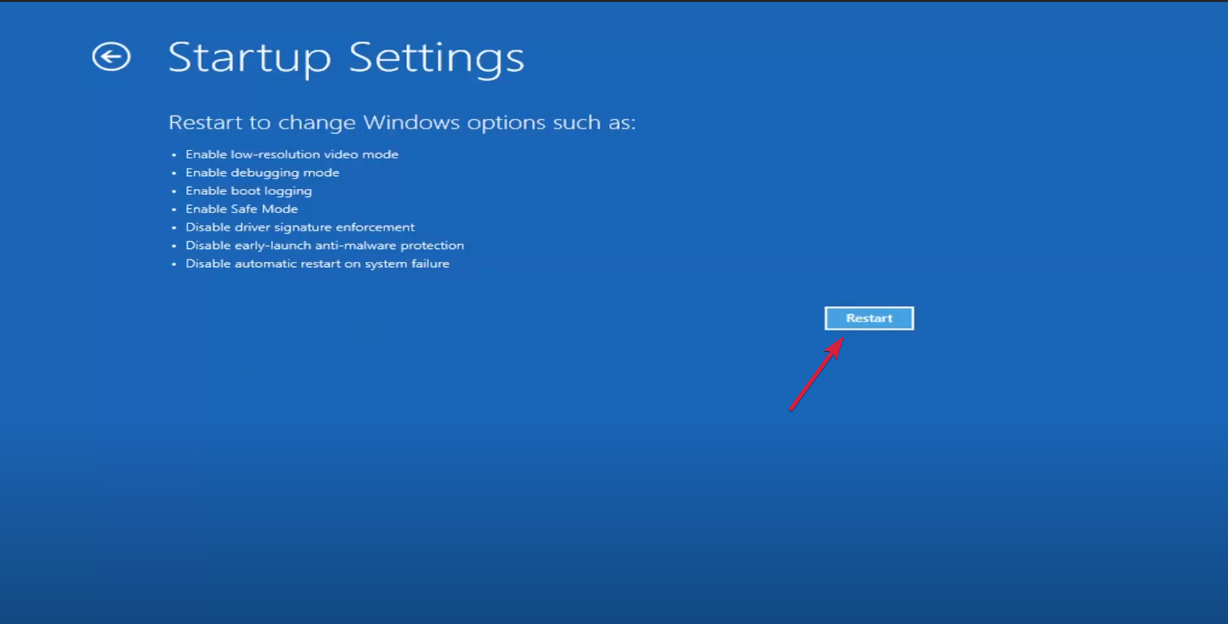
- You will get back to the main screen. Select again Troubleshoot, then Advanced options, and in the new window click on Startup Settings.
- Next, click on Restart to boot the PC in Safe Mode.
- After the PC restarts in Safe Mode, check if the problem occurs again. If it doesn’t, it means that a third party software is causing this issue and you need to uninstall it. If the issue persists, start the PC again in Recovery Mode.
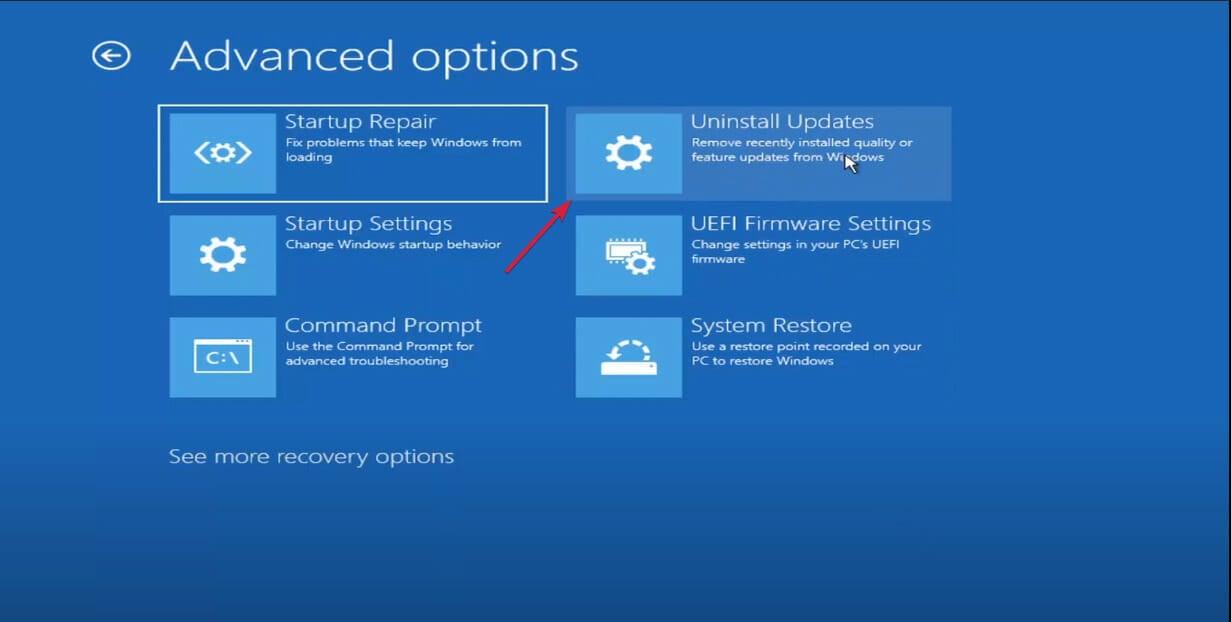
- Select Advanced options again from the main window.

- Now select Uninstall Updates and roll back any recent update if you suspect that they caused this issue.
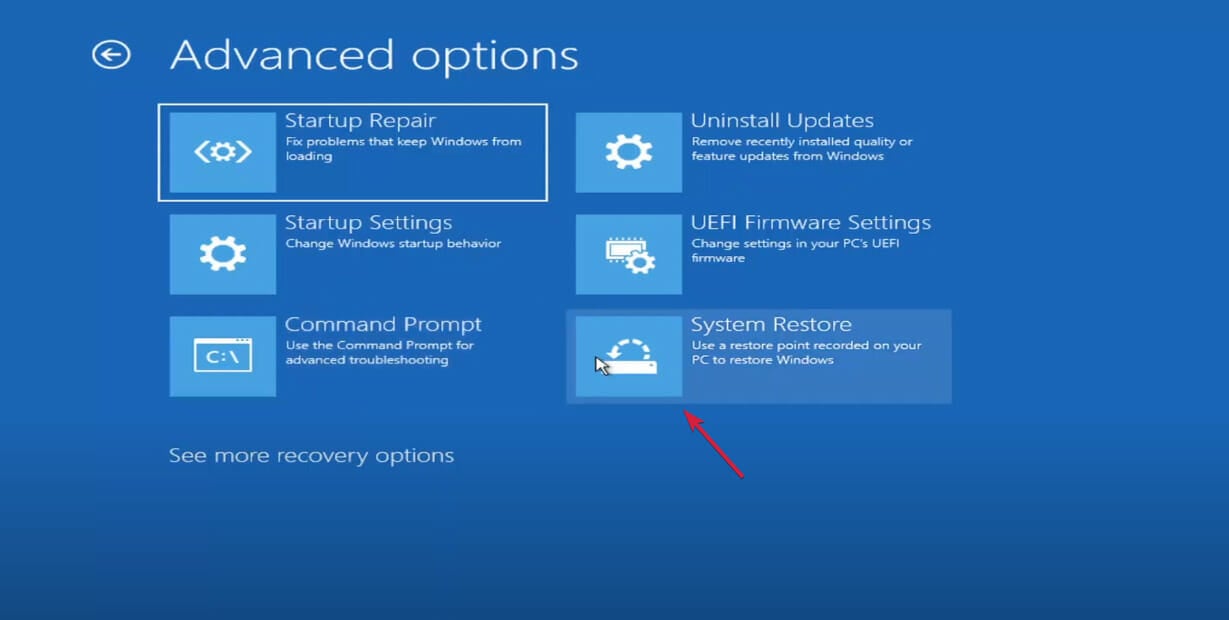
- If the previous step doesn’t solve the problem, you can also choose System Restore from the same menu and roll back your system to a previous restore point in time.
If you don’t have a bootable media yet, learn how to create a Windows 11 bootable USB drive and also keep it safe for any other occasions when you want to restore your system.
2. Run a CHKDSK scan
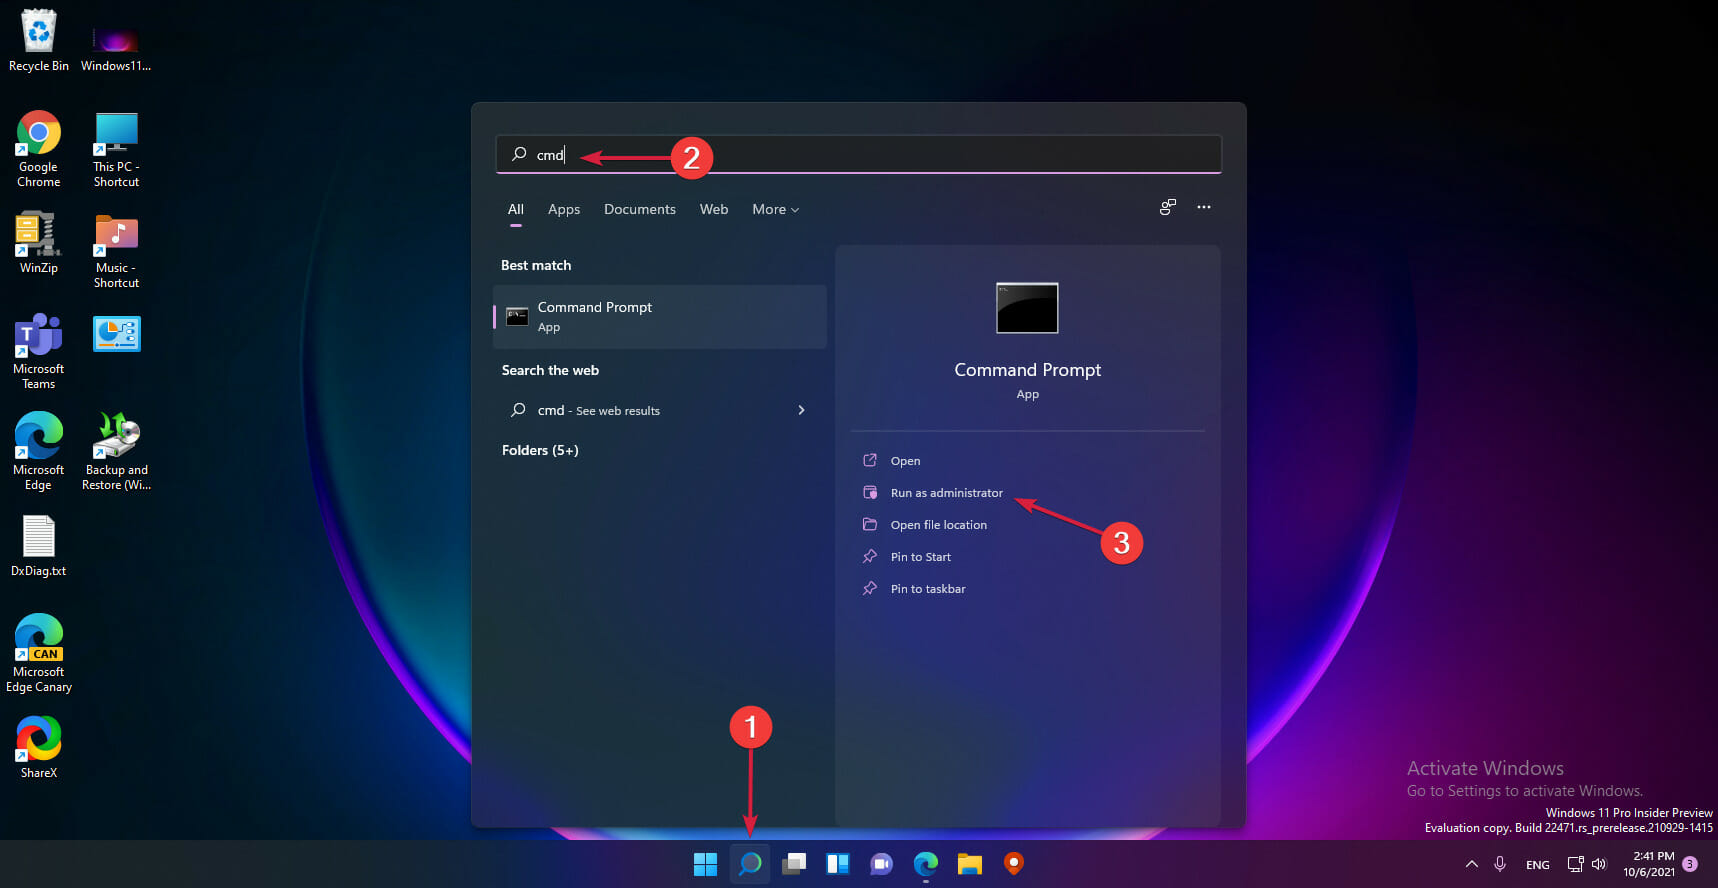
- Press the Search icon from the Taskbar, type cmd, and click on Run as administrator to start Command Prompt with full privileges.

- Type or paste the following command and press Enter to run it (C: is the default drive for the system but you can replace it with the drive letter of your corresponding system partition):
chkdsk /r /f C: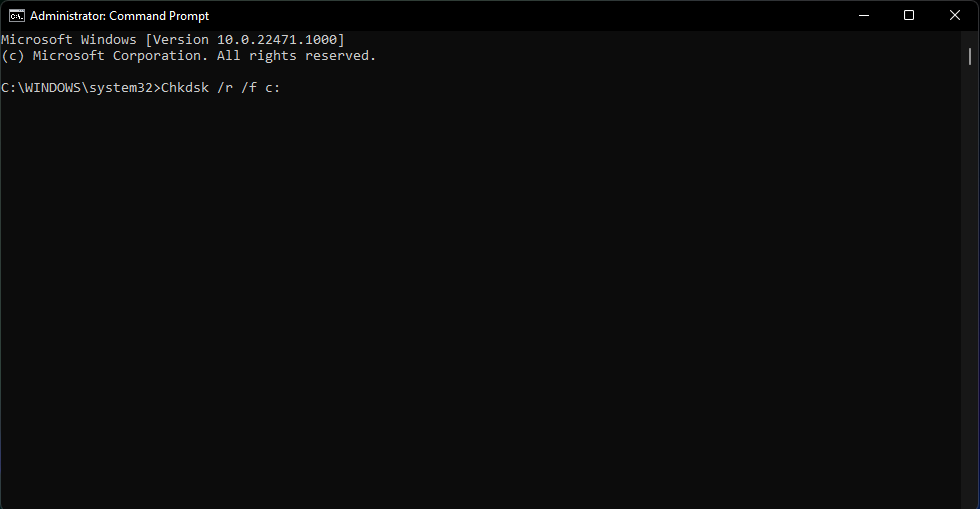
- CHKDSK will attempt to fix any problems found on your drive so wait patiently for the process to finish and then restart your PC.
3. Run a full antivirus scan
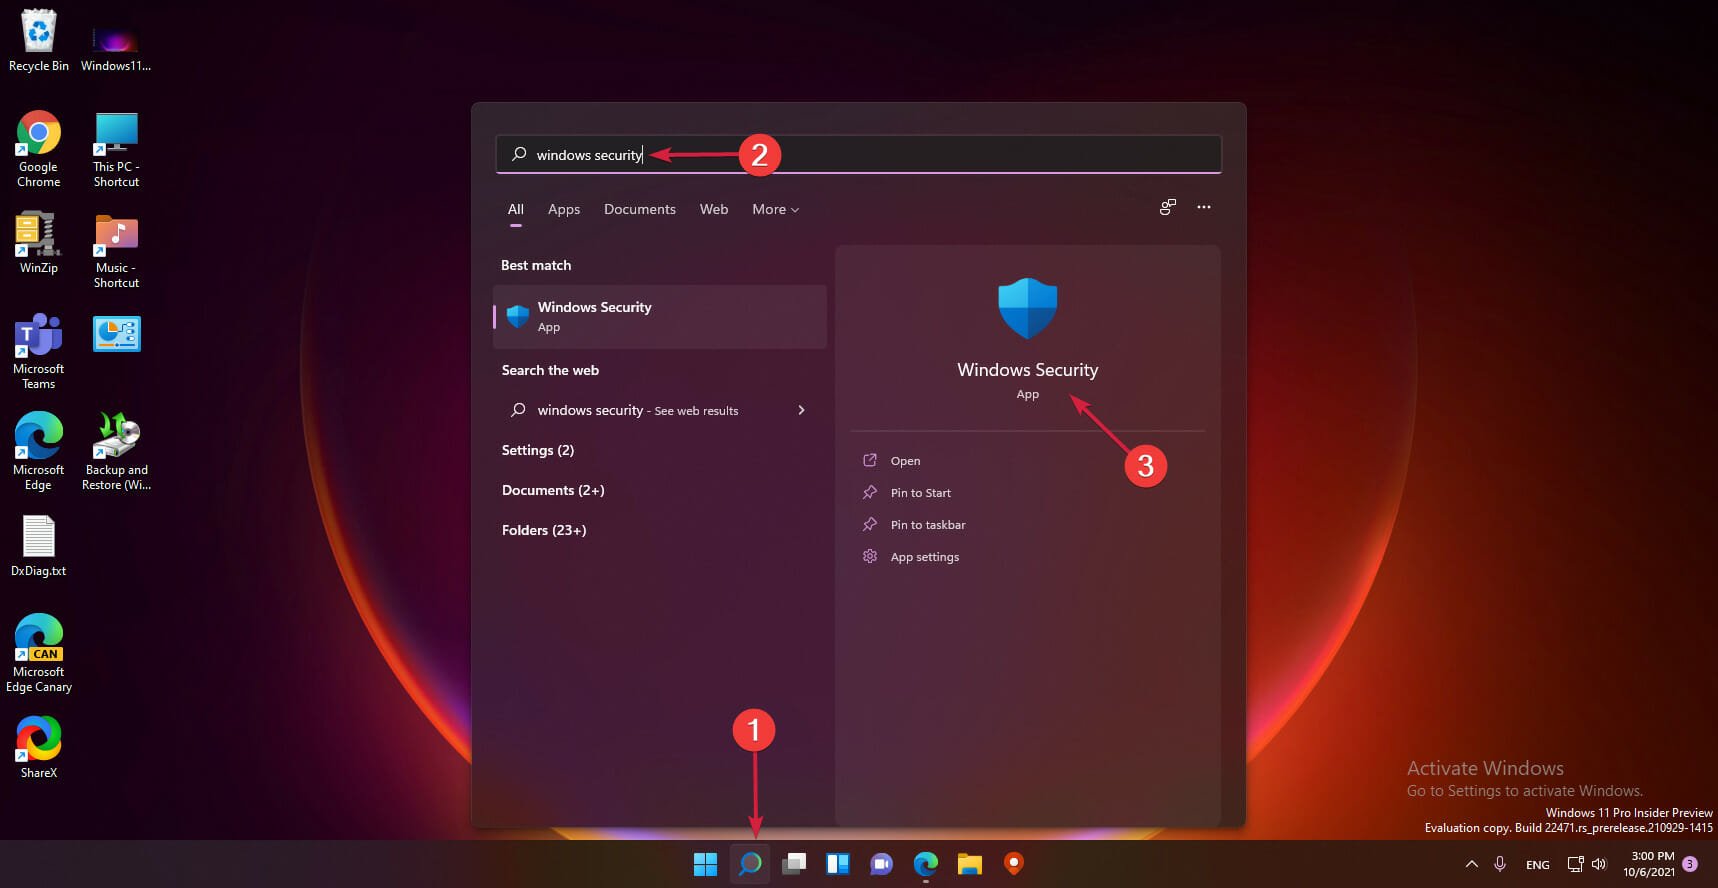
- Click the Search icon on the Taskbar, type windows security, and click on the app from the results.
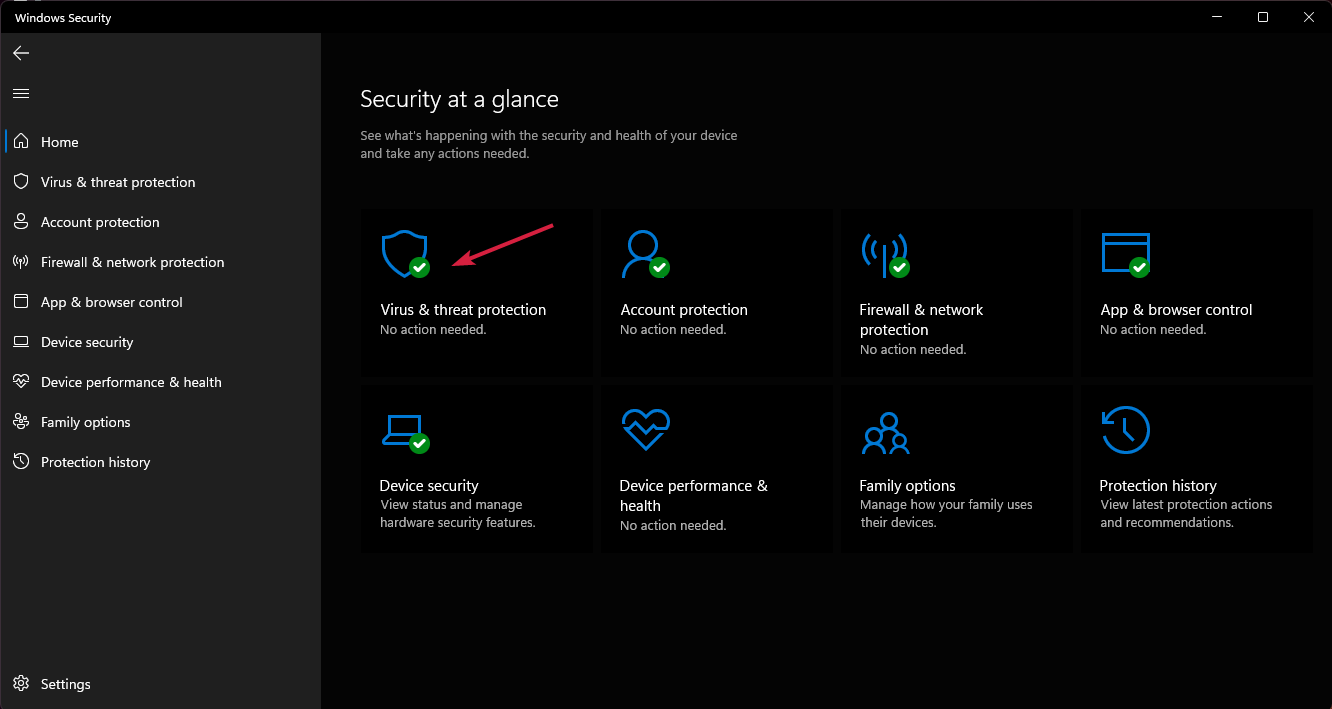
- Now click on Virus & threat protection.
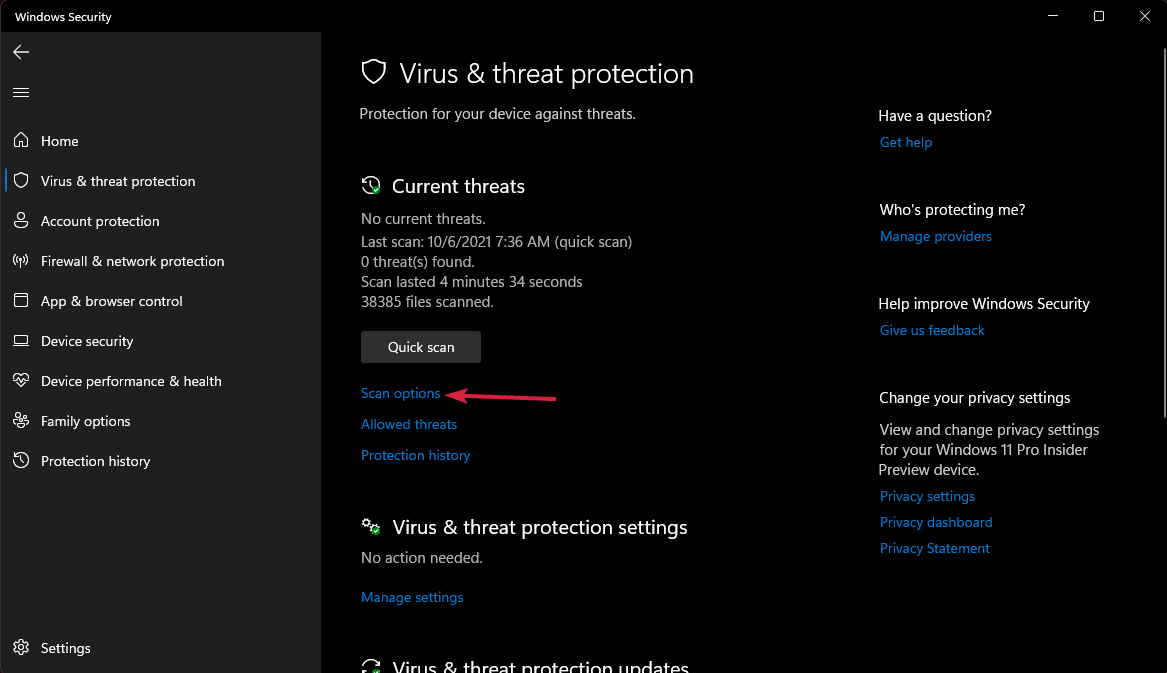
- Select Scan options right under the Quick scan button.
- Check the Microsoft Defender Offline scan and hit the Scan now button.
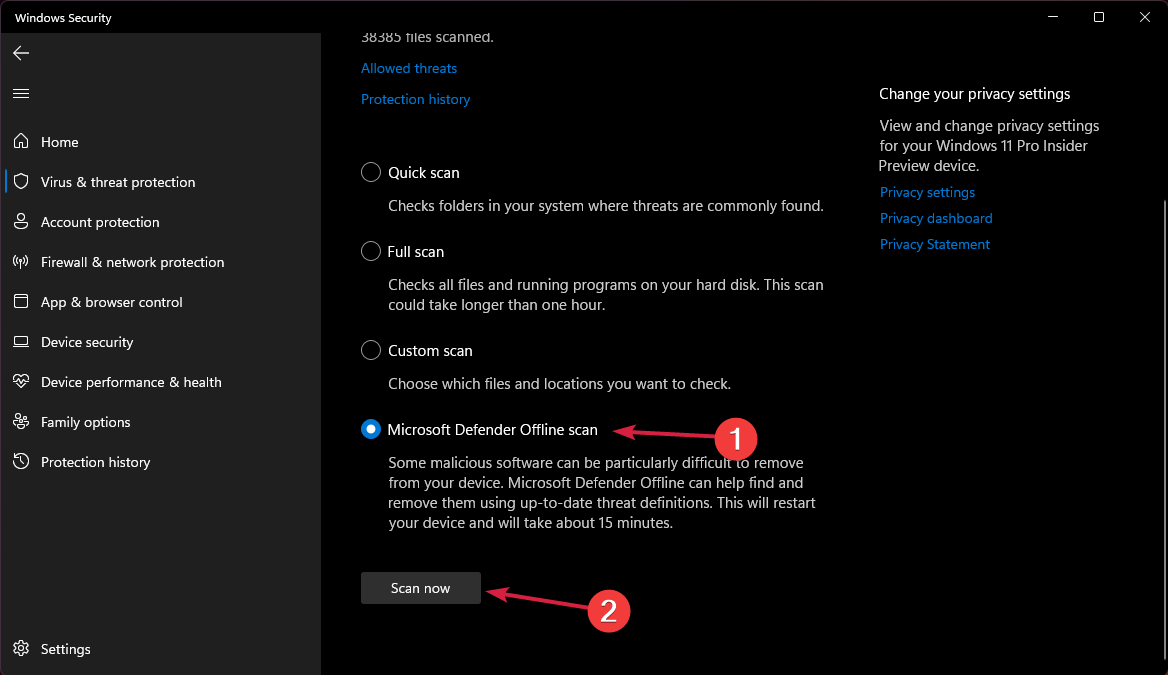
- You need to restart your PC for the scan procedure to start.
4. Update or reinstall the disk driver
4.1 Update the driver
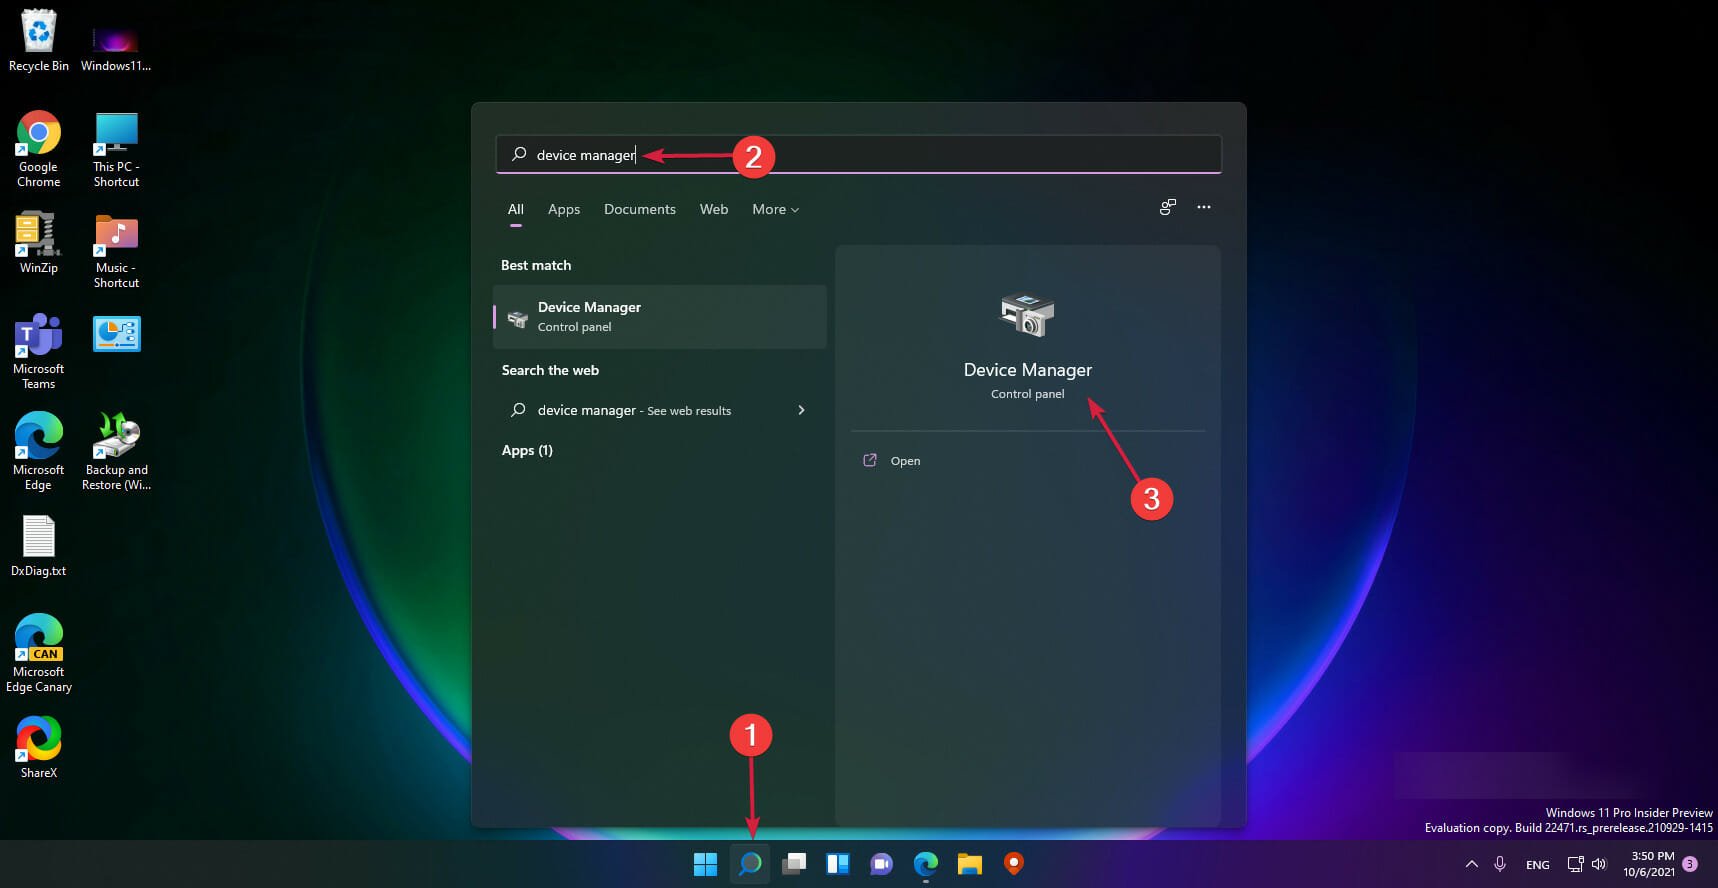
- Click the Search icon, type device manager, and select the app from the results.
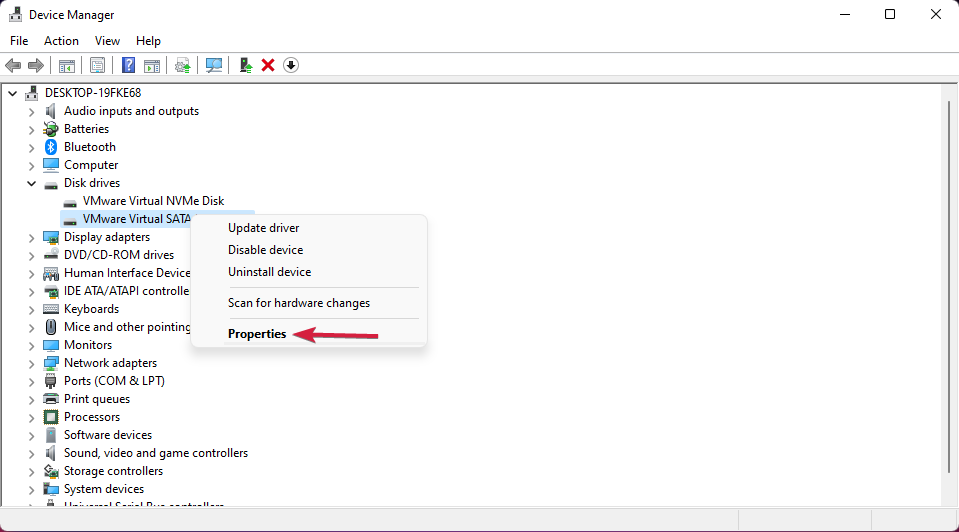
- Right click the driver from the Disk drives section and select Properties.
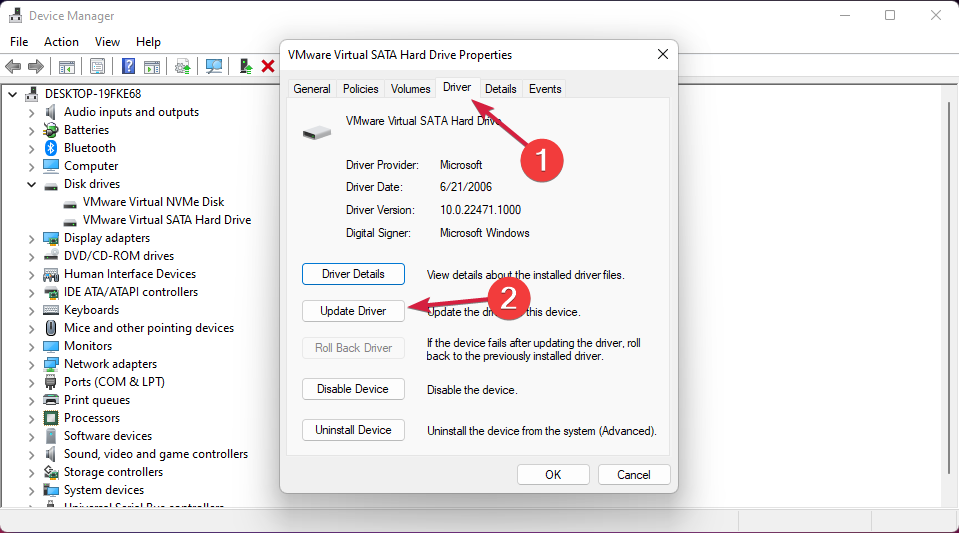
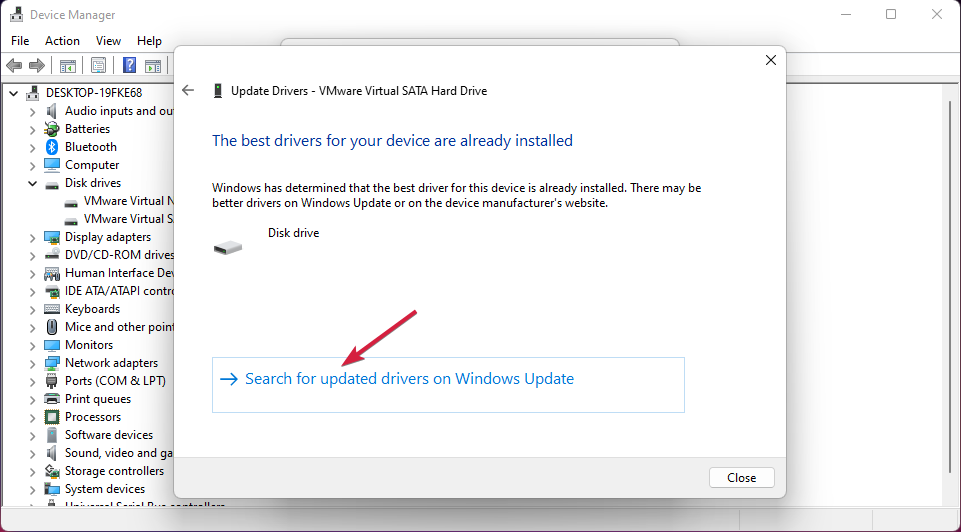
- Select the Driver tab, then click on the Update driver button.
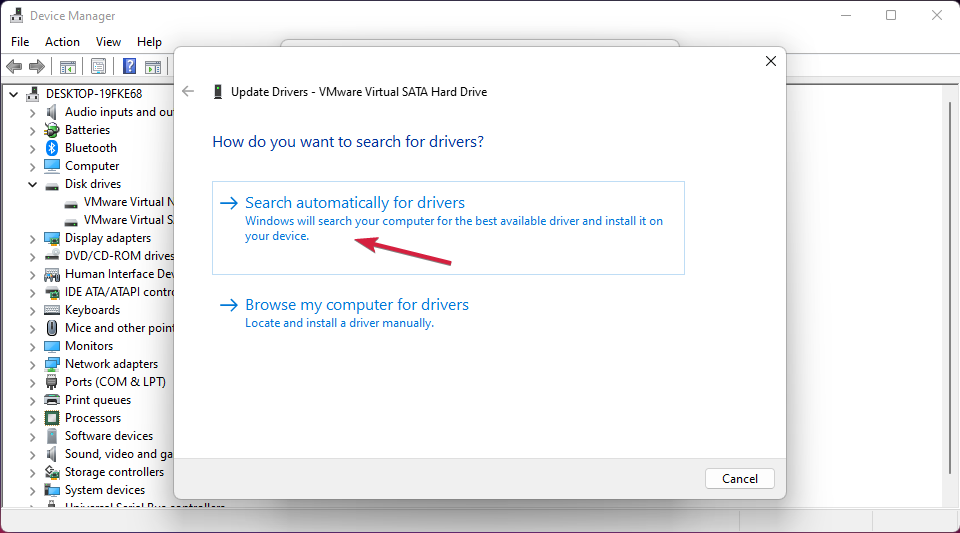
- Choose the first option, Search automatically for drivers.
- If the system finds any new drivers, it will install them. If not, you can also click on Search for updated drivers on Windows Update.
- You will be redirected to the Windows Update menu so hit the Check for updates button.
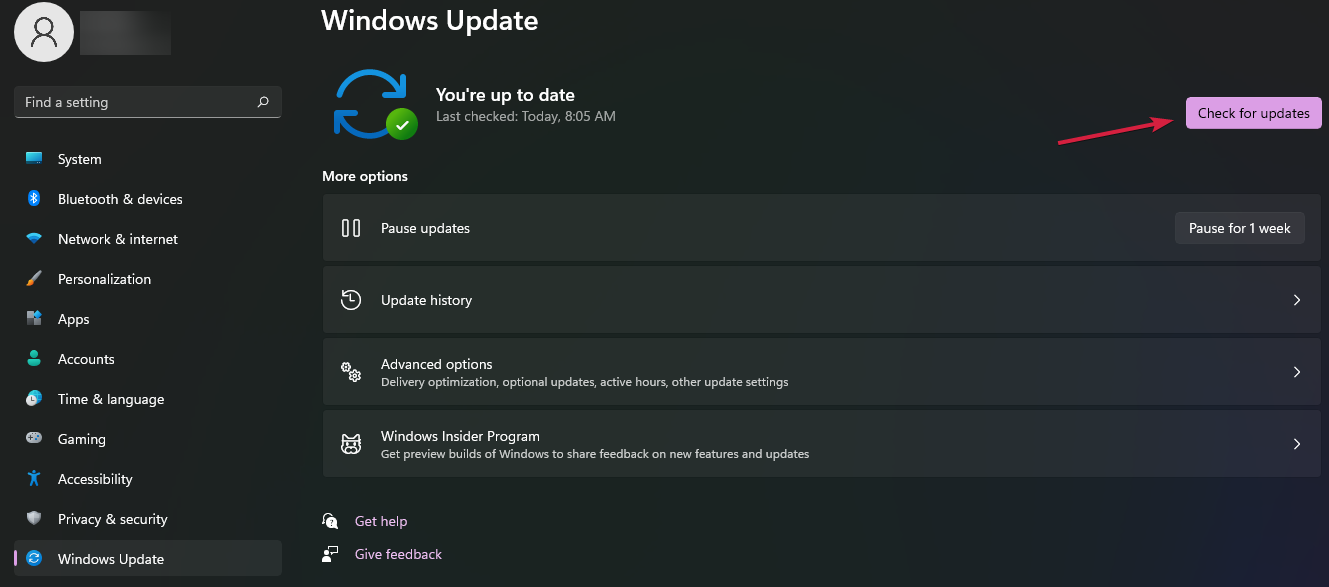
- If there are any system updates, they will be downloaded and installed and some updates may also contain new disk drives drivers.
4.2 Reinstall the disk driver
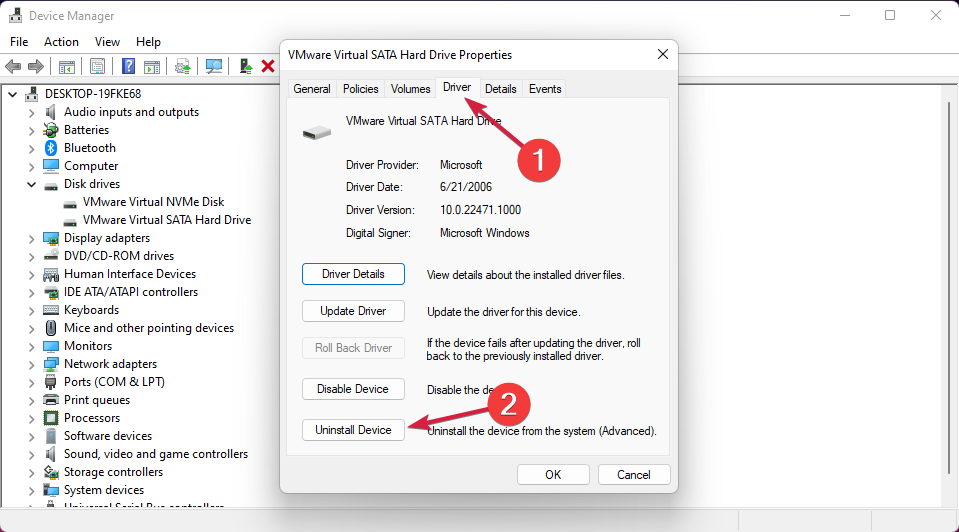
- Select the Search icon from the Taskbar, type device manager, and select the app from the results.

- Expand the Disk drives section, right click the driver, and select Properties.

- Select the Driver tab and then select Uninstall device.
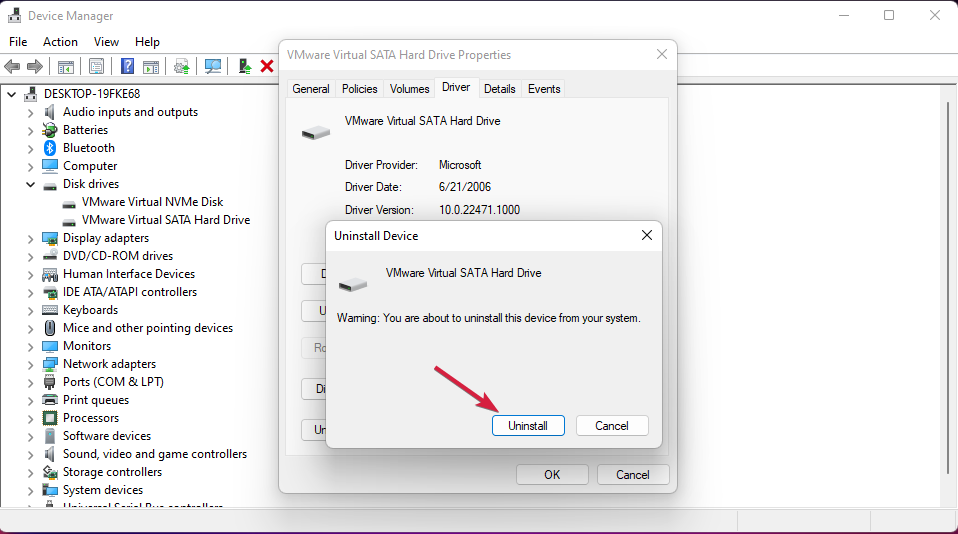
- Click on Uninstall to confirm your choice.
- Right-click on the Disk drives section and select Scan for hardware changes.
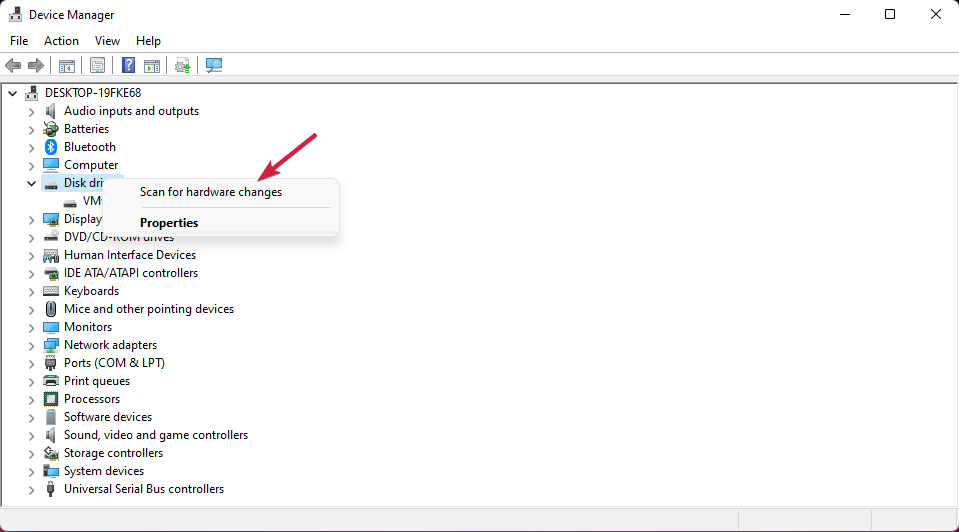
- The system will reinstall the latest driver for the drive.
5. Perform a SFC scan
- Click the Search button from the Taskbar, type cmd, and select Run as administrator to start Command Prompt with admin privileges.
- Type or paste the following command and press Enter to run it:
sfc /scannow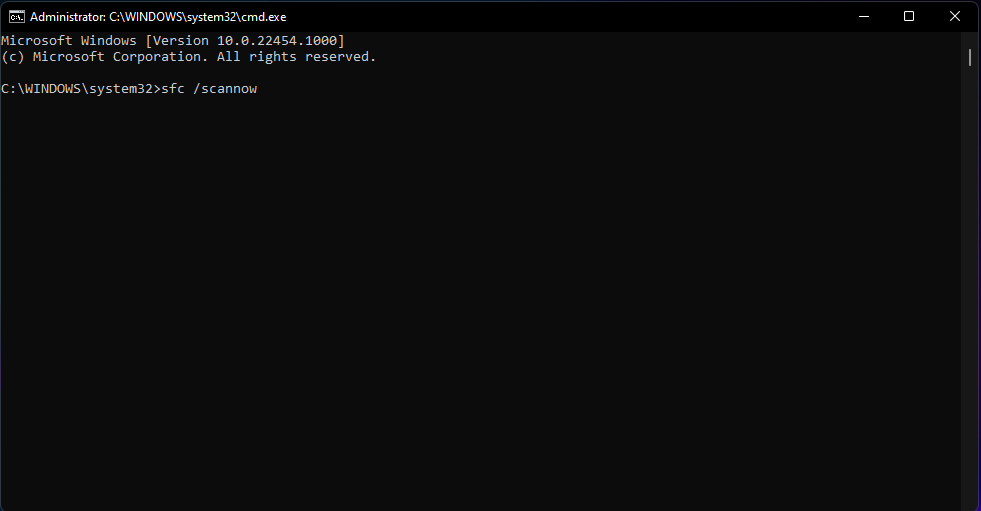
- Wait for the scan to complete the scanning process. If there are any corrupted system files, the tool will detect and repair them.
6. Set the Paging system to Automatic
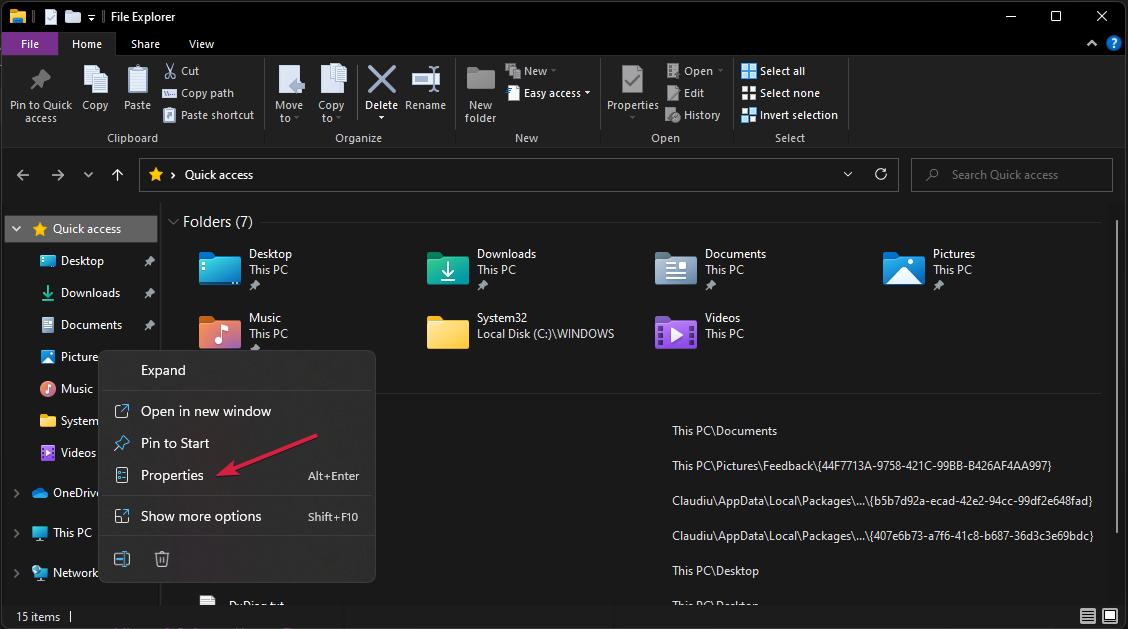
- Press the Windows key + E to start File Explorer.
- Right-click on This PC and select Properties.
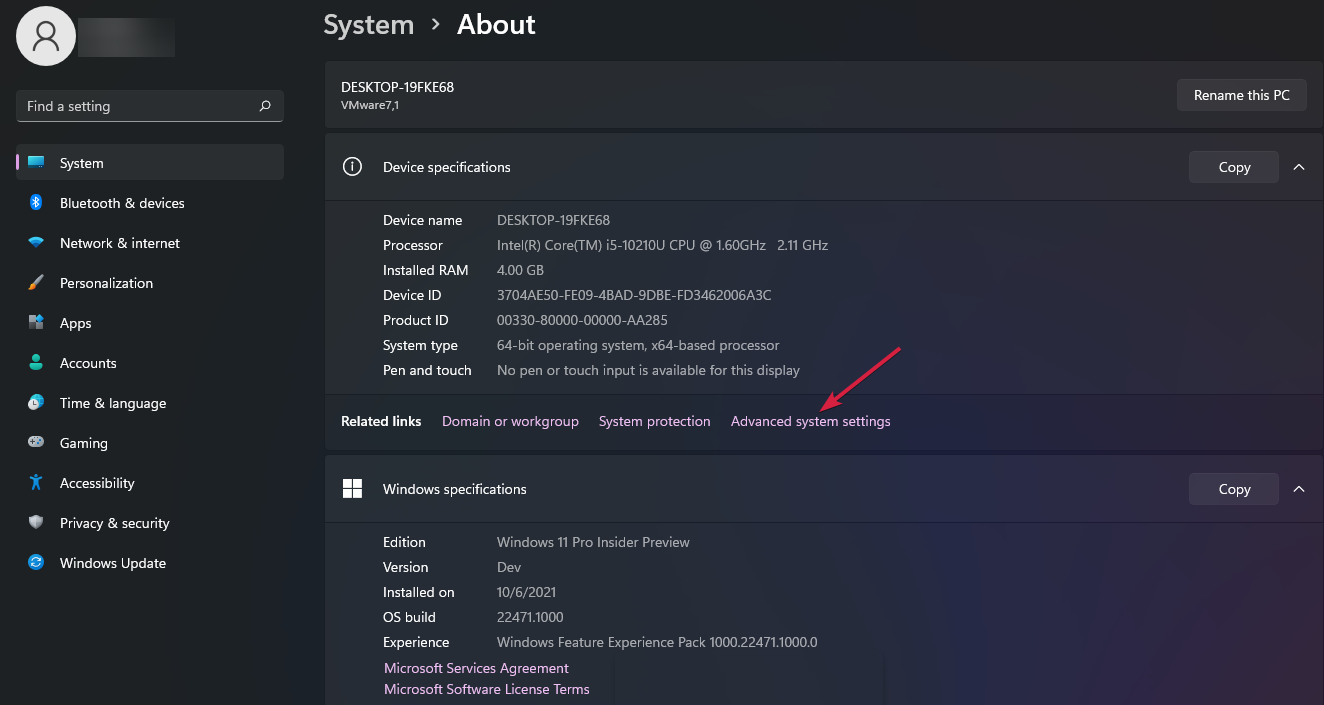
- Select Advanced system settings from the right pane.
- Hit the Settings button under the Performance section.
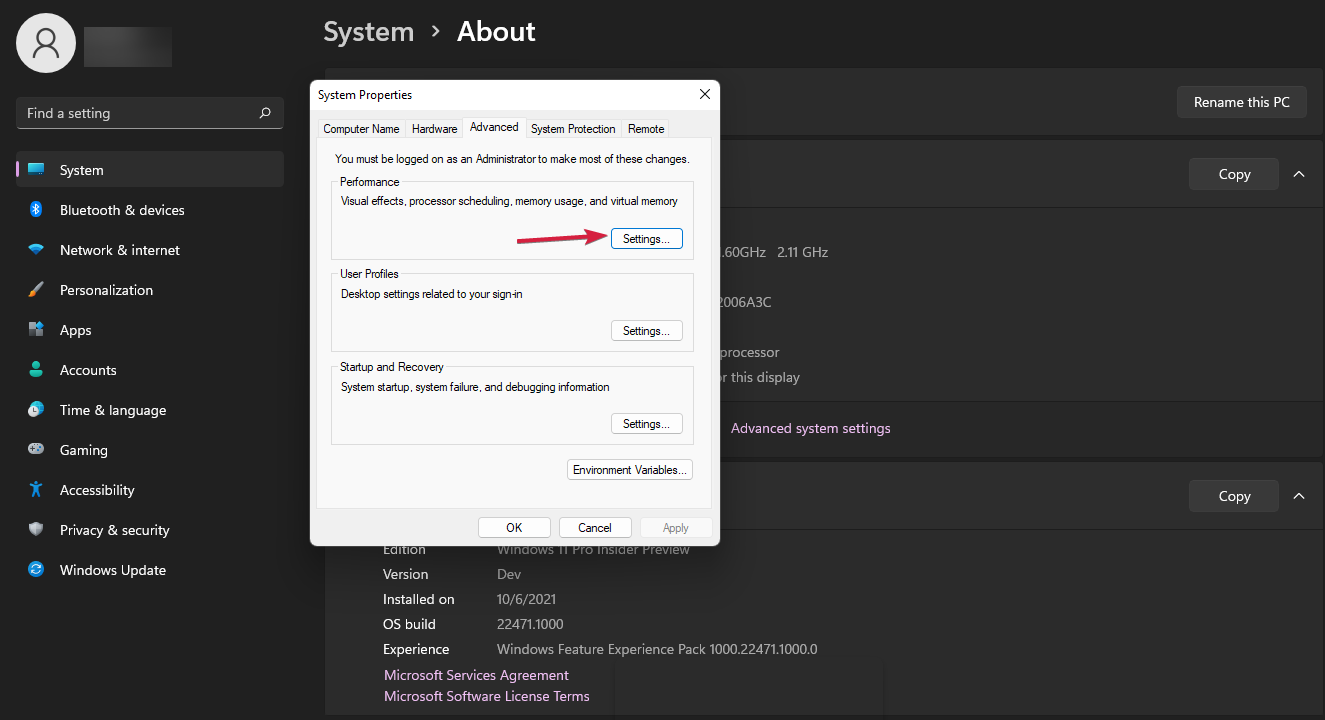
- Click on the Advanced tab, then click the Change button.
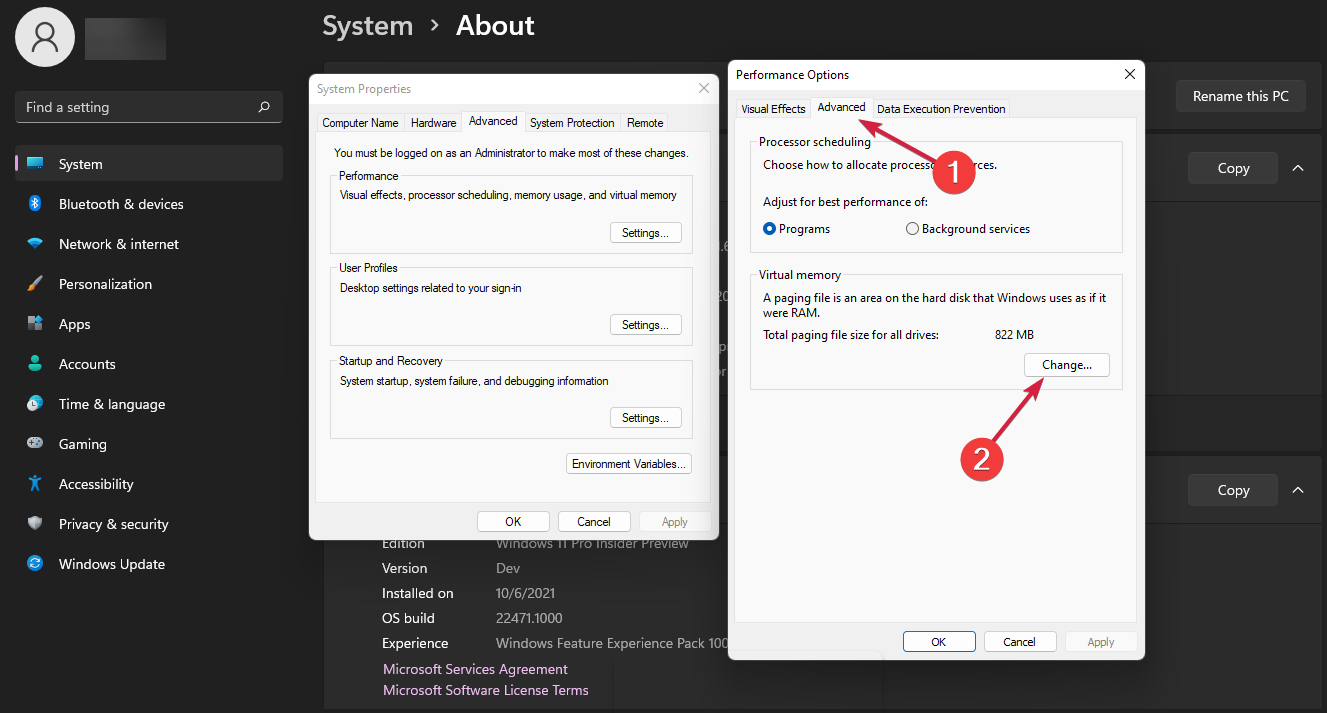
- Check the Automatically manage paging file size for all drives box and click OK.
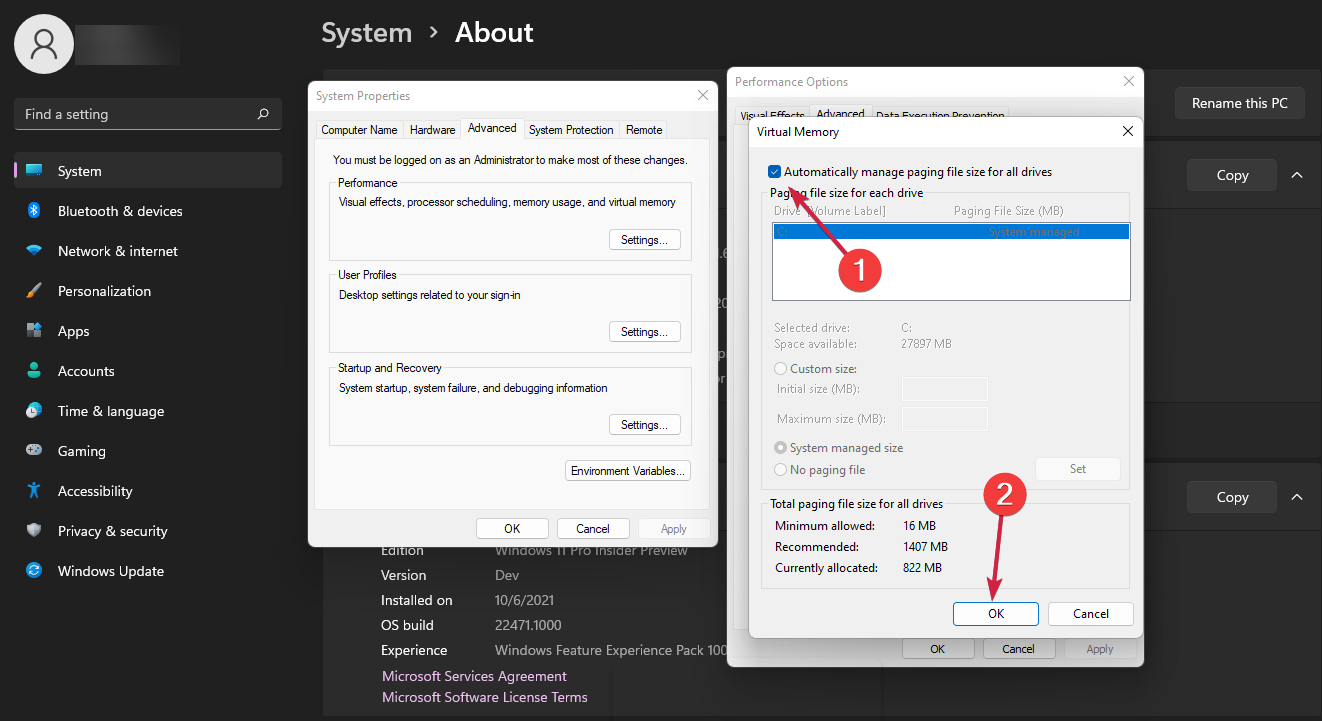
- Restart the PC for the changes to take effect.
What is a kernel failure?
The kernel is an integral part and the heart of the operating system and it’s the first program that is loaded on startup.
Then, the kernel failure or kernel panic is the operating system’s safety measure to stop all systems if it detects an internal fatal error.
It means that the system cannot recover from that error and it’s a way to protect your data and hardware integrity from any further damage.
Usually, this failure comes with a blue screen and an error code so that you can troubleshoot the problem and fix it before the problem gets worse.
KERNEL DATA INPAGE ERROR is just one of the BSoD errors that might occur on your PC and they are almost identical to the ones from the old Windows 10.
We hope that our solutions helped you fix the KERNEL DATA INPAGE ERROR and now your computer works perfectly again.
However, we have to mention that if it’s really a hardware problem with your storage drive, you should think about replacing it as soon as possible.
When the drive is showing signs of fatigue or malfunctioning, it’s a lot wiser to use the best backup software and look for a new component.
If you have any other suggestions or if you’ve experienced this problem first hand, tell us all about it in the comments section below.
Start a conversation