
- Startup Repair couldn’t repair your Windows 10 PC? Well, we’ve got some quick fixes for you.
- When your Windows 10 Startup Repair is not working, make sure to check your antivirus settings.
- Disable Automatic Repair and see if this makes any difference.
- Another great tip to solve such Windows 10 Automatic Repair issues is to use Command Prompt.

XINSTALL BY CLICKING THE DOWNLOAD FILE
Windows 10 comes with its own repair tool – Automatic Repair. However, sometimes it fails to fix whatever problems your system encounters and notifies you that Windows 10 Automatic Repair couldn’t repair your PC.
Here are some more error messages and codes you may encounter:
- Windows 10 automatic repair failed
- log file c /windows/system32/logfiles/srt/srttrail.txt Windows 10
- bootrec.exe /fixboot access is denied Windows 10
- Windows 10 automatic repair your pc did not start correctly
So in this article, we’ll detail the following issues:
- How do I fix Windows 10 automatic repair couldn’t repair your PC?
- How do I fix the Windows automatic repair loop?
- How do I fix Windows 10 Automatic Repair Loop without disc?
How do I fix Windows 10 automatic repair couldn’t repair your PC?
1. Run fixboot and/or chkdsk command
- Restart your PC and repeatedly press F8 before the Windows logo appears.
- Choose Troubleshoot > Advanced Options.
- Select Command Prompt from the list of options.
- Write the following lines and press Enter after each line in order to run it:
bootrec.exe /rebuildbcd | bootrec.exe /fixmbr | bootrec.exe /fixboot - Additionally, you can also run a chkdsk commands as well. To perform these commands, you need to know drive letters for all your hard drive partitions.
In Command Prompt you should enter the following: - Restart your computer and check if the issue is resolved.
If you encounter any issues or your chkdsk gets stuck, check this guide to solve the problem.
2. Run DISM
- Enter the Boot Options menu like in the previous solution.
- Choose Troubleshoot > Advanced options > Startup Repair.
- Click the Restart button. Your computer should now restart and give you a list of options. Choose Enable Safe Mode with Networking.
- When Safe Mode starts, you need to download an updated version of the driver that’s giving you trouble. You can download the driver from the manufacturer’s website, and you can save it to your USB flash drive.
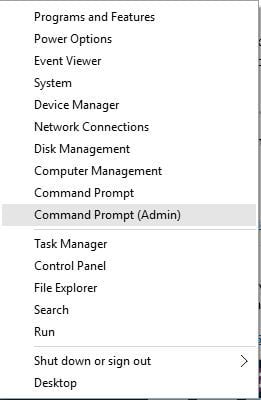
- Press Windows Key + X and choose Command Prompt (Admin) from the list.

- Copy the following and press Enter to run it:
- After the process is done, restart your computer.
- When Windows 10 starts, install the driver that you’ve downloaded and the issue should be resolved.
This solution is a bit tricky because you need to know which driver is causing you this problem. Even if you don’t know, you can still try this solution and skip Step 3.
If, for some reason, you can’t boot into Safe Mode, take a look at our troubleshooting guide on how to properly access Safe Mode.
How do I fix automatic repair loop on Windows 10?
1. Delete the problematic file
- Access the Boot Menu as shown before.
- Choose Troubleshoot > Advanced Options > Command Prompt.
- When Command Prompt opens, enter the following, one by one:
C:cd WindowsSystem32LogFilesSrtSrtTrail.txt
After the file opens, you should see a message like this: Boot critical file c:windowssystem32driversvsock.sys is corrupt. (It might look different for you).
Now, you need to perform some research into what exactly this problematic file does. In our case, for instance, vsock.sys was a file related to a third-party application called VMWare.
Since this isn’t an operating system file that is required by Windows 10, we can delete it.
To delete a file, you need to navigate to the specified location using the Command Prompt and enter the del command. In our example, it would look like this:
cd c:windowssystem32driversdel vsock.sys

Once again, this is just an example, and you might have to navigate to a different folder and delete a different file. Before deleting a file, make sure the file you want to delete isn’t a core Windows 10 file or else you can cause damage to your operating system.
After you’ve removed the problematic file, restart your computer and uninstall the program that caused you this issue (in our case it was VMware, but it might be a different program for you).
2. Disable Automatic Startup Repair
- When Boot Options start, choose Troubleshooting > Advanced Options > Command Prompt.
- Type the following and press Enter to run it:
bcdedit /set {default} recoveryenabled No
After you’ve done this, the Startup Repair should be disabled, and you might be able to access Windows 10 again.
3. Restore Windows registry
- Wait for Boot Options to appear and start Command Prompt.
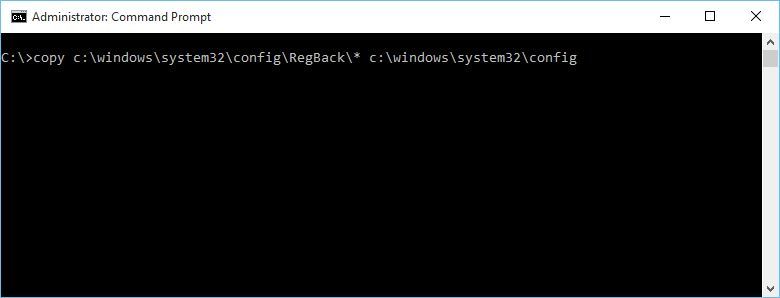
- In Command Prompt, enter the following and press Enter to run it:
copy c:windowssystem32configRegBack* c:windowssystem32config
- If you get asked to overwrite files, type All and press Enter.
- Now type exit and press Enter to exit Command Prompt.
- Restart your computer and check if the issue has been resolved.
4. Check device partition and osdevice partition
- From Boot Options start Command Prompt.
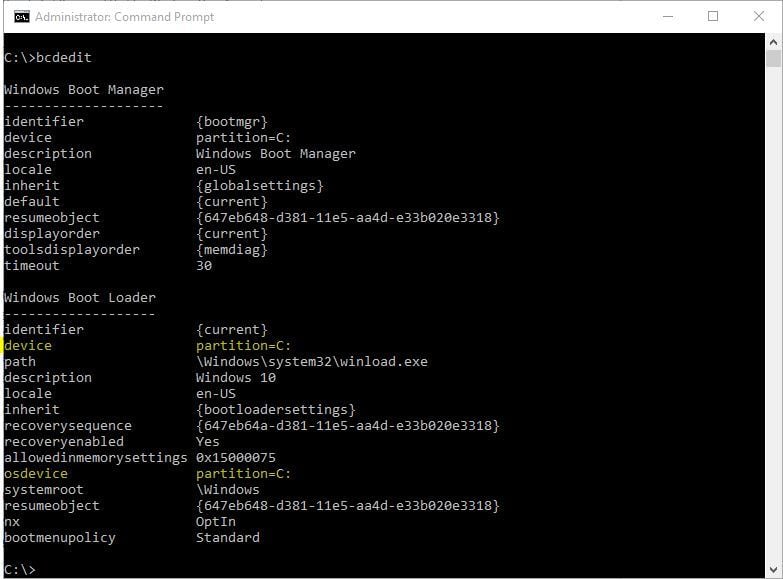
- Enter the following and press Enter:
- Find device partition and osdevice partition values and make sure that they are set to correct partition. On our device, the default and correct value are C: but this can change for some reason to D: (or some other letter) and create problems.
- If the value isn’t set to C: enter the following commands and press Enter after each one:
bcdedit /set {default} device partition=c:bcdedit /set {default} osdevice partition=c:
- By default it should be C: but if your Windows 10 is installed on a different partition, make sure that you use that partition’s letter instead of C.
- Restart your computer and check if the issue has been resolved.


5. Disable early launch anti-malware protection
- Access the Boot Menu.
- Choose to Troubleshoot > Advanced Options > Startup Repair.
- Your computer should now restart and give you a list of options.
- Choose to Disable early launch anti-malware protection (it should be option no. 8).
- Restart your computer, and check if the issue has been resolved.
It has been reported that this problem can sometimes appear again. If this happens, repeat all the steps and temporarily deactivate your antivirus software.
Users have reported some problems with Norton 360 antivirus software (although we assume the problem can be created by other antivirus software as well), so after you’ve deactivated this application, everything should go back to normal.
However, we don’t recommend disabling or deleting your antivirus for good. Instead, we suggest you use intrusive protection on your device and consider switching your antivirus provider.
Many tools offer just the right security level you need to stay protected in real-time, with minimum impact on running programs and apps, using the latest technology.
6. Perform Refresh or Reset
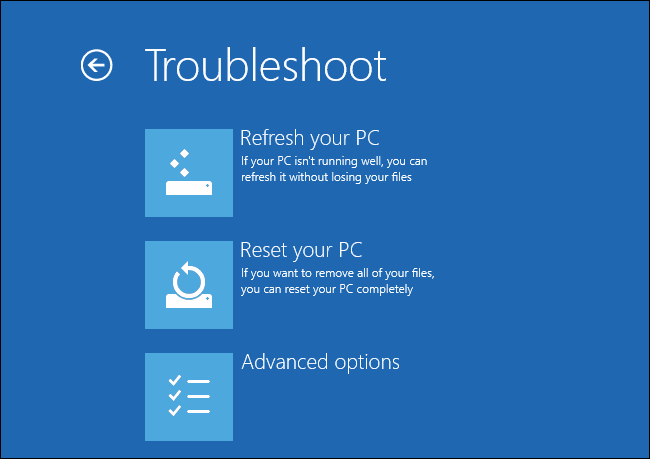
- When Boot Menu opens, choose Troubleshooting.
- Choose between Refresh or Reset option.
- Follow the instructions to complete the process.
If the problem still persists, you might have to perform a Reset or Refresh. By doing this, your installed applications will be removed but your installed Universal apps and settings will be saved if you choose the Refresh option.
On the other hand, the Reset option will delete all installed files, settings, and apps. If you decide to take this step, it’s advised that you backup your important files.
You might need Windows 10 installation media to complete this process, so make sure that you have it.
How do I fix Windows 10 Automatic Repair Loop without disc?
1. Check your boot priority in BIOS
If you want to fix Windows 10 Automatic Repair Loop without a disc, you need to check that boot priority is set properly in BIOS. If that’s the case, you might have to enter BIOS and change these settings.
To do that, follow these steps:
- While your computer boots, keep pressing one of the following buttons: F1, F2, F3, Del, Esc. Usually, there is a prompt to press a certain key to enter setup.
- Locate the Boot section.
- Make sure that your hard drive is set as the first boot device. If you have multiple hard drives, make sure that the drive where you have Windows 10 installed is set as a first boot device.
- Save changes and exit BIOS.
Users have reported that sometimes Windows Boot Manager might be set as the first boot device and that can cause a Windows 10 Automatic Repair couldn’t repair your PC loop on your computer.
Expert Tip: Some PC issues are hard to tackle, especially when it comes to corrupted repositories or missing Windows files. If you are having troubles fixing an error, your system may be partially broken. We recommend installing Restoro, a tool that will scan your machine and identify what the fault is.
Click here to download and start repairing.
In order to fix that, make sure that your hard drive is set as the first boot device.
2. Remove your laptop battery
Some users have reported that they have fixed Windows 10 Automatic Repair Loop without a disc on their laptop by simply removing the laptop battery.
After you’ve removed the battery, put it back on your laptop, connect the power cable and check if the issue has been resolved.
3. Reconnect your hard drive
In some cases, Windows 10 Automatic Repair couldn’t repair your PC error can be caused by your hard drive, and the only solution is to reconnect it. Just turn off your PC, unplug it, open it, and disconnect your hard drive.
Now you just need to reconnect your hard drive, connect the power cable, and start it again. Several users have already reported that reconnecting their hard drive has successfully fixed this problem for them, so you might want to try that.
We have to mention that this step will break your warranty, so keep that in mind. If you have more than one hard drive, you’ll have to repeat this process for each hard drive.
In addition, if you have more than one hard drive, you might want to disconnect only those hard drives on which you don’t have Windows 10 installed.
Keep only one hard drive (the one that has Windows 10 on it) connected to your computer, and try to start Windows 10 again. If the issue is resolved, reconnect other hard drives.
If Windows doesn’t recognize your second hard drive, you can easily solve the issues with a couple of simple steps.
4. Remove your RAM
Few users have reported that they have managed to fix Windows 10 Automatic Repair Loop simply by removing their RAM memory. To do this, you need to turn off your computer, unplug it and remove all memory modules.
Return memory modules to your computer and check if the issue has been resolved. If you have two or more RAM modules, try removing just one RAM module and starting your PC without it.
You might have to repeat this step a few times, depending on how many modules you have.
5. Remove additional USB drives
It has been reported that you can sometimes fix Windows 10 Automatic Repair couldn’t repair your PC problem by unplugging USB drives from your computer.
If you have any additional USB drives attached, disconnect them, and check if the issue is resolved.
If you plug them back in and Windows doesn’t recognize them, check this simple guide.
6. Change your disk controller mode in BIOS
You can fix Windows 10 Automatic Repair Loop without a disc by entering BIOS and changing a few settings.
After you’ve entered BIOS, you need to find your disk controller mode and set it to Standard (IDE, SATA or Legacy) instead of RAID or AHCI. Save the changes and restart your computer.
If the issue persists, try changing the mode again. If that doesn’t solve it, return the disk controller mode to its original value.
7. Enable NX, XD or XN in BIOS
To enable this option, enter BIOS and go to the Security tab. Find XD-bit (No-execute Memory Protect) and set it to Enable. If you don’t have XD option, search for NX or XN and enable it. Save the changes and restart your computer.
8. Perform a clean reinstallation
- Download the Media Creation tool on an alternative PC.
- Insert the blank DVD or plug in the compatible USB flash drive (4GB).
- Run Media Creation Tool and accept the License Terms.
- Select Create installation media (USB flash drive, DVD, or ISO file) for another PC and click Next.
- Choose the preferred language, architecture, and edition and click Next. Make sure to select the version you have the license key for.
- Select USB flash drive or ISO and click Next.
- Once the setup is downloaded, you can either continue with the procedure with USB or burn ISO file to DVD and move from there.
- Finally, once we prepared everything, restart your PC.
- Press F11 (F12 or F9 or F10 might work, too, depending on your motherboard) to open the Boot menu.
- Choose USB flash drive or DVD-ROM as the primary boot device. Save changes and restart your PC again.
- From here, your Windows setup files should start loading. Follow the instructions and you should be running a brand new system in no time.
Finally, if none of the previous solutions were helpful, and you can confirm that the hardware is properly working, we can only advise you to perform a clean system reinstallation.
We’re well aware that this isn’t the desired solution since you’ll lose all the data stored on the system partition. But, once things take the ultimate wrong turn, the system reinstallation is the final resort.
If you’re not sure how to reinstall Windows 10 and start from scratch, follow the steps above.
The Windows 10 Automatic Repair couldn’t repair your PC error is one of the harder errors to fix and it can make your computer almost unusable. We hope you’ve managed to fix it by using one of our solutions.
Tell us how your fix ended up below in our comments section!

Frequently Asked Questions
There are 81 comments