
Event 4502 appears in Event Viewer and it’s usually harmless
Milan has been enthusiastic about technology ever since his childhood days, and this led him to take interest in all PC-related technologies. He’s a PC enthusiast and he… read more
Updated on
Alex Serban
After moving away from the corporate work-style, Alex has found rewards in a lifestyle of constant analysis, team coordination and pestering his colleagues. Holding an MCSA Windows Server… read more
- You might get Event 4502 to appear on your PC after a Windows Update.
- You can get rid of it by recreating the recovery partition or by removing updates.
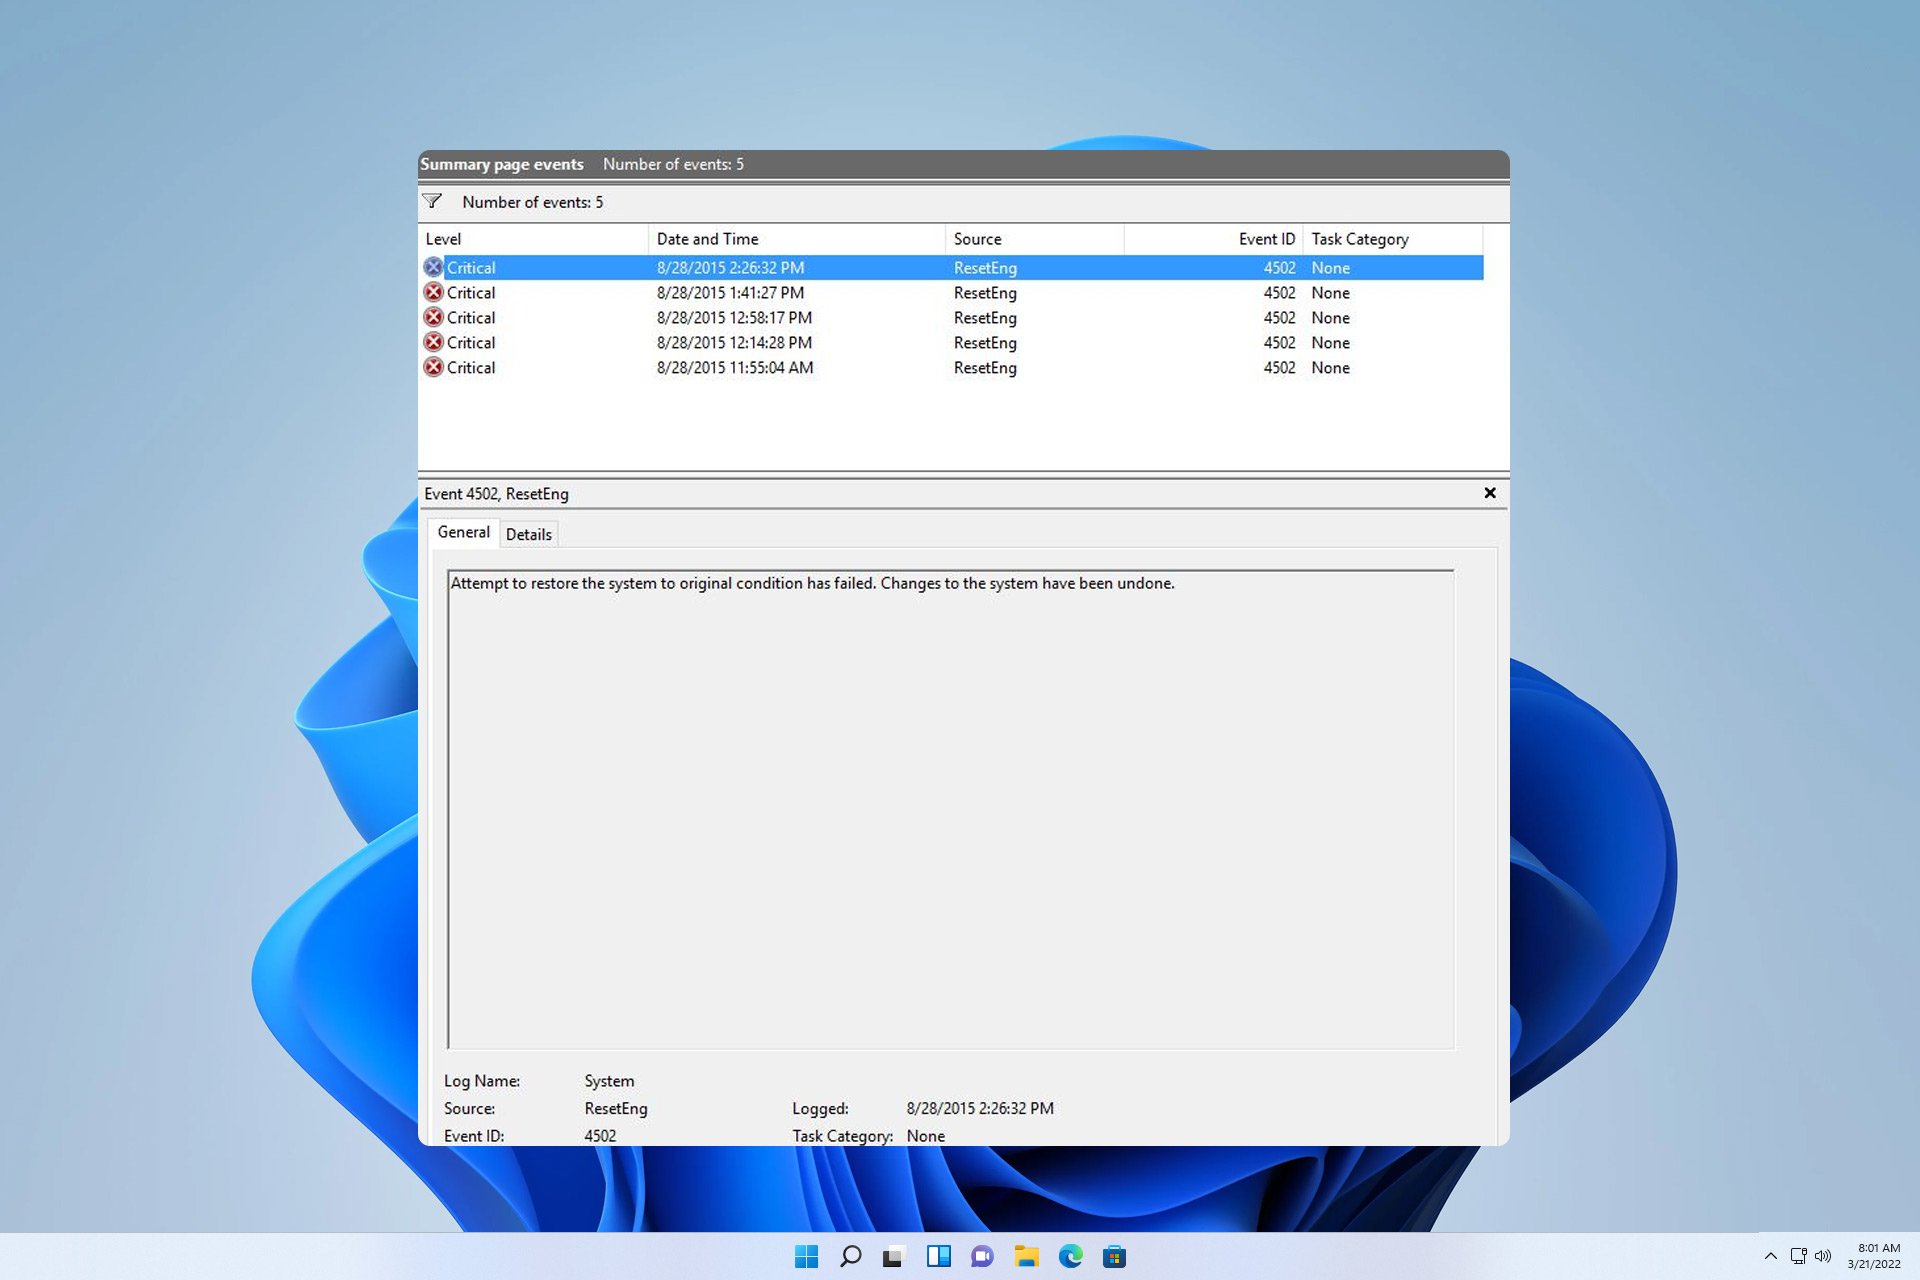
Several users reported the Event 4502 WinREAgent message on their PC, and even though this error didn’t cause any issues, it still had users worried.
In today’s guide, we’re going to take a closer look at this error, see what it means, and show you a few potential methods you can use to fix it.
What is the event ID 4502?
How we test, review and rate?
We have worked for the past 6 months on building a new review system on how we produce content. Using it, we have subsequently redone most of our articles to provide actual hands-on expertise on the guides we made.
For more details you can read how we test, review, and rate at WindowsReport.
- This is an error message that appears in Event Viewer.
- It’s usually caused by a Windows Update.
- A recovery partition that’s too small can give you this error.
How do I fix event 4502 WinREAgent on Windows 11?
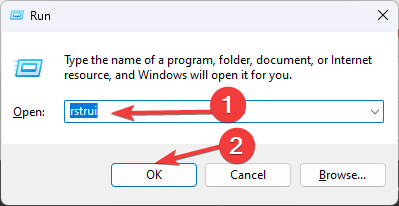
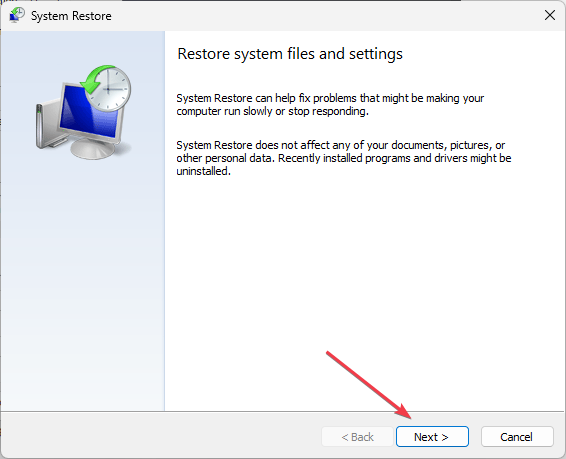
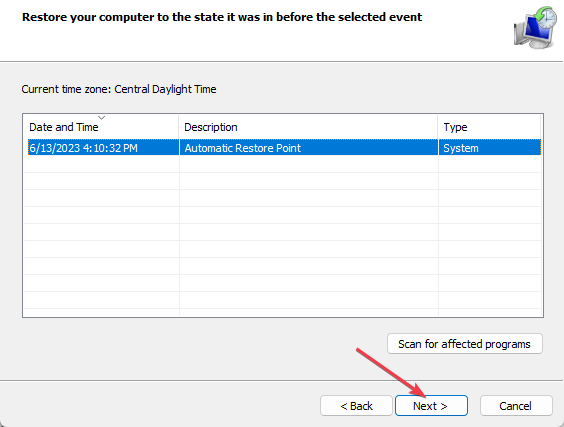
1. Perform a system restore
- Press the Windows key + R and enter rstrui.
- This will open the System Restore window. Click on Next.
- Select the desired restore point and click Next.
- Follow the instructions on the screen to complete the process.
2. Remove recent Windows updates
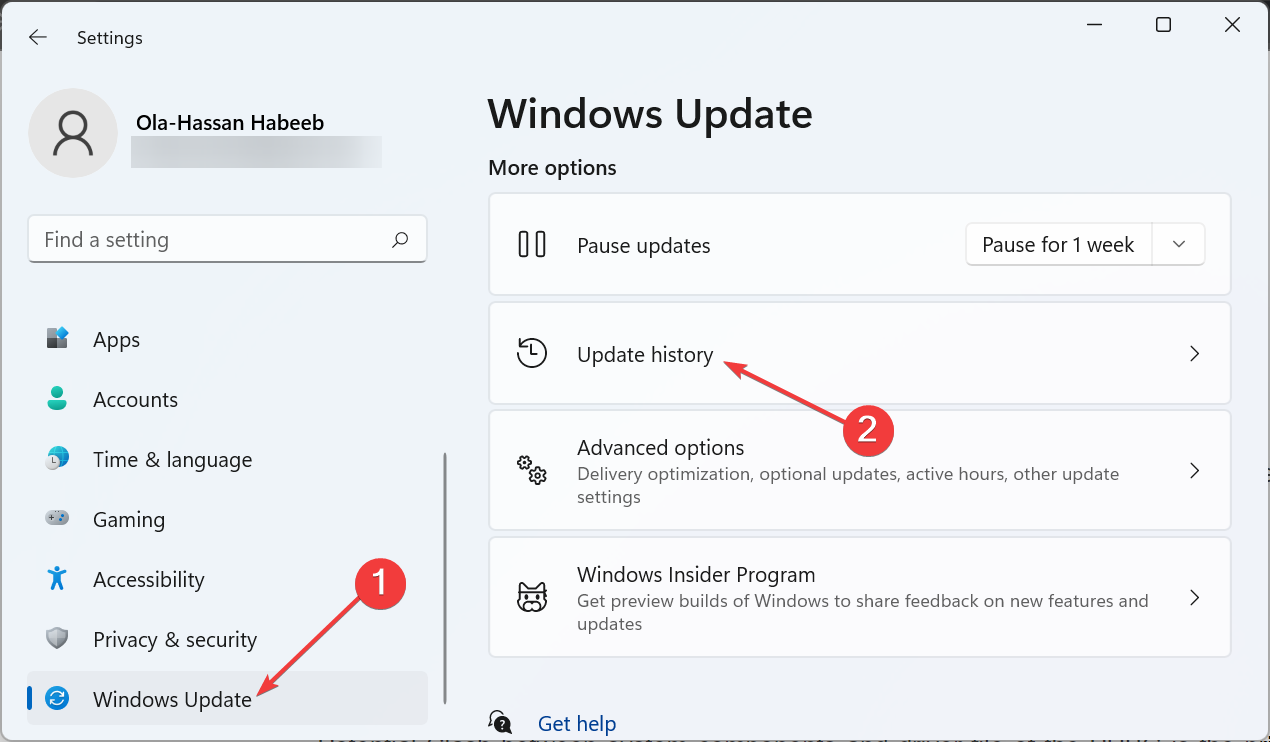
- Press the Windows key + I to open the Settings app.
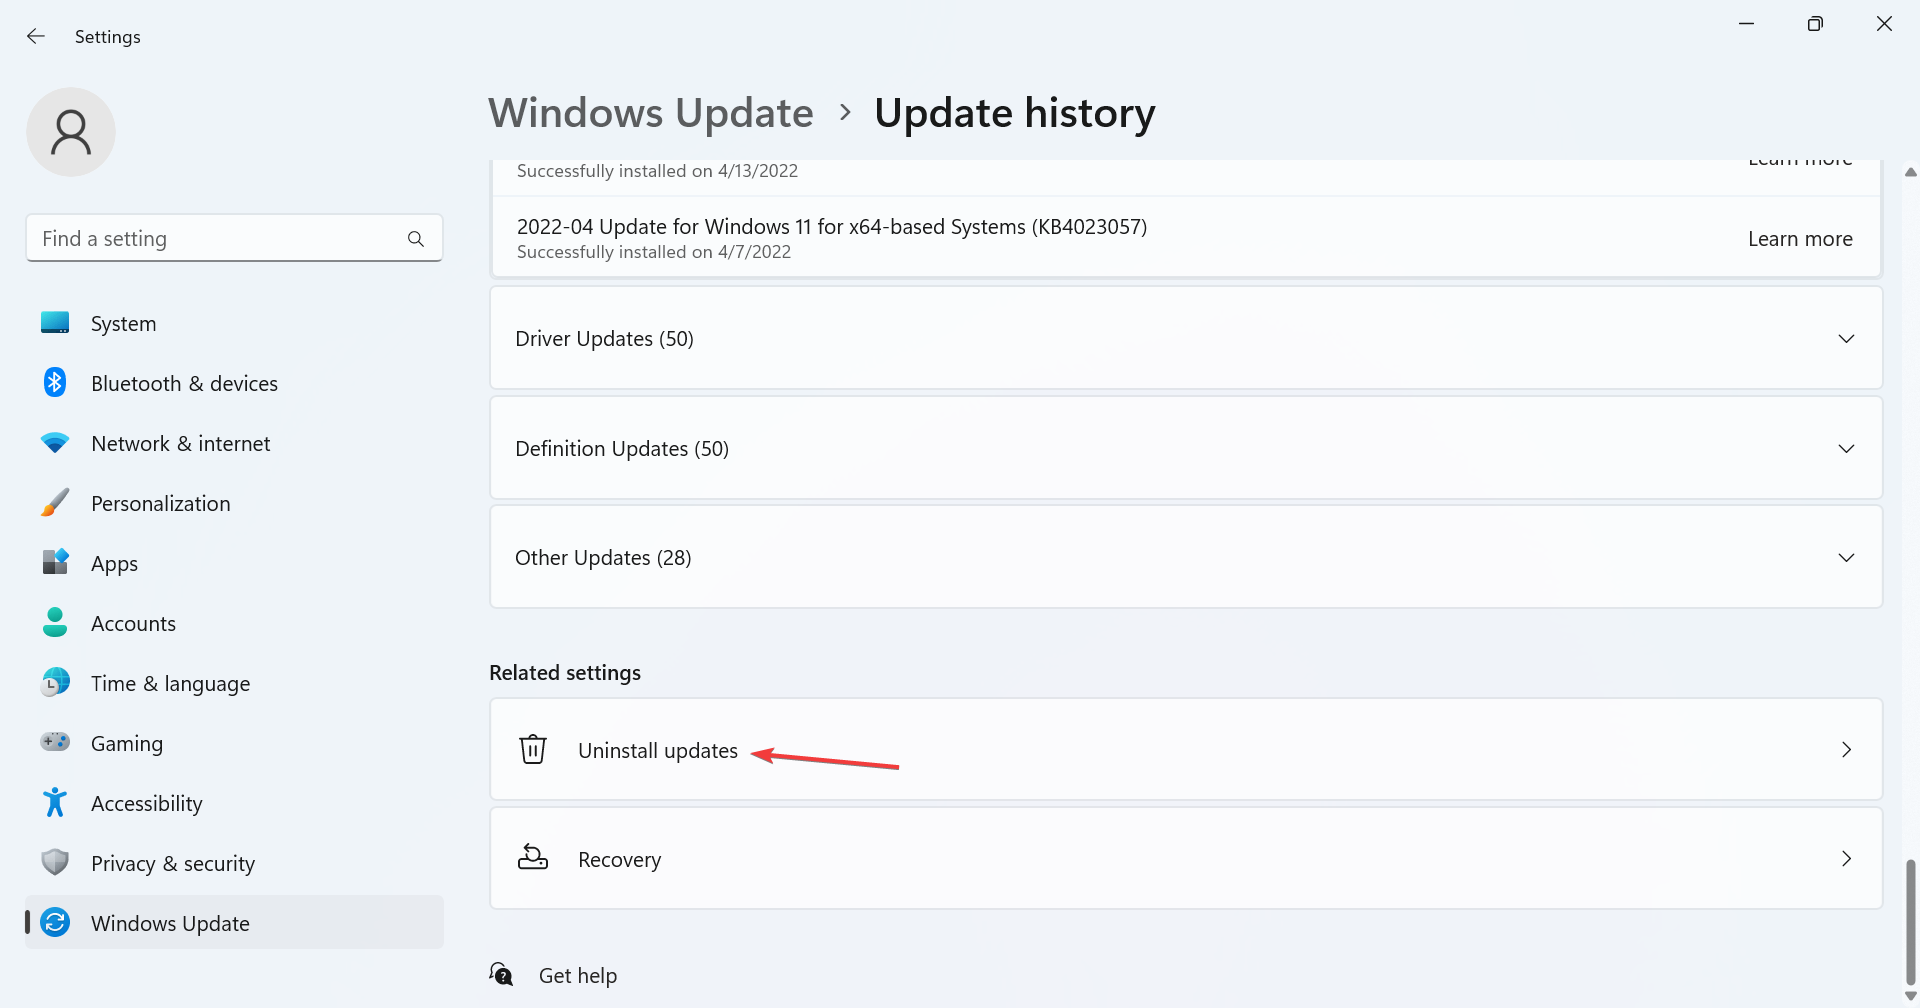
- Next, select Windows Update and choose Update history.
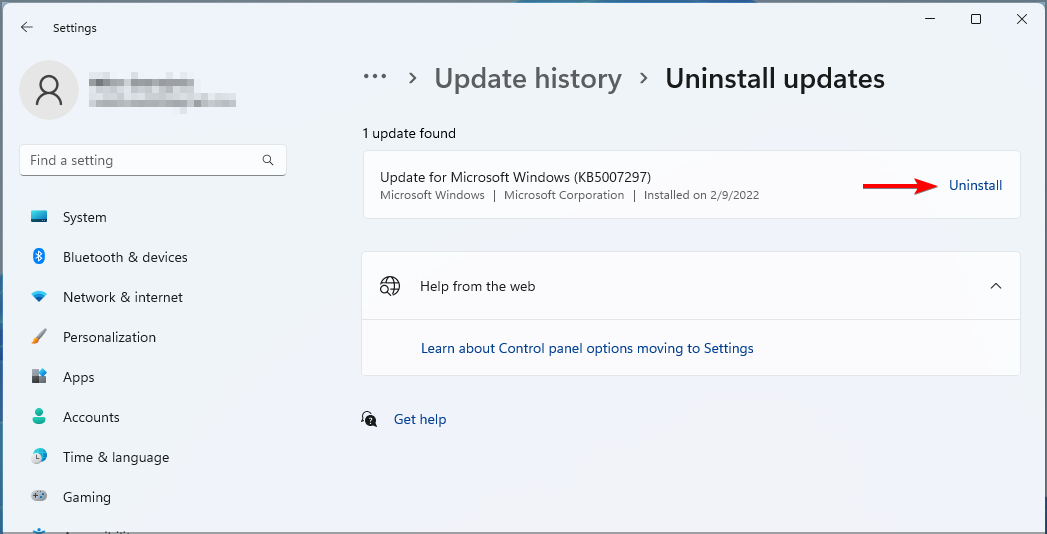
- Select Uninstall updates.
- Select the update you want to remove, click Uninstall, and follow the instructions on the screen.
3. Change the size of the recovery partition

NOTE
This is an advanced solution and you’re using it at your own risk. We’re not responsible for any issues that might occur.
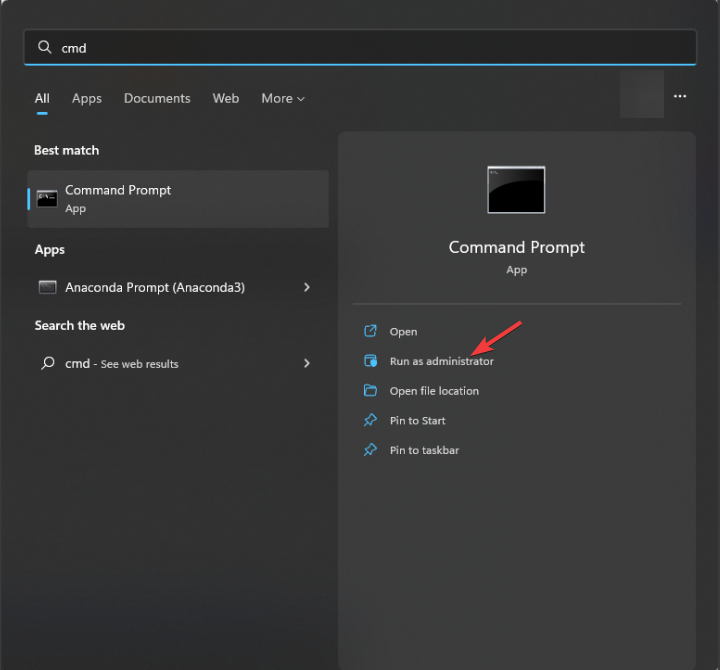
- Press the Windows key + S and type cmd. Select Run as administrator.
- Run the following command to see the info regarding the recovery partition and be sure to save this information since you’ll need it later:
reagentc /info

- Next, you need to disable this feature by running
reagentc /disable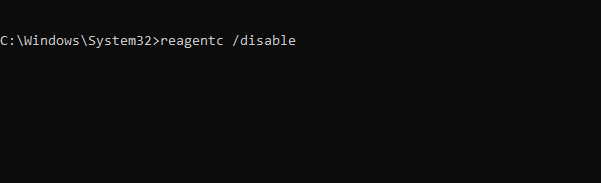
Now we need to remove the recovery partition by doing the following:
- In the same command line run:
diskpart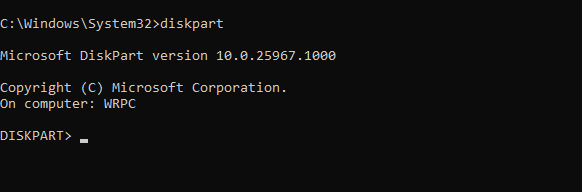
- Next, you need to show all available drives with
list disk
- Select the disk where your OS is installed. In our example it’s the number 0, so we used:
sel disk 0
- List all partitions with
list part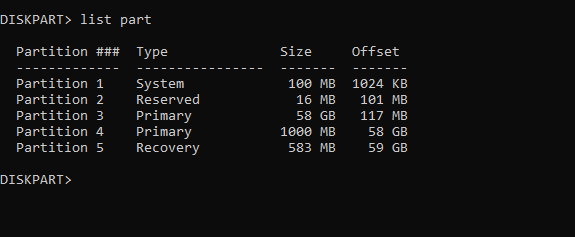
- Now select your system partition. In our example that’s number 3, so we used
sel part 3 - Now shrink the partition with the following command:
shrink Desired=500 Minimum=500
- Select the system recovery partition. On our PC that’s number 5, so we used:
sel part 5
- Now delete it by running:
delete partition override
- Create a new partition with
create partition primary
- Next, format the drive with the following command:
format fs=ntfs quick
- Run the following commands to assign the attributes and drive letter:
set id=de94bba4-06d1-4d40-a16a-bfd50179d6ac
gpt attributes=0x8000000000000001
assign letter=R - Exit diskpart with
exit
Lastly, we need to recreate the recovery partition:
- Now copy the necessary data with these commands:
mkdir R:RecoveryWindowsRE
xcopy /h C:WindowsSystem32RecoveryWinre.wim R:RecoveryWindowsRE
reagentc /setreimage /path R:RecoveryWindowsRE /target C:Windows - Enable WinRE with the following command:
reagentc.exe /enable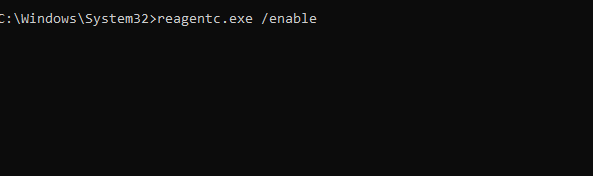
- Lastly, check if WinRE is on the right partition by running
reagentc.exe /info
Event 4502 is usually just a message in Event Log and if it doesn’t cause you any problems, you shouldn’t try to fix it. Removing updates can temporarily help, but if the issue reappears, you might have to change the size of the recovery partition.
To better understand this issue, we suggest reading our guide on the $WinREAgent folder. Unfortunately, these aren’t only event issues, and many reported Event ID 16 and Event ID 4663, but we covered those in earlier guides.
Did you ever encounter event 4502 WinREAgent and how did you fix it? Share your solutions with us in the comments below.
Start a conversation