- How to take print screens on Windows 11? It’s easier than you think, even if this is a new OS.
- In fact, note that all the procedures that worked on Windows 10 will do nicely on this version too.
- One important upgrade is the Snip & Sketch tool which will gradually replace the Snipping Tool.
- You can also use the Game Bar or the dedicated Prt Sc key to take a screenshot on Windows 11.
Windows 11 went from rumor to official news in a heartbeat. Unlike other topics that tend to deflate once the aura of mystery surrounding them is broken, Microsoft’s brand-new OS got us hooked for good.
And questions continue to pop up, one after the other. For instance, taking a screenshot on Windows 11 is something we all want to know more about.
Even though Windows 11 has a great deal to offer in terms of new functionalities, looks, and interface improvements, its core is not that different from its predecessors.
This basically means that all the different methods that worked on Windows 10 will work just fine on Windows 11.
Are screenshots useful?
For those who are not really aware, a screenshot is a caption of the whole screen, a window, or just a part of the image displayed on the screen at one time.
We, at WindowsReport, do a lot of screenshots in order to create guides and make you understand exactly how to perform certain steps in a solution.
Want to know how to take screenshots on Windows 11? We’ll show you four different ways. So read on, pick your favorite and start capturing those essential bits of information in no time!
How do you take a screenshot on Windows 11?
1. Put the Print Screen Key to good use

The PrtSc button is a core Windows function that’s here to stay. It’s a dedicated key on all Windows keyboards that will essentially capture whatever is displayed on your desktop at that particular time.
In this matter, Windows 11 is no different than its predecessor and it responds to the same command.
The Print Screen function can be used in different ways depending on what you want to achieve. So, here’s how to take print screens on Windows 11 with the PrtSc key.
Print Screen key
You can use the Print Screen button alone. Do keep in mind that this method will copy your screenshot to the clipboard, which means that you’ll lose any other information previously stored there.
One more thing that’s worth mentioning here is that you won’t be able to select a particular area of the screen.
Windows key + Print Screen combination
This key combination will also capture the entire screen, but it has a twist. Instead of copying your screenshot to the clipboard, it will save your image in the Pictures/Screenshots folder.
Obviously, this is a big plus since it cuts down on manual operations, allowing you to take screenshots in rapid succession, for example.
Alt key + Print Screen combination
Unlike the previous 2 methods, this one will allow you to take a screenshot of the active window instead of the entire screen.
However, this perk comes at a cost. The file is not automatically saved, you will have to select a destination for the file.
2. Try using a dedicated app
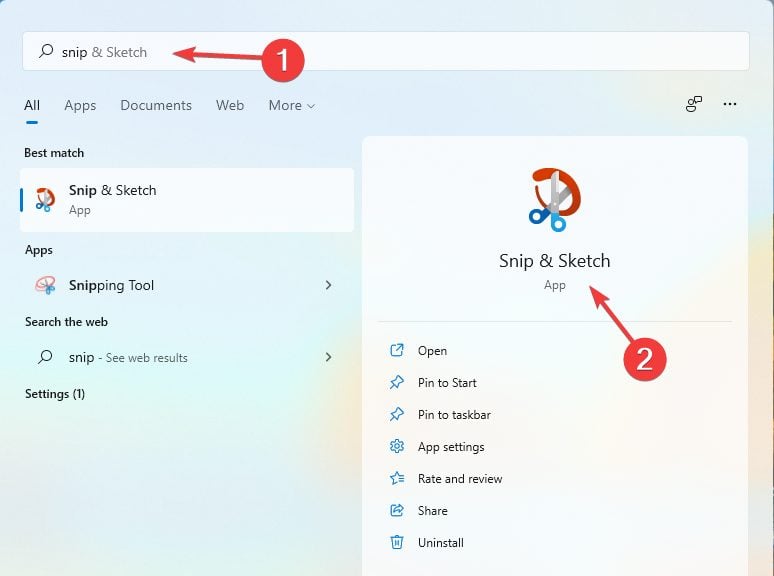
- Search for the Snip & Sketch tool in the Start Menu or just type snip in Windows search and select it from the results.
- Now you need to click on the New button on the upper left corner.

- You’ll see different options: Rectangular Snip, Free-form Snip, Windows Snip and Full-screen Snip.
- Use the mouse to select your area of interest.
- The tool will automatically transfer your screenshot to the clipboard and automatically start an editor.
- So now you can edit it as you wish in Snip & Sketch, paste the image from the clipboard to another editor or save it on your Windows 11 PC without editing as a PNG, JPG of GIF file.
Snip & Sketch is a handy built-in app that you will still be able to use on Windows 11 for the time being. As you might have read already, this is the new app that replaces Snipping Tool.
When you’re looking for Snip & Sketch, you will also see that the Snipping Tool app is still available in Windows 11 but we don’t know for how long.
After all, the new tool is easier to use, it looks better and it’s a lot more simple to manage by everyone so if you upgraded to Windows 11, you should think about using it.
The Snipping Tool app is just one of the many functionalities that Microsoft deemed obsolete or unfit for the new Windows 11.
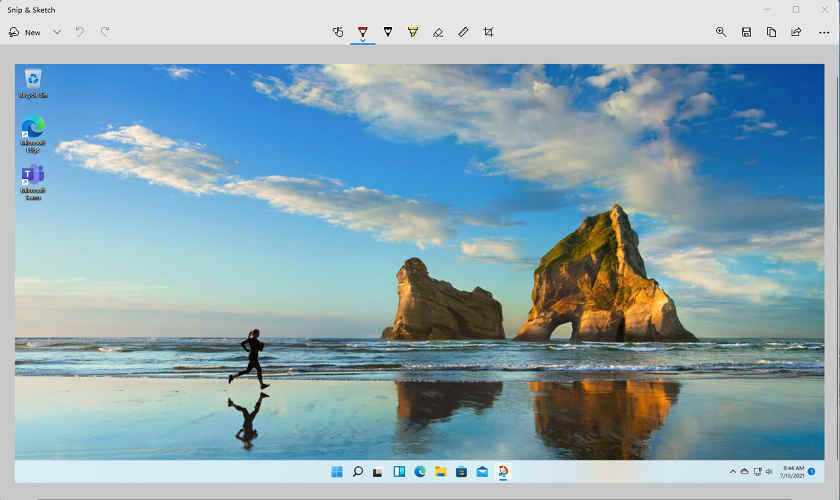
3. Explore Snip & Sketch
It’s time for the big reveal – introducing the new Snip & Sketch tool which will gradually replace the Snipping Tool. If you were expecting major differences, you’ll be somewhat disappointed.
The new tool basically offers the same features as the original one. In fact, the appearance is the biggest change with the new app offering a more polished look that blends in with the overall flow and feel of the modern Windows 11.
In other words, the Snip & Sketch tool is pretty much a more sophisticated version of the Snipping Tool.
When it comes to functionalities, you will have the same modes that allow you to choose a specific area to capture, plus to copy to clipboard flow.
One notable addition is that you can edit the screenshot by adding text, shapes, or highlighting directly in the preview window.
Finally, accessing the Snip & Sketch tool is as easy as using this keyboard shortcut: Windows Key + Shift + S.
4. Use the Xbox Game Bar
- Press Windows + G key combination to use the Game Bar or use the Start menu to search for it.
- When the app opens, click on the camera icon within its taskbar.
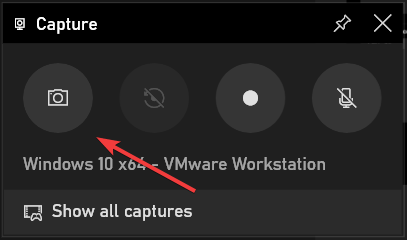
- This will capture your entire screen.
Even though the Xbox Game Bar is a gaming app, it offers interesting capture functionalities that you can apply to a broader area.
Furthermore, you can use it to record videos of your screen just as you would with a third-party screen recorder. While it’s not a specialized screenshot software, the Game Bar will do the job just fine.
As you can see, some things have drastically changed in the new OS, while others have not so much. If you want to further explore the topic, here’s a detailed comparison between Windows 10 and Windows 11 you might enjoy.
Finally, these are 4 different methods to explore when taking a screenshot on Windows 11. What’s your favorite one?
Feel free to share your choice with us and don’t be shy to suggest more solutions. Sharing is caring after all, right?
Start a conversation